carttek.com
8
INITIAL ASSEMBLY
INSTRUCTIONS
1. Remove components from packaging and verify you have the
following:
Front wheel assembly
Axle assembly
Handle Assembly
Anti-Tip Wheel
Remote Control
Battery Charger
Accessories if included
Tool Kit
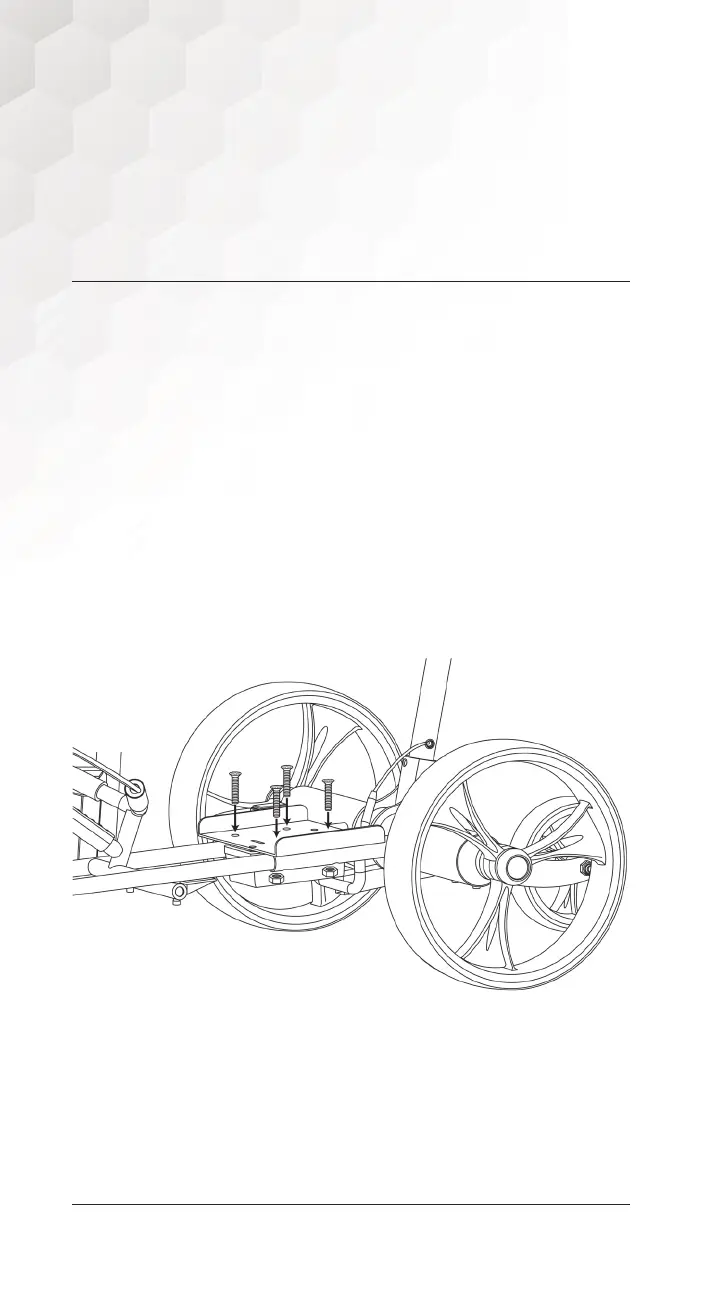
2. Install the front wheel assembly into the axle assembly.
Align bolt holes, and install bolts as shown below:
3. Install the 2 large drive wheels. The wheels are unidirectional.
Wheel hubs are marked “L” for left, and “R” for right as oriented
behind the cart. Depress knob on the inside wheel hub and
slide wheel onto axle. Fully insert wheel onto drive collar, with
the four pins fully engaged. (For “free wheel” mode, depress
and pull wheel out 1/4th of an inch, releasing pins and making
sure wheels snaps into groove on axle.)


 To Next Page