INSPECTION OP THE VALVES,OUIDES AND SPRINGS
Valve springs should be checked for flat
squared ends
t
broken or cracked coils and
correct spring p:ressure. Use a Valve Spring
Tension Tester. Refer to "Specification!!
Section.
Valve guides can be checked for wear by
using a bore gauge and micrometer, Figure
M-4.
BORE GAUGE
Figure
M-4
The valve guide should be checked at the
top, middle and bottom of the bore for wear,
Figure M-5.
EXPANDABLE
BORE
GAUGE
CHECK WEAR OF VALVE :;:_
GUIDE AT
THREE
POINTS AT LEAST
Figure M-5
The inside diameter wear limits of the
valve guide should not exceed the specifica-
tion given in the "Specification" Section, at
any point along the bore of the guide, Replace
guide
if
it does. Check the new valve guides
after installation to make sure that the bore
is not less than the inside diameter given in
the "Specification" Section. Using an Arbor
equal to the inside diameter of the valve
guide will keep the guide from collapsing
when pressed in place.
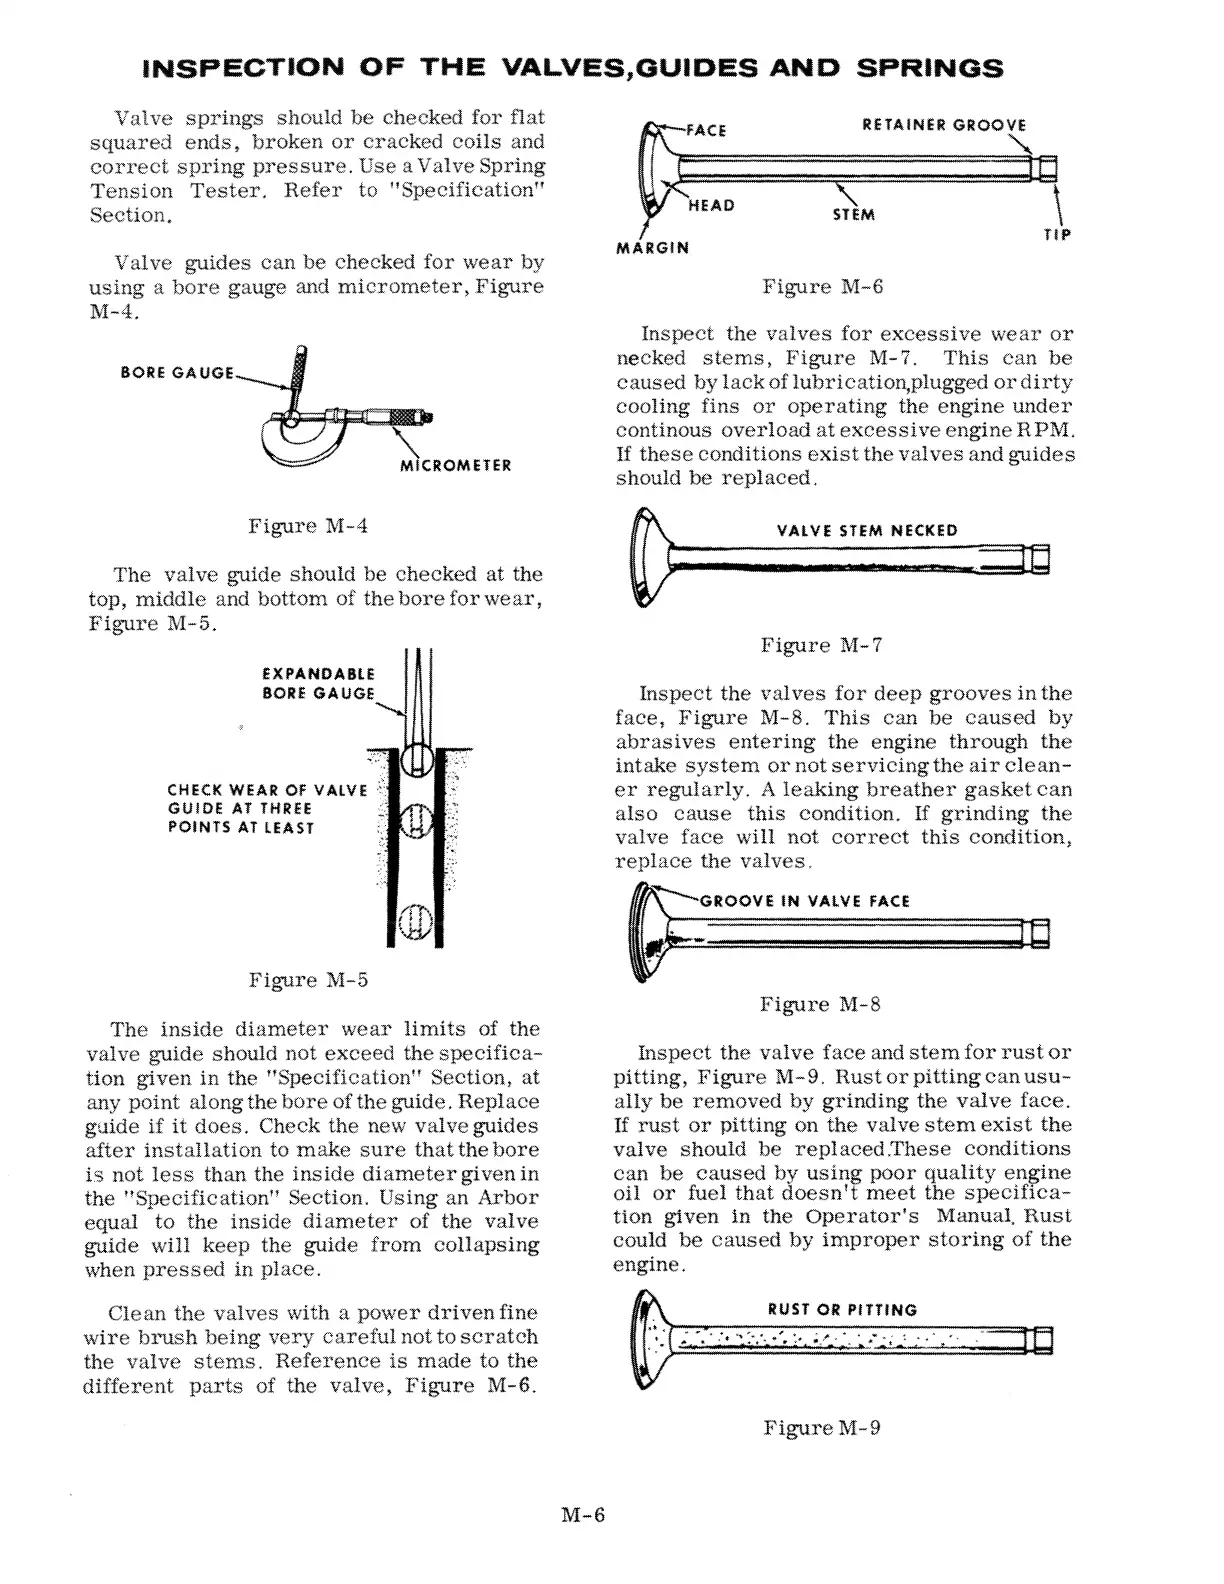
Clean the valves with a power driven fine
wire brush being very careful not to scratch
the valve stems. Reference is made to the
different parts of the valve, Figure M-6.
M-6
MARGIN
TIP
Figure M-6
Inspect the valves for excessive wear or
necked sterns, Figure
M-7.
This can be
caused by lack of lubrication,plugged or dirty
cooling fins or operating the engine under
continous overload at excessive engine RPM.
If these conditions exist the valves and guides
should be replaced.
VALVE STEM NECKED
Figure
M-7
Inspect the valves for deep grooves in the
face, Figure M-8. This can be caused by
abrasives entering the engine through the
intake system or not servicing the air clean-
er regularly. A leaking breather gasket can
also cause this condition.
If grinding the
valve face will not correct this condition,
replace the valves,
ROOVE
IN
VALVE FACE
Figure M-8
Inspect the valve face and stern for rust or
pitting, Figure M-9. Rustorpittingcanusu-
ally be removed by grinding the valve face.
If
rust or pitting on the valve stem exist the
valve should
be
replaced.These conditions
can
be
caused by using poor quality · ne
oil or fuel that doesn't meet the speci ca-
tion given in the Operator's Manual. Rust
could
be
caused
by
improper storing of the
engine.
RUST OR PITTING
Figu:reM-9