REFACING INTAKE AND EXHAUST VALVES
Before refacing the valves they should be
wire brushed, cleaned and inspected, Refer
to the
ti Specification" Section for the correct
valve face grinding angle. Set the refacing
machine protractor at this angle. Be sure
the chuck of the machine is clean before
installing valve. Dress the grinding wheel
before starting to each valve. Take
only light cuts as the valve is refaced and
the last cut must be very fine so the valve
face will have a polished finish.
/#/IO/ITAIIT Replace any valve that
after grinding has a thin edge or margin,
Figure M-16. If the margin on the ground
valve is less than half the margin on a new
valve, replace the valve.
VALVE FACE
GRINDING ANGLE
-ll-MARGIN
Figure M-16
I
CHAMFER
The tip end of the valve should be checked
for roughness or wear. Usually this can be
removed with some very light cuts against
the side of the grinding wheel and will square
up the end. Never grind the chamfer off the
valve stem end.
Any excessive grinding
should not be done to the stem end. Replace
the valve.
Before installing new valves a fine finish
grinding should be done to each new valve.
Check the valve face and valve stem runout
before installing (Refer to Page M-9).
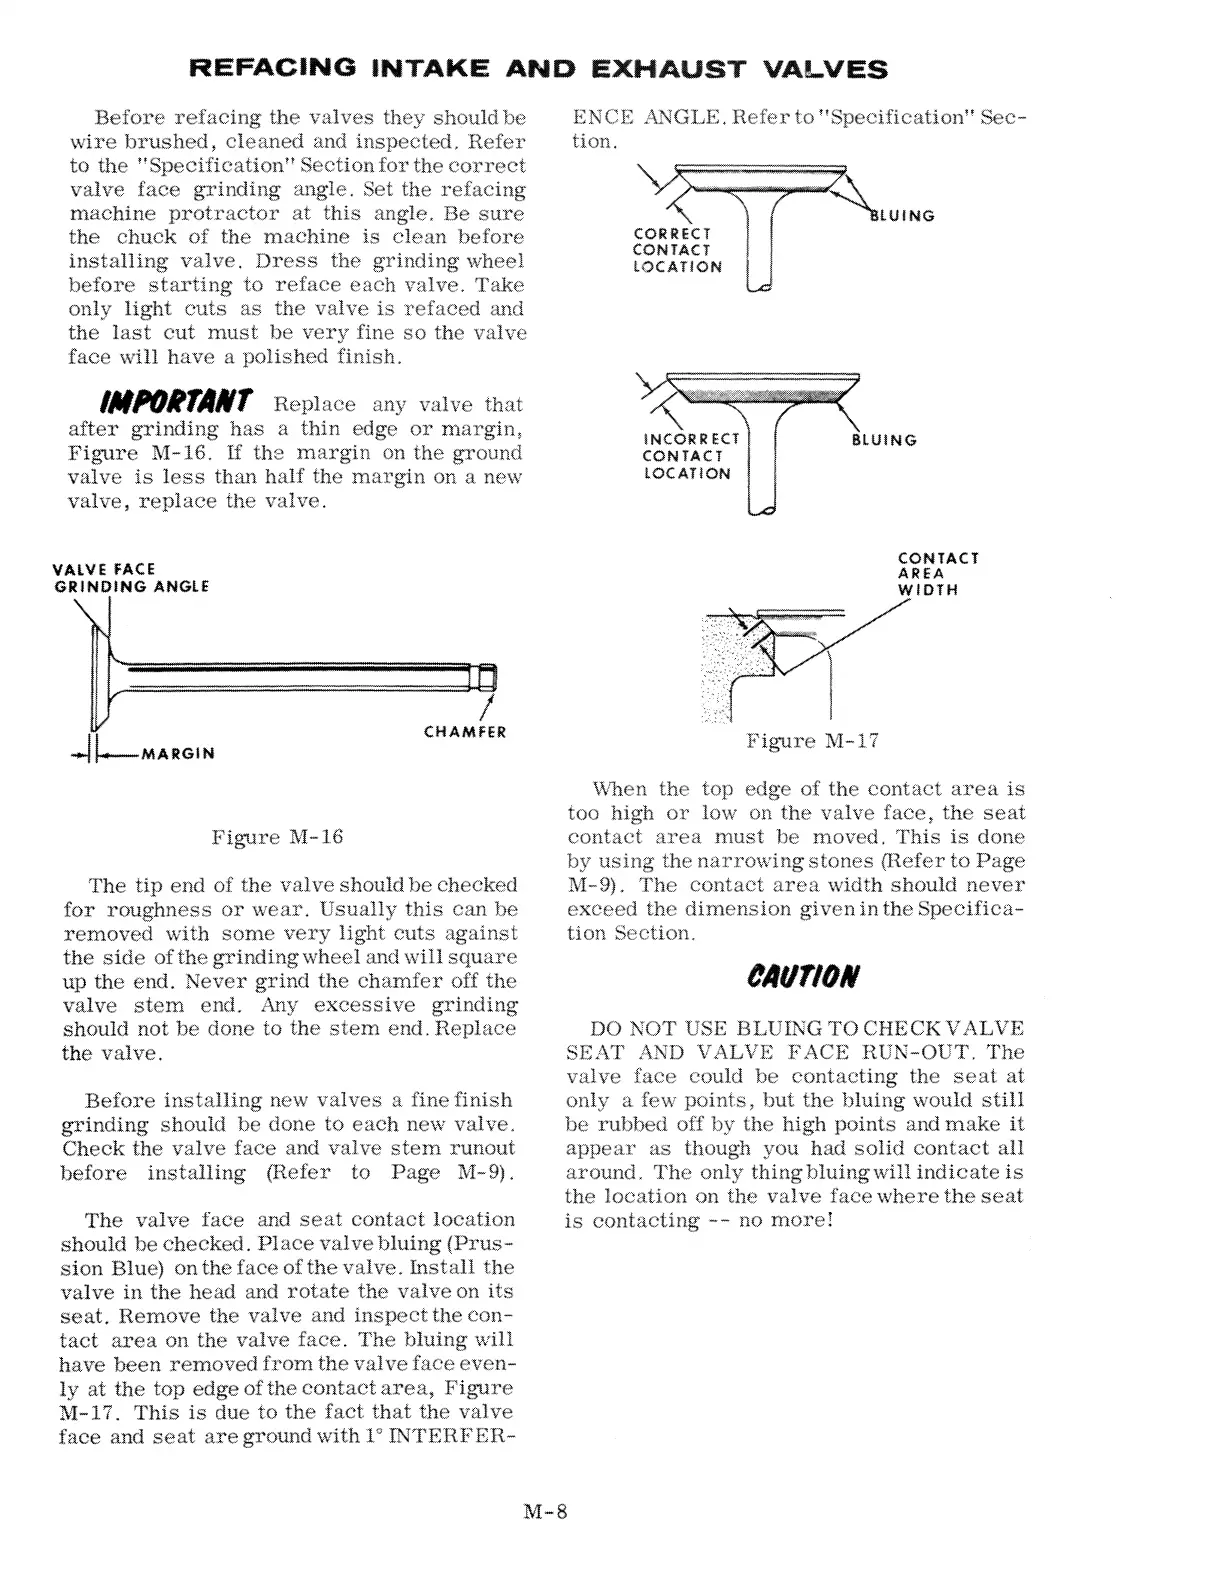
The valve face and seat contact location
should be checked. Place valve bluing (Prus-
sion Blue) on the face of the valve. Install the
valve in the head and rotate the valve on its
seat. Remove the valve and inspect the con-
tact area on the valve face. The bluing will
have been removed from the valve face even-
ly at the top edge of the contact area, Figure
M-1 7. This is due to the fact that the valve
face and seat are ground with
1" INTERFER-
ENCE ANGLE. Refer to "Specification" Sec-
tion.
CORRECT
CONTACT
LOCATION
INCORRECT
CONTACT
LOCATION
BLUING
Figure M-17
CONTACT
AREA
WIDTH
When the top edge of the contact area is
too high or low on the valve face, the seat
contact area must be moved. This is done
by using the narrowing stones (Refer to Page
M-9). The contact area width should never
exceed the dimension given in the Specifica-
tion Section.
CAUTION
DO NOT USE BLUINGTOCHECKVALVE
SEAT AND VALVE FACE RUN-OUT. The
valve face could be
contacting the seat at
only a few points, but the bluing would still
be rubbed off by the high points and make it
appear as though you had solid contact all
around. The only thing bluingwm indicate is
the location on the valve face where the seat
is contacting -- no morel
M-8
 Loading...