SECTION 58 - ATTACHMENT/HEADERS - CHAPTER 1
58-4
4. Assemble the second yoke to the cross in the
same manner as previously described.
5. After complete assembly of the U-joint, strike the
forged surfaces of all yoke ears with a sharp blow
from a hammer. This will ensure proper seating
of the bearings, and eliminate any possible
tightness to ensure a free flexing joint.
IMPORTANT: Use caution not to strike the bearing
bore area of the yoke, as this will damage the bore
and may cause premature cross bearing failure.
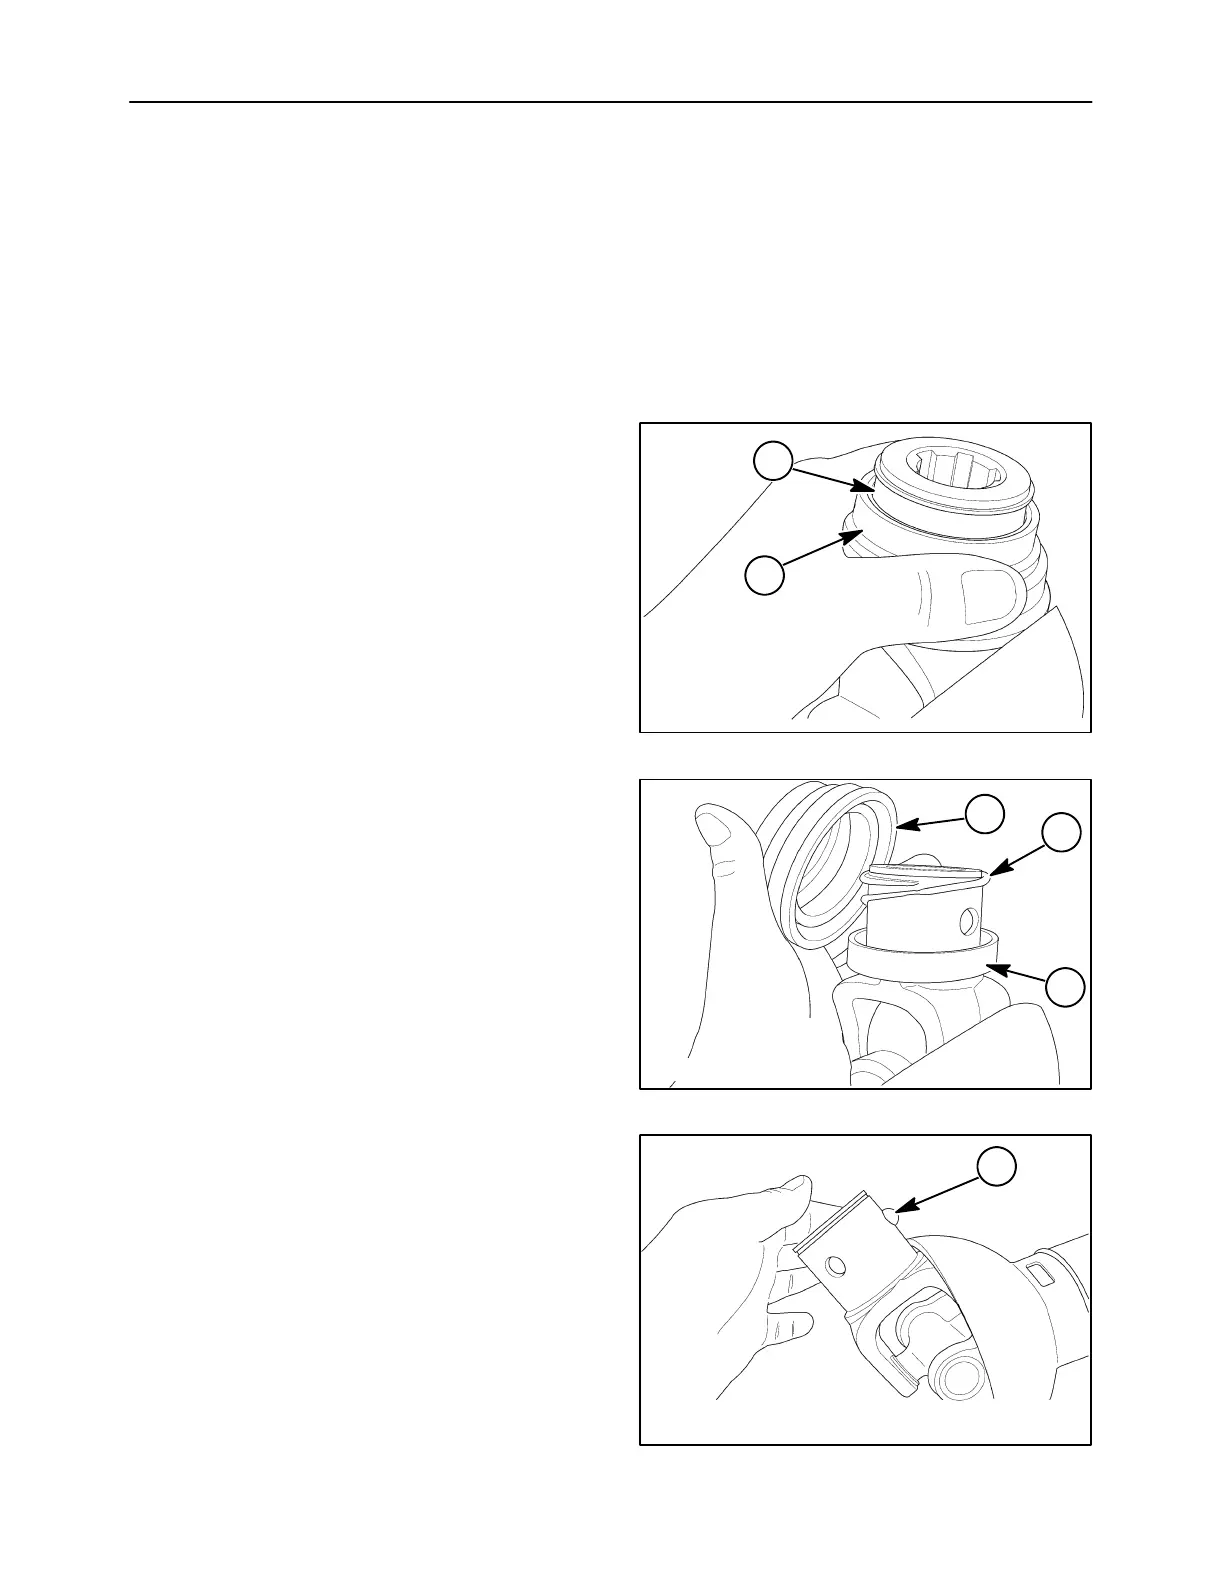
SLIDE LOCK DISASSEMBLY
1. Pull the slide lock collar, 1, rearward. Use a pair
of pliers to remove the retaining ring, 2, from the
end of the yoke.
10008329
2
1
7
2. Slide the collar, 1, off the yoke and remove the
spring, 2, and lower retaining collar, 3, from the
yoke barrel.
10008330
3
2
1
8
3. Remove the three centering balls, 1, from the
yoke by pushing them out from the center.
4. Thoroughly clean all slide lock components.
Clean the yoke bore and pawl holes. Replace the
yoke if damage or excessive wear is found.
10008331
1
9