SECTION 58 - ATTACHMENT/HEADERS - CHAPTER 2
58-11
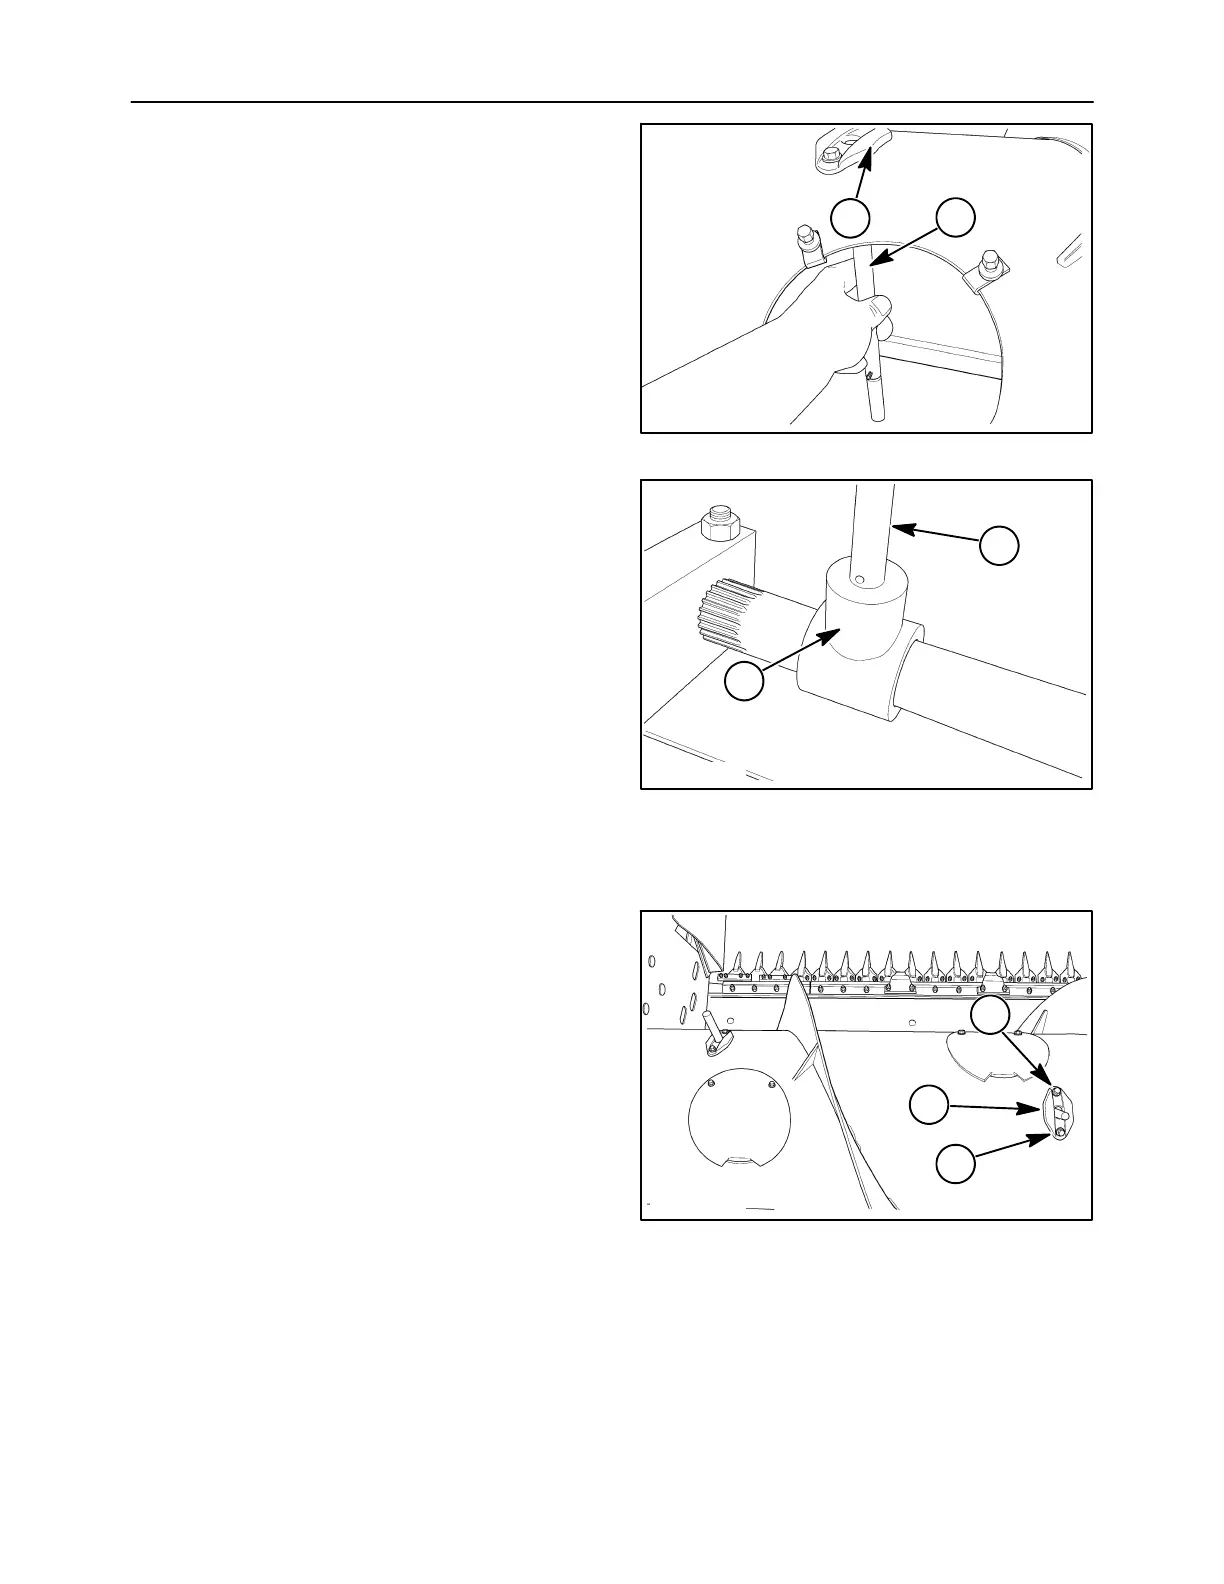
3. Pass the replacement finger, 1, through the
guide, 2, from the inside of the auger.
10008317
1
2
28
4. Set the new finger, 1, into the mounting tee, 2,
with the cotter pin holes lined up. Insert the
hairpin cotter through the tee and finger.
5. Install the access cover.
10008318
1
2
29
FINGER GUIDE REPLACEMENT
NOTE: Finger removal is not required.
1. Remove the cover closest to the defective guide.
2. Remove the mounting cap screws, 1, and nuts.
Lift the guide, 2, from the auger.
3. Set a new guide into position.
4. Attach the guide to the auger using the previously
remove cap screw and nut.
5. Install the cover.
2
1
1
10008315
30
 Loading...