SECTION 58 - ATTACHMENT/HEADERS - CHAPTER 3
58-9
IMPORTANT: Ensure that sealing surfaces of the
eccentric shaft are not damaged while being
positioned in a vise.
4. Set the eccentric shaft in a holding tool with the
drive end pointing down. Place the eccentric
housing onto the tapered bearing. The set screw
holes in the housing must be pointing down
toward the drive end.
CAUTION
The bearing is very hot!
5. Drop the heated outer bearing, 1, onto the
installed shaft with the tapered end down. Ensure
that the bearing slides down the shaft evenly and
completely against the shoulder. Allow the
bearing to cool and shrink before moving the
shaft.
10007644
1
20
6. Turn the slotted nut, 1, onto the shaft. Tighten
the nut to obtain a rolling torque of 0.5 - 1.0 N⋅m
(4 - 9 in. lbs.). Stake the slotted nut at 2 into the
key way of the shaft.
CAUTION
The race is very hot!
7. Drop the heated race, 3, (smaller) onto the shaft
with the flanged end down. Ensure that the race
slides down the shaft evenly and completely
against the shoulder. Allow the race to cool and
shrink before moving the shaft.
10007645
3
1
2
21
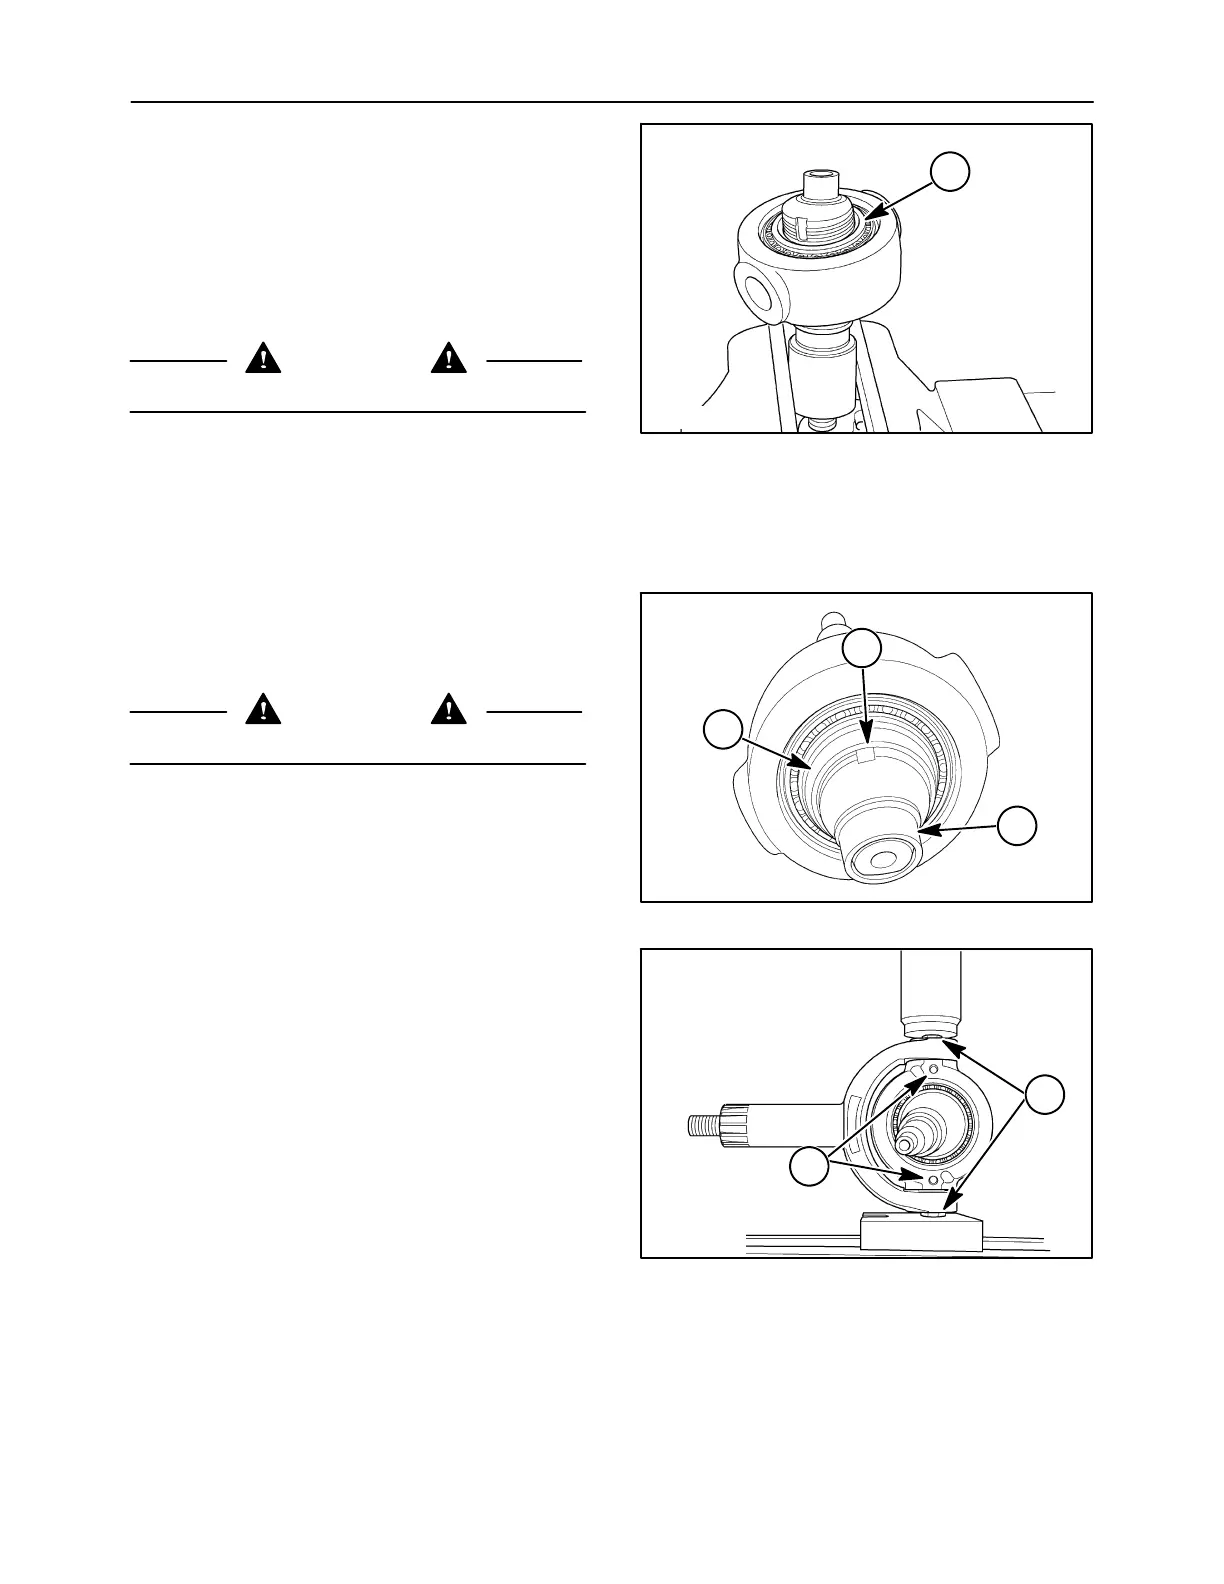
NOTE: Orient the pivot pins so that the flattened area
of the pins will line up with the set screw holes. The
pins have a groove etched onto the end to assist with
alignment.
8. Position the eccentric assembly, yoke and pivot
pins, 1, in a press. Push the pins into the housing
until they are securely seated against the inside.
Install the set screws into threaded holes, 2.
Tighten the lock nuts to hold the set screws in
place.
10007646
1
2
22
 Loading...