2050-3
3. Use B and C to change the character at the cursor position in the text
area. The character changes in the following sequence.
-
)
Press C.
Press B.
(space)
0
to
9
A
to
Z
( / .
4. When the character you want is at the cursor position, press M to move
the cursor to the right.
5. Repeat the steps 3 and 4 until your text is complete.
6. After you input text, use M to move the cursor to the number area.
• Holding down M for at least one second causes the cursor to jump
between the text area and number area.
• The text area in the Identification Mode can hold up to 16 characters.
When the cursor is located at the 16th space of the text area, moving the
cursor to the right causes it to jump down to the first digit in the number
area. When the cursor is at the 10th digit of the number area, moving it to
the right causes it jump back up to the first character of the text area.
7. Use B and C to change the character (hyphen, number, or space) at
the cursor position in the number area. The character changes in the
following sequence.
x
(space)
0
to
9
Press C.
Press B.
8. When the character you want is at the cursor position, press M to move
the cursor to the right.
9. Repeat steps 7 and 8 until you complete number input.
10.Press A to store your data and return to the Identification Mode data
screen (without the cursor).
Inputting Your Blood Type
1. In the Identification Mode, display the
BLOOD TYPE title.
2. Hold down A until the blood type ABO starts
to flash.
3. Use B and C to scroll through the available
blood type in the following sequence.
4. Press M to advance to specification of the Rh factor.
• At this time the current Rh factor (
x or *) will flash on the display.
5. Press C to select either x (negative) or * (positive).
6. Press A to store your data and return to the BLOOD TYPE screen.
Editing Identification Mode Data (except Blood Type Data)
1. In the Identification Mode, scroll through the data and display the one
you want to edit.
2. Hold down A until the cursor appears in the text area.
3. Use M to move the cursor to the character you want to change.
4. Use B and C to change the character.
• For details on inputting characters, see “Inputting Text and Numbers”
(step 3 for text input and 7 for number).
5. After making the changes that you want, press A to store them and
return to the Identification Mode data screen.
Deleting Identification Mode Data (except Blood Type Data)
1. In the Identification Mode, scroll through the data and display the one
you want to delete.
2. Hold down A until the cursor appears in the text area.
3. Press B and C at the same time to clear the data.
• At this time the cursor appears in the text area, ready for input.
4. Input data or press A to return to the Identification Mode data screen.
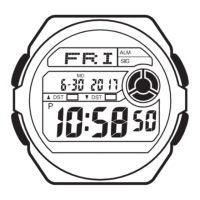
M
A
B
C
ALM SIG
Blood type ABO
Rh factor
A B- O AB
Press C.
Press B.
3. While hour or minutes is flashing, press C to increase the setting or B
to decrease it.
• When setting the alarm time using the 12-hour format, take care to
set the time correctly as a.m. (no indicator) or p.m. (P indicator).
4. Press A to return to the alarm display screen.
Daily Alarm Operation
The alarm sounds at the preset time each day for about 20 seconds, or
until you stop it by pressing any button.
To test the alarm
Hold down C to sound the alarm.
Turning the Daily Alarm and Hourly Time Signal on and off
In the Alarm Mode, press C to cycle through the on and off settings a
shown below.
[Alarm On Indicator / Hourly Time Signal On Indicator]
ALARM MODE
You can set a Daily Alarm that sounds at the
same time each day, while it is turned on. You
can also turn on an Hourly Time Signal that
causes the watch to beep twice every hour on
the hour.
Setting the Alarm Time
1. In the Alarm Mode, hold down A until the
hour digits of the alarm time start to flash.
• This operation automatically turns on the
Daily Alarm.
2. Press M to move the flashing in the following
sequence.
Hour Minutes
M
A
B
C
P
ALM SIG
P
Mode indicator
Current time
Alarm on indicator
Hour : Minutes
Hourly time signal
on indicator
Alarm On
Signal On
Alarm Off
Signal Off
Alarm On
Signal Off
Alarm Off
Signal On
M
A
B
C
ALM SIG
STOPWATCH MODE
The Stopwatch Mode lets you measure elapsed
time, split times, and two finishes. The range of
the stopwatch is 23 hours, 59 minutes, 59.99
seconds.
1/100 second
Hours : Minutes
Mode indicator
Seconds
M
A
B
C
AUTO
P
ALM SIG
AUTO
BACKLIGHT
The backlight uses an EL (electro-luminescent)
panel that causes the entire display to glow for
easy reading in the dark. The watch’s auto light
switch automatically turns on the backlight when
you angle the watch towards your face.
• The auto light switch must be turned on
(indicated by the auto light switch on indicator)
for it to operate.
Turning on the Backlight manually
In any mode, press B to illuminate the display for about two seconds.
• The above operation turns on the backlight regardless of the current
auto light switch setting.
Auto light switch
on indicator
First runner
finishes.
Second runner finishes.
Record time of first
runner.
Record time of
second runner.
(a) Elapsed Time
CC C C A
Start Stop Re-start Stop Clear
(b) Split Time
CA A C A
Start Split Split release Stop Clear
(c) Two Finishes
CA C A A
Start Split Stop Split release Clear
J J J J
J J J J
J J J J
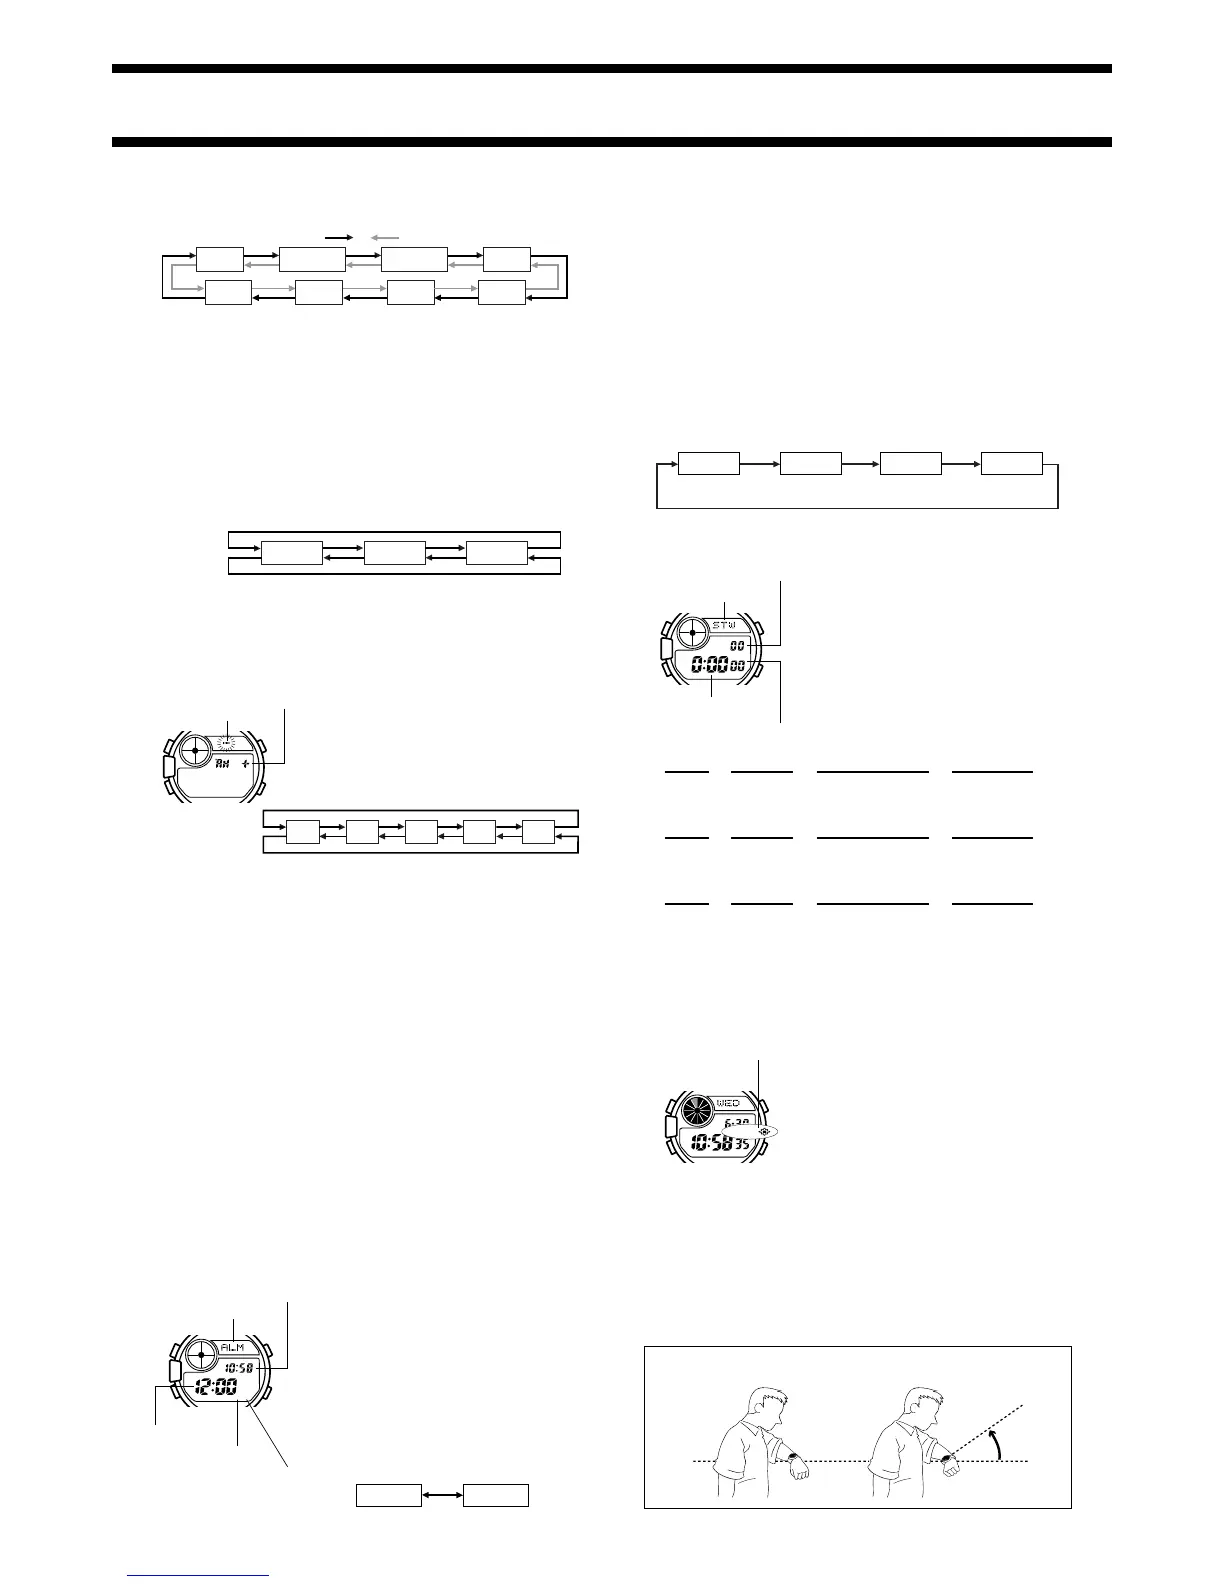
About the Auto Light Switch
Turning on the auto light switch causes the backlight to turn on for about
two seconds, whenever you position your wrist as described below in any
mode.
• See “Backlight Precautions” for other important information about using
the backlight.
Moving the watch to a position that is parallel to the ground and then
tilting it towards you more than 40 degrees causes the backlight to light.
Parallel to
ground
More
than
40
°
 Loading...