Music Presets
E-58
You can modify the preset chord progression and save it as a
user preset, or you can create a new chord progression from
scratch and save it.
1.
Perform steps 1 through 4 under “To perform
using a music preset” (page E-50) and select
the music preset you want to edit in order to
create your user music preset.
2.
Configure tone and other settings referring to
“Music Preset Settings” (page E-52).
3.
While holding down the R-13 (FUNCTION)
button, press the C-13 (MENU) button.
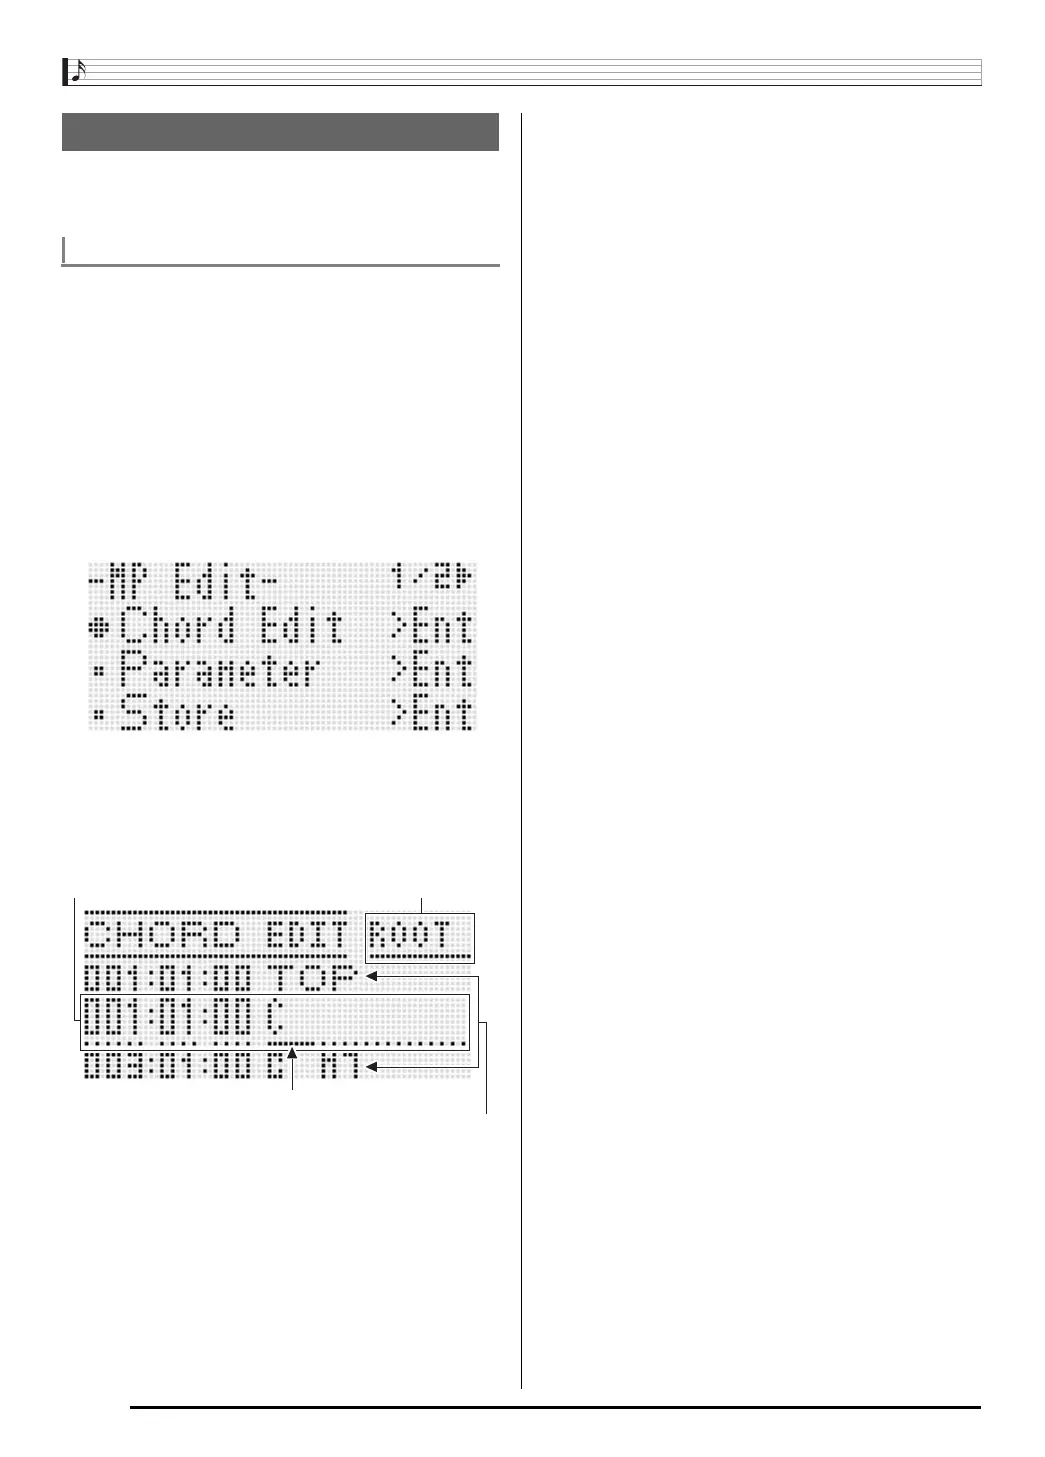
• This displays the MP (music preset) editor screen like
the one shown below with the 0 next to “Chord Edit”.
4.
Press the R-16 (ENTER) button.
• This displays the chord editor screen shown below. You
can use this screen to directly edit the individual chord
data items of a chord progression.
5.
Perform the following chord progression
editing operations.
• Change an existing chord (“To modify recorded chord
data”, page E-59)
• Delete an existing chord (“To delete recorded chord
data”, page E-59)
• Insert a new chord (“To insert a new chord”, page E-59)
• Delete all existing chords (“Initialize”, under “To perform
menu operations”, page E-61)
• Input a series of chords (“To perform step input of
chords”, page E-60)
• Key shift all existing chords (“Key Shift”, under “To
perform menu operations”, page E-61)
• Insert another music preset chord progression following
the chord progression data of the preset being edited
(“Append Chord”, under “To perform menu operations”,
page E-61)
• Delete existing chords in a specific measure (“Delete
Measure”, under “To perform menu operations”, page
E-61)
• Insert blank measures at a specific location (“Insert
Measure”, under “To perform menu operations”, page
E-61)
6.
After editing is complete, press the R-15 (EXIT)
button.
• This returns to the MP editor screen.
7.
Perform steps 4 through 9 under “To create and
save a user preset” on page E-54.
• Steps 4 and 5 can be skipped if they are not necessary.
Editing a Chord Progression
Chord Progression Editing Flow
Data being edited
Cursor
Data type name at
cursor position
Data before and after data being edited
CTK6000_e.book 58 ページ 2010年7月12日 月曜日 午後12時50分