– 48 –
DT-X200/DT-X8
6. DISASSEMBLY AND REASSEMBLY
Note:
▪ When reassembling the parts, reverse the disassembly procedures.
If
“
note(s) on reassembling
”
is stated, be sure to follow it.
▪ Use the right screwdriver according to the screw diameter.
▪ When disassembling or reassembling parts, do not pinch or damage wires.
▪ When reassembling FPC (cable), be sure that its orientation is correct. The contacts of the FPC are on
one side only.
▪ When handling an antenna cable, disconnect and connect it horizontally. After connecting, be sure that
it is securely connected to the socket.
▪ Adhesive tape is not reusable. Use the new one.
Tool list:
The following tools are necessary when replacing maintenance parts.
No. Item Remarks
1 #0 precision screwdriver (Phillips head)
2 #1 precision screwdriver (Phillips head)
3 Tweezers
4 Special screwdriver (Y-shaped head)
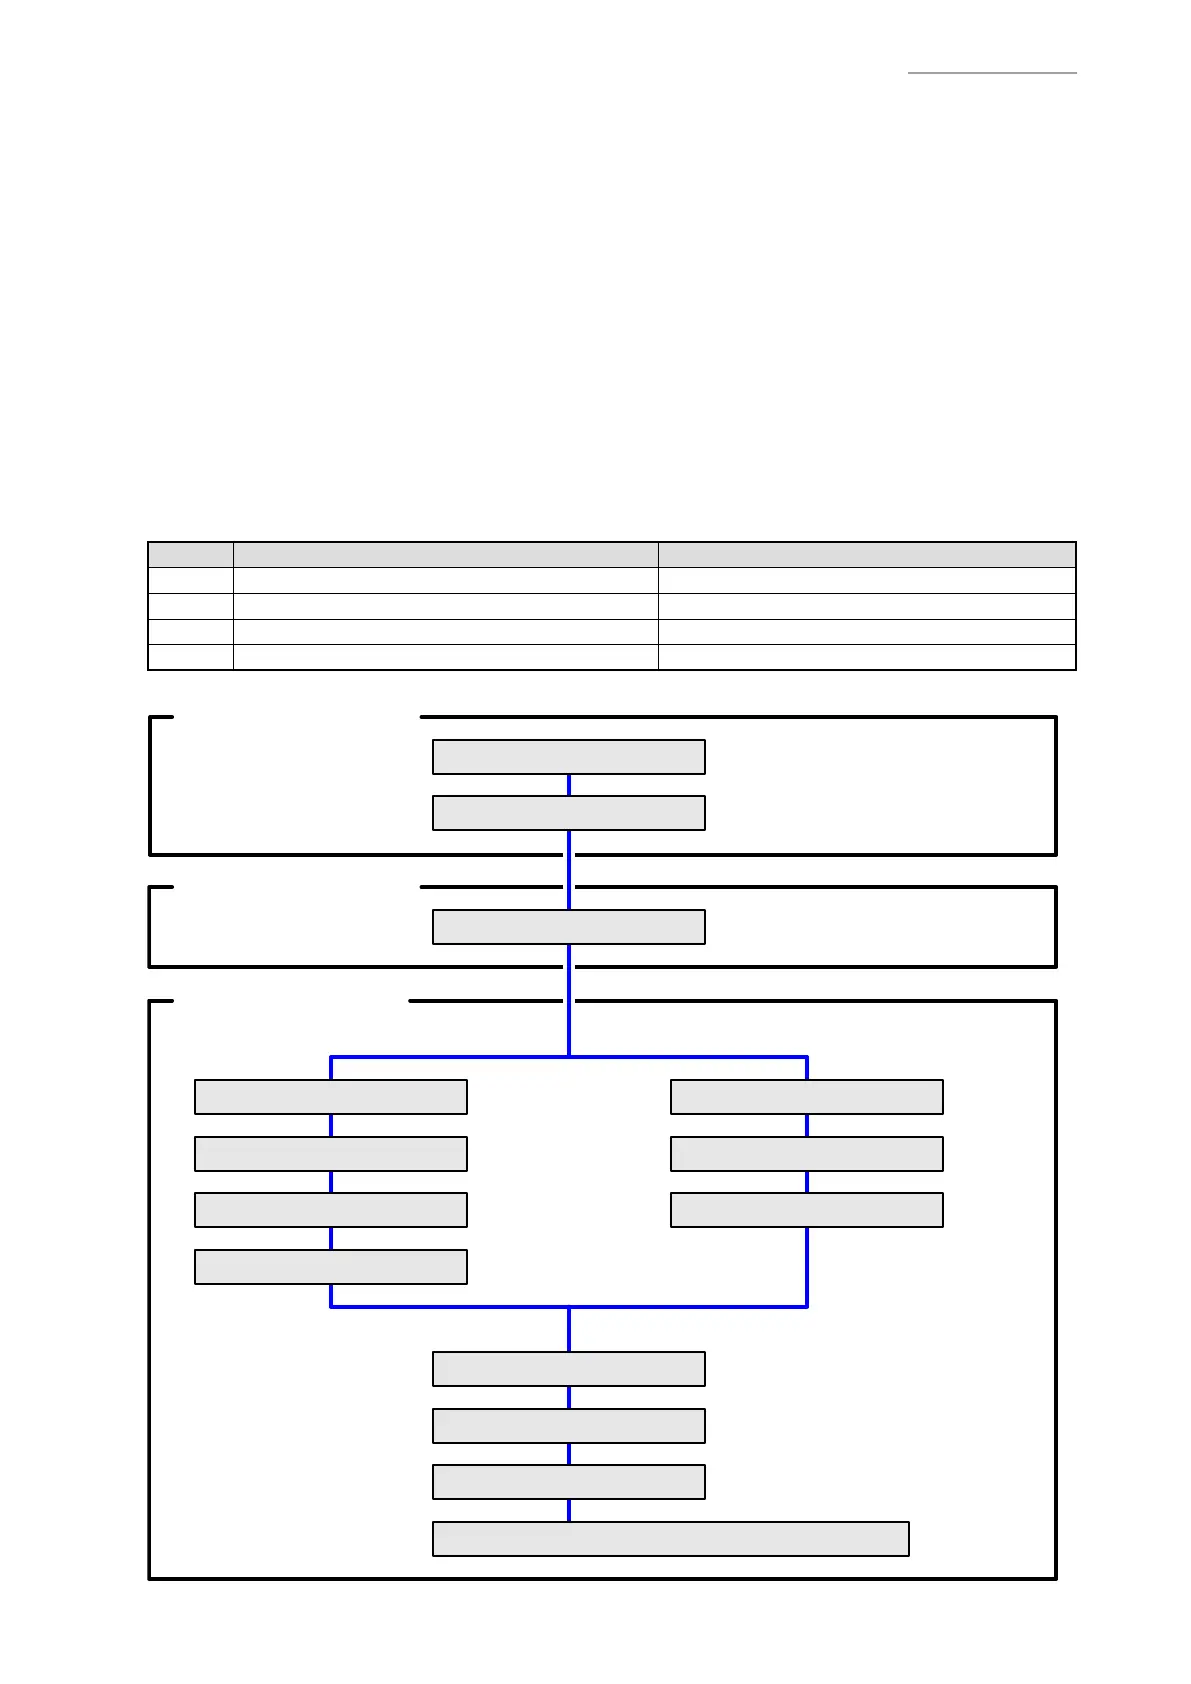
(1) L-CASE-UNIT
(2) NFC-ANTENNA
6-1. LOWER-CASE-UNIT
(1) UPPER-CASE-UNIT
(1) 1D Laser or 2D Scanner
(2) NFC-UNIT
(3) SBAT-UNIT
(4) EXT-UNIT
(1) SBAT-UNIT
(2) NFC-UNIT
(3) FRI-ASSY & EXT-UNIT
(1) MAIN-PCB
(2) SCANNER-UNIT
(3) LCD-UNIT
(4) I-CASE, VIBRATION-MOTOR, LAN-ANT-UNIT
6-2. UPPER-CASE-UNIT
6-3. INNER-CASE-UNIT
6-3-1. 1D LASER / 2D SCANNER MODEL 6-3-2. FULL RANGE IMAGER MODEL
6-3-3. ALL MODEL
 Loading...