– 8 –
SOLAR CELL-PCB ASS’Y CONTACT CHECKING7-3.
Check a Solar cell and PCB ass’y are contacted correctly by contact spring, when a module is disassembled.
To enter TEST mode.1)
1-1) While pressing
A
button, press
D
and
B
buttons at the normal timekeeping mode.
A B
A
→
D
+
B
C D
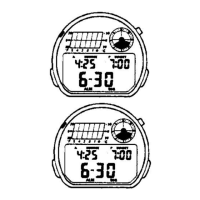
Figure 1 Figure 2
L
SLR Bright
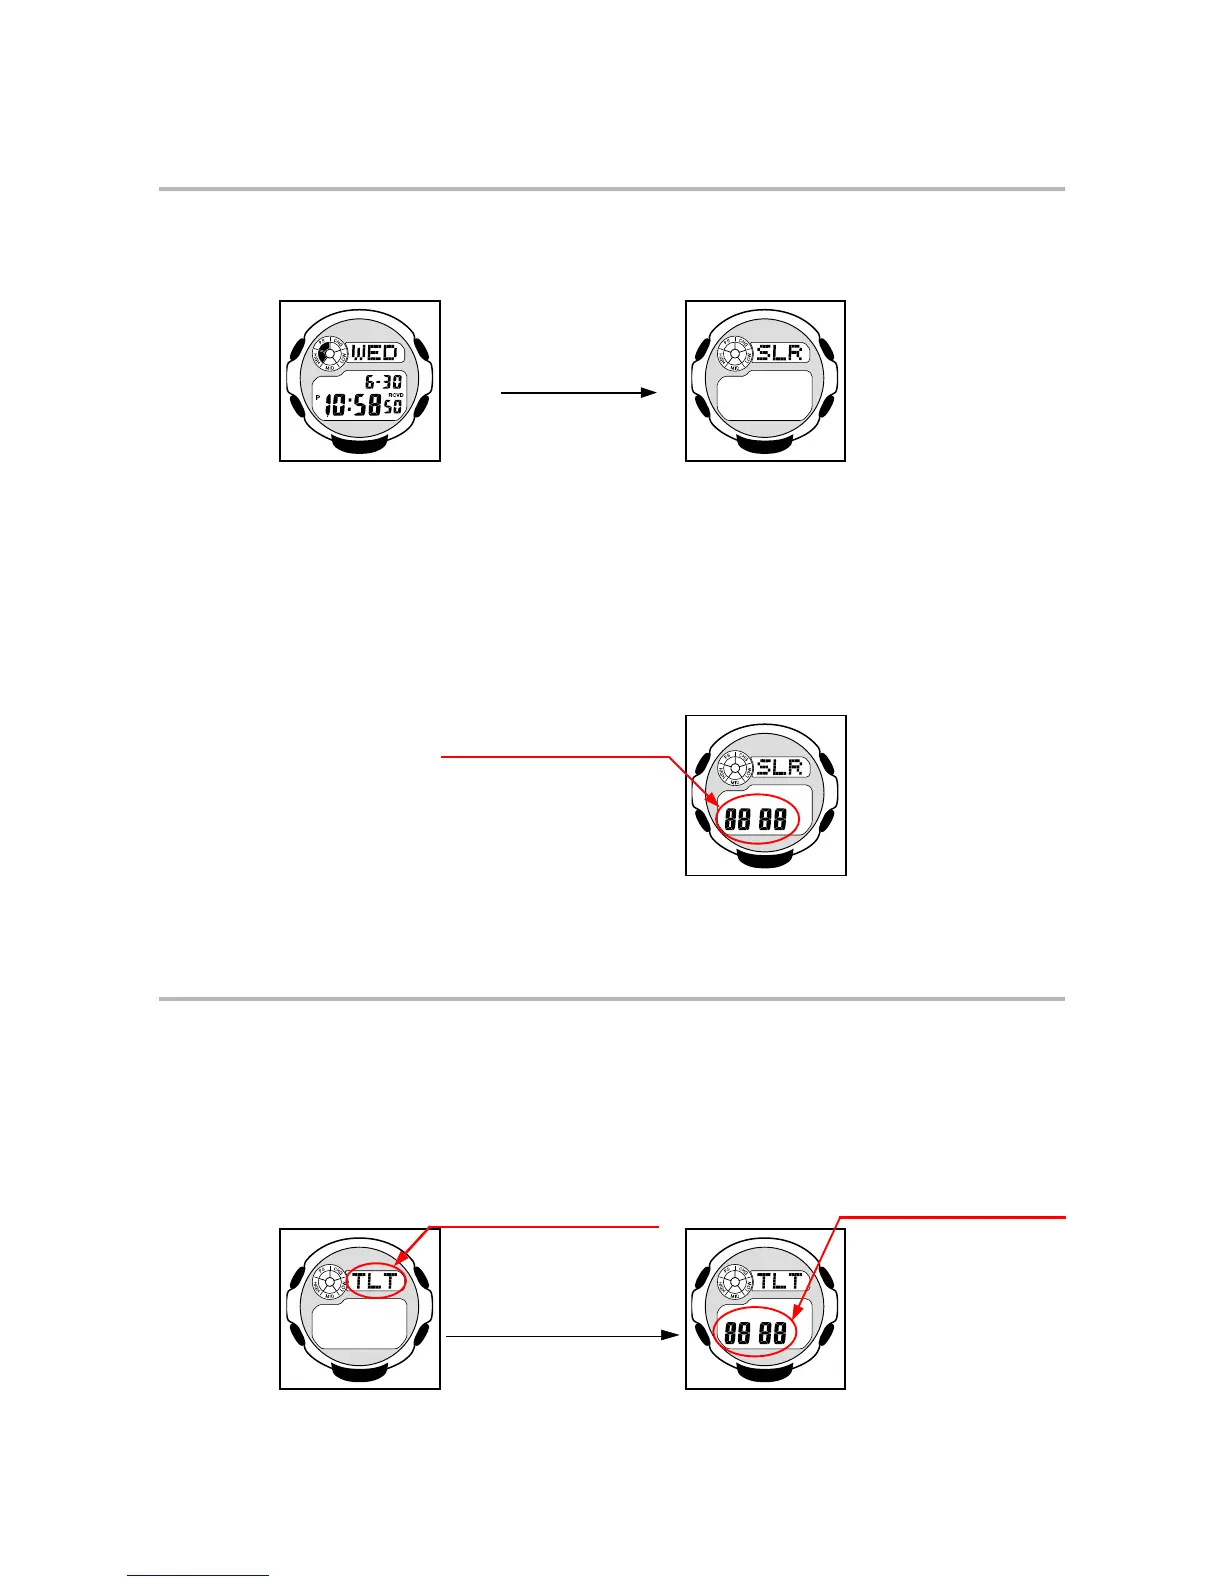
Check a Solar cell and PCB ass’y contact in the following order.2)
2-1) Check that “SLR” is displayed as shown in Figure 2, and place the watch in a sufciently-lit
area with its face up for 5 seconds.
2-2) Check that the display remains the same.
2-3) Place the watch on a desk with its glass face down for 5 seconds or more.Or go to a dark
area and leave the watch for 5 seconds or more.
2-4) Check that “8888” appears on the display indicating that light is insufcient.
Once “8888” appears, the display remains the
same even after the watch face is exposed to light.
Figure 3
To exit from TEST mode, press 3)
D
button.
HOW TO CHECK TILT SENSOR7-4.
While pressing 1)
A
button, press
C
and
B
buttons at the normal timekeeping mode.
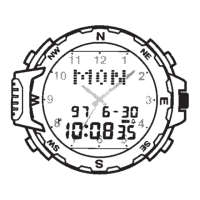
Check the display indicates as gure 4.2)
Tilt the watch in the way that the “6-o’clock” end of the face is lowered. (45°)3)
How to tilt the watch: One tilting cycle is 0°(1 sec.) → 45°(1 sec.) → 0°. Repeat the cycle 3 times.
(Check the tilt sensor as described above at least twice).
Check the display indicates as gure 5.4)
Tilt the watch in the way that
the “6-o’clock” end of the face
is lowered.
(Repeat the cycle 3 times.)
Figure 4 Figure 5
To exit from TEST mode, press 5)
D
button.
Appear “8888” on display.
Appear “TLT” on display.
Appear “8888” on display.
(for more than two times)
 Loading...