EasyManua.ls Logo

Casio RANGEMAN GW9400 - User Manual

Casio RANGEMAN GW9400
14 pages
Print Icon
To Next Page IconTo Next Page
Loading...
MO1408-EC
© 2013 CASIO COMPUTER CO., LTD.
E-1
ENGLISH
Congratulations upon your selection of this CASIO watch.
Applications
The built-in sensors of this watch measure direction, barometric pressure, temperature and altitude.
Measured values are then shown on the display. Such features make this watch useful when hiking,
mountain climbing, or when engaging in other such outdoor activities.
Warning !
The measurement functions built into this watch are not intended for taking measurements that
require professional or industrial precision. Values produced by this watch should be considered
as reasonable representations only.
When engaging in mountain climbing or other activities in which losing your way can create a
dangerous or life-threatening situation, always use a second compass to confi rm direction readings.
Note that CASIO COMPUTER CO., LTD. assumes no responsibility for any damage or loss
suffered by you or any third party arising through the use of this product or its malfunction.
E-2
Important!
Your watch’s Altimeter Mode calculates relative altitude based on changes in barometric pressure
measurement by its pressure sensor. For more information, see page E-36 and E-48.
Immediately before embarking or otherwise taking altitude readings, be sure to specify a reference
altitude. If you don’t the readings produced by the watch probably will not be very accurate. For more
information, see “To specify a reference altitude value” (page E-44).
E-3
About This Manual
Depending on the model of your watch, digital display text appears
either as dark fi gures on a light background, or light fi gures on a dark
background. All examples in this manual are shown using dark fi gures
on a light background.
Button operations are indicated using the letters shown in the
illustration.
Note that the product illustrations in this manual are intended for
reference only, and so the actual product may appear somewhat
different than depicted by an illustration.
E-4
Things to check before using the watch
1. Check the battery power level.
Is
H
or
M
indicated by the battery power indicator (page E-11)?
Go to step 2.
Power is low.
Charge the watch by placing it in a location
where it is exposed to light. For details, see “Charging the
Watch” (page E-10).
NO YES
YES
Does any one of the following conditions exist?
Battery power indicator indicates L and LOW is flashing on the
display.
CHG is flashing on the display.
The face is blank.
The watch is charged
sufficiently.
For details about
charging, see
“Charging the Watch”
(page E-10).
NEXT
Battery power
indicator
E-5
2. Check the Home City and the daylight saving time (DST) setting.
Use the procedure under “To confi gure Home City and summer time settings” (page E-31) to confi gure
your Home City and daylight saving time settings.
Important!
Proper time calibration signal reception, and World Time Mode and Sunrise/Sunset Mode data depend
on correct Home City, time, and date settings in the Timekeeping Mode. Make sure you confi gure
these settings correctly.
3. Set the current time.
To set the time using a time calibration signal
See “To get ready for a receive operation” (page E-17).
To set the time manually
See “Confi guring Current Time and Date Settings Manually” (page E-33).
The watch is now ready for use.
For details about the watch’s radio controlled timekeeping feature, see “Radio Controlled Atomic
Timekeeping” (page E-15).
E-6
Contents
E-3 About This Manual
E-4 Things to check before using the watch
E-10 Charging the Watch
E-14 To recover from the sleep state
E-15 Radio Controlled Atomic Timekeeping
E-17 To get ready for a receive operation
E-19 To perform manual receive
E-22 To check the latest signal reception results
E-22 To turn auto receive on or off
E-24 Mode Reference Guide
E-29 Timekeeping
E-30 Using Date/Time Records
E-31 Confi guring Home City Settings
E-31 To confi gure Home City and summer time settings
E-33 Confi guring Current Time and Date Settings Manually
E-33 To change the current time and date settings manually
E-35 Specifying Temperature, Barometric Pressure, and Altitude Display Units
E-35 To specify temperature, barometric pressure, and altitude display units
E-7
E-36 Using the Altimeter Mode
E-37 To select the altitude screen format
E-37 To select the altitude auto reading interval
E-39 To take altitude readings
E-42 To specify the altitude differential start point
E-43 To use the altitude differential value
E-44 To specify a reference altitude value
E-45 To save a reading manually
E-51 Precautions Concerning Simultaneous Altitude and Temperature Readings
E-52 Taking Direction Readings
E-52 To perform 2-point calibration
E-54 To take a direction reading
E-58 To perform magnetic declination correction
E-61 Taking Barometric Pressure and Temperature Readings
E-61 To take barometric pressure and temperature readings
E-66 To enable or disable the barometric pressure change alert
E-68 To calibrate the pressure sensor and the temperature sensor
E-70 Viewing Memory Records
E-70 To view data in watch memory
E-74 To delete all saved data
E-74 To delete a specifi c record
Operation Guide 3410
Question and Answer IconNeed help?

Do you have a question about the Casio RANGEMAN GW9400 and is the answer not in the manual?

Summary

Watch Applications and Warnings

Applications Overview

Describes the watch's sensor functions and outdoor applications.

Critical Safety Warnings

Crucial safety warnings regarding measurement precision and product use.

About This Manual

Manual Clarifications

Notes on watch display variations and button operation indicators.

Initial Setup Checks

Battery Power Check

Guides on checking battery level and identifying charging needs.

Home City and DST Settings

Instructs on setting Home City and DST for accurate timekeeping and data.

Setting Current Time

Details on setting the current time manually or via signal.

Charging the Watch

Charging Guide and Safety

Provides guidance on optimal charging and warns about potential burn injuries.

Power Levels and Status

Battery Level Indicators and Recovery

Explains battery indicators, power recovery mode, and charging times.

Power Saving Function

Recovering from Sleep State

Instructions on how to wake the watch from its sleep state.

Radio Controlled Atomic Timekeeping

Reception Ranges and Preparation

Maps and steps to prepare for receiving time calibration signals.

Receive Operations and Status

Procedures for manual/auto reception, signal indicators, and precautions.

Mode Reference Guide

Navigating Watch Modes

Explains how to select and switch between different watch modes.

Sensor Mode Overview

Introduces the three primary sensor modes.

General Watch Functions

Auto Return, Initial Screens, Scrolling

Explains automatic mode exit, initial displays, and data scrolling.

Timekeeping Mode Operations

Time and Date Settings

Guides on using the Timekeeping Mode for time and date management.

Date and Time Records Management

Managing Date;Time Records

Notes on memory limits and accessing saved records.

Home City Configuration

Setting Home City and DST

Step-by-step guide to setting the Home City and daylight saving time.

Manual Time and Date Settings

Adjusting Time and Date Elements

Details on changing specific elements like seconds, hour, minutes, and year.

Display Unit Settings

Unit Selection Procedure

Steps to select display units for temperature, pressure, and altitude.

Altimeter Mode Usage

Preparing for Altitude Readings

Guides on selecting screen format and reading interval.

Taking Altitude Readings

Step-by-step guide to perform basic altitude readings.

Altitude Change Monitoring

Altitude Differential Value Usage

How to set and use the altitude differential start point.

Altitude Differential for Navigation

Setting Altitude Differential Start Point

Steps to set a starting point for measuring altitude changes.

Reference Altitude Settings

Specifying Reference Altitude

Steps to set a reference altitude for more accurate readings.

Altitude Data Management

Manually Saved Altitude Records

Explains how altitude readings are stored as records.

Auto Saved Altitude Values

Details auto-tracking of high/low altitude and cumulative ascent/descent.

Cumulative Ascent and Descent Calculation

How the Altimeter Works

Altitude Measurement Methods

How altitude is measured using preset values or a reference altitude.

Altimeter Operational Precautions

Important precautions for accurate and safe altimeter use.

Simultaneous Altitude and Temperature Precautions

Taking Direction Readings

Compass Calibration and Readings

Procedure to calibrate the compass and take direction readings.

Bearing Memory and Records

Setting Map for Navigation

How to align a map with the watch for navigation.

Bearing Records Management

Instructions on saving and accessing bearing records.

Magnetic Declination Correction

Performing Declination Correction

Steps to input magnetic declination for true north indication.

Digital Compass Precautions

North Definitions and Reading Factors

Explains north definitions and factors affecting direction readings.

Barometric Pressure and Temperature Readings

Taking Pressure and Temperature Readings

Procedure to take barometric pressure and temperature measurements.

Display Units and Ranges

Details on units and measurement ranges for pressure and temperature.

Barometric Pressure Graph

Reading the Pressure Graph

Explains how to read and interpret the barometric pressure graph.

Barometric Pressure Differential Pointer

Reading the Differential Pointer

How to read the pointer indicating relative barometric pressure changes.

Barometric Pressure Change Indications

Interpreting Pressure Change Indicators

Explains the meaning of different barometric pressure change indicators.

Barometric Pressure Change Alert Configuration

Enabling;Disabling Pressure Alert

Steps to turn the barometric pressure change alert and indicator on or off.

Barometric Pressure and Temperature Records

Sensor Calibration Procedure

Explains how to calibrate pressure and temperature sensors if needed.

Barometer and Thermometer Precautions

Viewing Memory Records

Accessing Saved Data

Instructions on how to access all types of saved data records.

Data Deletion Procedures

Deleting All Saved Data

Warning about the irreversibility of deleting all saved data.

Deleting Specific Records

Warning about the irreversibility of deleting a specific record.

World Time Mode

Setting Up World Time

Steps to enter the World Time Mode and view different city times.

Specifying City Time Settings

Stopwatch Operations

Stopwatch Mode and Elapsed Time

Steps to access Stopwatch Mode and measure elapsed time.

Split Time Measurement

How to pause the stopwatch and record split times.

Measuring Two Finishes with Stopwatch

Countdown Timer Usage

Countdown Timer Mode and Start Time

Steps to access Countdown Timer Mode and set the start time.

Countdown Timer Operation and Alarm

Performing Countdown and Stopping Alarm

How to start and run the countdown timer and stop its alarm.

Alarm Mode Operations

Accessing Alarm Mode

Steps to access the Alarm Mode.

Setting and Managing Alarms

Setting Alarm Times

Procedure to set a daily alarm time.

Controlling Alarms and Hourly Signal

How to enable or disable alarms and the hourly time signal.

Stopping Alarms

Sunrise and Sunset Times

Viewing Sunrise;Sunset for Today

How to view sunrise and sunset times for the current day.

Sunrise;Sunset Times for Specific Dates

Sunrise;Sunset Times for Specific Locations

Location Configuration for Sunrise;Sunset

How to configure location details for accurate sunrise/sunset times.

Watch Illumination

Manual Illumination Activation

How to manually activate the watch's backlight.

Auto Light Switch Function

Auto Light Switch Operation and Warnings

Explains auto light switch and provides critical safety warnings.

Illumination Precautions and Tips

Auto Light Switch Precautions

Advice on using the auto light switch to avoid battery drain and distractions.

Other Watch Settings

Button Operation Tone Setting

How to turn the button operation tone on or off.

Power Saving Function Control

How to enable or disable the Power Saving function.

Troubleshooting Common Issues

Time Setting and Calibration Problems

Solutions for time accuracy and calibration issues.

Sensor Mode Errors and Readings

Explains "ERR" indicator and reading issues in sensor modes.

Altitude and Direction Reading Accuracy

Addresses problems with altitude and direction reading accuracy.

Troubleshooting Specific Modes and Charging

World Time Mode Issues

Addresses problems with time settings in the World Time Mode.

Charging Problems

Solutions for issues when the watch does not resume operation after charging.

Troubleshooting Time Calibration Signals

Time Calibration Signal Reception Issues

Solutions for ERR indicators and incorrect time settings from signals.

Manual Time Setting Issues

Explains why manually set times might change due to auto-receive.

Troubleshooting Auto Receive and Time Settings

Auto Receive and Manual Receive Problems

Solutions for issues preventing auto or manual signal reception.

Incorrect Time;Day After Reception

Addresses incorrect time or day settings after signal reception.

Watch Specifications Overview

Timekeeping, Calibration, and Sensor Specs

Details on timekeeping accuracy, signals, and sensor ranges.

Timer, Alarm, and Other Feature Specs

Specifications for stopwatch, timer, alarms, world time, and illumination.

Power Supply and Operating Time

Information on the power source and battery operating duration.

Overview

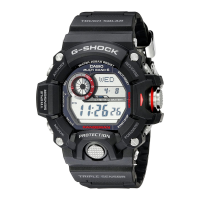
This document describes the operation and features of a CASIO watch, model 3410, which is equipped with sensors for measuring direction, barometric pressure, temperature, and altitude. It also includes radio-controlled atomic timekeeping, a stopwatch, countdown timer, alarms, and sunrise/sunset time display.

General Functions and Modes

The watch features 11 distinct modes, each serving a specific purpose. Users can navigate between these modes using the watch's buttons. A key feature is the ability to return to the Timekeeping Mode from any other mode by holding down a specific button for about two seconds. The watch also incorporates an auto-return feature, automatically reverting to the Timekeeping Mode if no button operations are performed for a set period, which varies by mode (e.g., 3 minutes for Sunrise/Sunset, Data Recall, Alarm, Receive, and Digital Compass modes; 1 hour minimum to 12 hours maximum for Altimeter mode; 1 hour for Barometer/Thermometer mode; and 3 minutes for setting screens with flashing digits).

The watch's display can show either dark figures on a light background or light figures on a dark background, with all examples in the manual illustrating the former. Button operations are clearly indicated by letters (A, B, C, D, E).

Power and Charging

The watch is powered by a solar panel on its face, which charges a built-in rechargeable battery when exposed to light. For optimal charging, it should be placed in direct sunlight. When worn, care should be taken to ensure the face is not blocked by clothing, as this can lead to a sleep state.

The battery power level is indicated by a three-level indicator (L, M, H).

  • Level 1 (H) and Level 2 (M): All functions are enabled.
  • Level 3 (L): Battery power is low, requiring charging. Auto and manual receive, illumination, beeper, and sensor operations are disabled.
  • Level 4 (CHG): Indicates charging is in progress. All functions and display indicators are disabled, except for the CHG indicator.
  • Level 5: Battery is dead, all functions stop, data is deleted, and settings revert to factory defaults.

A "Power Recovery Mode" is activated if multiple sensor, illumination, or beeper operations are performed in a short period, causing all battery power indicators to flash. During this mode, illumination, alarms, countdown timer alarms, hourly time signals, and sensor operations are disabled for about 15 minutes until power recovers. Frequent flashing of all indicators suggests low battery power, prompting the user to charge the watch.

The watch also has a "Power Saving" function, which automatically enters a sleep state in the dark. In "display sleep" (60-70 minutes in dark), the display is blank, but all functions are enabled. In "function sleep" (6-7 days in dark), the display is blank, and all functions are disabled, though timekeeping is maintained. The watch will not enter sleep between 6:00 AM and 9:59 PM, but if already in sleep, it will remain so. Power Saving is active only in Timekeeping Mode (Day of the Week screen) or World Time Mode. To recover from sleep, the watch can be moved to a well-lit area, any button pressed, or angled towards the face for reading.

Timekeeping and Radio-Controlled Atomic Timekeeping

The Timekeeping Mode allows users to set and view the current time and date. It can display the day of the week, month-day, hour-minutes-seconds, and a barometric pressure graph.

The watch receives time calibration signals to update its time settings automatically. This feature is available when the Home City is set to a city in Japan, North America, Europe, or China that supports signal reception.

  • Reception Ranges: The watch can receive signals from transmitters in Anthorn (England), Mainflingen (Germany), Shangqiu City (China), Fukushima (Japan), Fukuoka/Saga (Japan), and Fort Collins (United States).
  • Reception Conditions: Signal reception can be difficult or impossible due to geographic contours, structures, weather, time of year/day, and radio interference. Optimal reception is generally at night, with the watch positioned with its 12 o'clock side facing a window, away from metal objects.
  • Auto Receive: The watch automatically attempts to receive the calibration signal up to six times a day (five for the Chinese signal) between midnight and 5 a.m. If successful, subsequent attempts for that day are skipped.
  • Manual Receive: Users can manually initiate a receive operation in the Receive Mode. A signal level indicator (L1, L2, L3) appears during reception, and "GET" indicates success, while "ERR" indicates failure.
  • Reception Results: The latest reception results can be checked in the Receive Mode, showing the date and time of the last successful reception or "---" if all attempts failed.
  • Auto Receive On/Off: Auto receive can be toggled on or off in the Receive Mode settings.

Precautions for Radio-Controlled Atomic Timekeeping: Strong electrostatic charges can cause incorrect time settings. The watch is designed to update the date and day of the week automatically from January 1, 2000, to December 31, 2099. Reception is disabled when battery power is low, in power recovery mode, during sensor operations, in function sleep, or during countdown timer operations.

Home City and Time Settings

Users can configure their Home City and select between standard time and daylight saving time (DST). The Home City setting affects UTC offsets for World Time Mode and proper time calibration signal reception. The watch also allows for manual adjustment of current time and date settings, including 12/24-hour format, seconds reset, hour/minute, and year/month/day. The full auto-calendar accounts for different month lengths and leap years.

Display Units

The watch allows users to specify display units for temperature, barometric pressure, and altitude.

  • Altitude: Meters (m) or feet (ft).
  • Barometric Pressure: Hectopascals (hPa) or inches of mercury (inHg).
  • Temperature: Celsius (°C) or Fahrenheit (°F). Note that when TYO (Tokyo) is selected as the Home City, these units are automatically set to meters, hectopascals, and Celsius, and cannot be changed.

Altimeter Mode

The Altimeter Mode uses a built-in pressure sensor to take altitude readings based on air pressure measurements.

  • Screen Formats: Two formats are available: "Altitude Tendency Graph" (showing current altitude and a graph of recent changes) and "Relative Altitude" (showing current altitude and a differential value from a specified start point).
  • Auto Reading Interval: Users can select between 0'05 (one-second intervals for 3 minutes, then every 5 seconds for 1 hour) or 2'00 (one-second intervals for 3 minutes, then every 2 minutes for 12 hours).
  • Taking Readings: Altitude readings are automatically started upon entering the Altimeter Mode and are displayed in 1-meter (5-foot) units. The measurement range is -700 to 10,000 meters (-2,300 to 32,800 feet).
  • Altitude Differential: This feature allows users to measure the change in altitude from a specified start point, useful for mountain climbing or hiking.
  • Reference Altitude: To improve accuracy, users can specify a reference altitude value based on external information (e.g., map data). This value can be set within -10,000 to 10,000 meters (-32,800 to 32,800 feet).
  • Auto Save Values: The watch automatically tracks and updates high altitude (MAX), low altitude (MIN), cumulative ascent (ASC), and cumulative descent (DSC) values during altimeter measurements. These values are retained even after exiting Altimeter Mode.
  • How the Altimeter Works: Altitude is estimated based on International Standard Atmosphere (ISA) values, which define relationships between altitude and air pressure. The watch expresses altitudes as relative altitude.
  • Altimeter Precautions: Altitude readings can vary due to changes in barometric pressure, atmospheric conditions, and elevation. The watch is not intended for professional precision or activities involving sudden altitude changes (e.g., sky diving).

Digital Compass Mode

The Digital Compass Mode allows users to take direction readings (north, south, east, west) and determine bearing to a destination.

  • 2-point Calibration: This feature corrects for measurement errors caused by local magnetism. The watch must be kept level and away from strong magnetic sources during calibration.
  • Taking Direction Readings: Upon entering the Digital Compass Mode, readings automatically start and update every second for about 60 seconds, displaying direction and bearing.
  • Bearing Memory: Users can save a bearing to a particular destination and refer to it later to ensure they are headed in the correct direction.
  • Magnetic Declination Correction: This feature allows users to input a magnetic declination angle (difference between magnetic north and true north) to enable the watch to indicate true north.
  • Digital Compass Precautions: Readings can be inaccurate near strong magnetic sources (e.g., permanent magnets, metal concentrations, high tension wires, household appliances) or inside vehicles/buildings.

Barometer/Thermometer Mode

This mode uses a pressure sensor for barometric pressure and a temperature sensor for temperature.

  • Taking Readings: Readings automatically start upon entering the mode and update every five seconds for three minutes, then every two minutes thereafter.
  • Display Units: Barometric pressure is displayed in hPa or inHg, and temperature in °C or °F.
  • Barometric Pressure Graph: The watch automatically takes barometric pressure readings every two hours, displaying a chronological history of pressure changes. This graph can help predict weather changes.
  • Barometric Pressure Differential Pointer: This pointer indicates the relative difference between the most recent barometric pressure reading on the graph and the current barometric pressure value.
  • Barometric Pressure Change Indicator: The watch analyzes past readings and informs users of significant pressure changes (sudden fall/rise, sustained rise/fall) with an alert beep. This indicator can be enabled or disabled.
  • Sensor Calibration: The pressure and temperature sensors are factory-calibrated but can be re-calibrated by the user if significant errors are noticed, by comparing readings with another reliable device.
  • Barometer and Thermometer Precautions: Sudden temperature changes can affect pressure sensor readings. For accurate temperature readings, the watch should be removed from the wrist and allowed to stabilize in a well-ventilated area away from direct sunlight.

Memory Records

The watch can store up to 40 records of various types, including:

  • Date/Time Records: Current date and time.
  • Altitude Records: Manually saved altitude readings with date and time.
  • Historical Altitude Values: Automatically tracked high altitude, low altitude, cumulative ascent, and cumulative descent.
  • Direction Records: Current bearing readings with date and time.
  • Barometric Pressure and Temperature Records: Current readings with date and time.

When the memory is full, the oldest record is automatically deleted to make room for new data. Records can be viewed in the Data Recall Mode and specific records can be deleted.

Stopwatch

The Stopwatch Mode measures elapsed time, split times, and two finishes.

  • Measuring Capacity: Up to 999 hours, 59 minutes, 59.99 seconds.
  • Operations: Start, stop, resume, split, split release, and reset.
  • Direct Access: The stopwatch can be directly accessed from Timekeeping Mode by pressing a specific button.

Countdown Timer

The Countdown Timer Mode allows users to set a countdown start time and sounds an alarm when the countdown ends.

  • Countdown Range: Up to 24 hours.
  • Setting Unit: 1 minute.
  • Operations: Start, stop, restart, and reset.
  • Alarm: Sounds for ten seconds when the countdown reaches zero and automatically resets to the starting value.

Sunrise/Sunset Mode

This mode allows users to look up sunrise and sunset times for a particular date and location.

  • Location Settings: Users can specify a city code, latitude (65.0°S to 65.0°N), and longitude (179.9°W to 180.0°E) for accurate times.
  • Date Selection: Sunrise/sunset times can be viewed for any date between January 1, 2000, and December 31, 2099.
  • Sea Level Times: The displayed times are for sea level and may differ at other altitudes.

Illumination

The watch display is illuminated for easy reading in the dark.

  • Manual Illumination: Pressing a button in any mode turns on illumination for 1.5 or 3 seconds, depending on the user's setting.
  • Auto Light Switch: When enabled, illumination automatically turns on when the wrist is positioned to angle the watch towards the face (more than 40 degrees tilt from parallel to the ground). This feature only operates when available light is below a certain level.
  • Illumination Duration: Can be set to 1.5 or 3 seconds.
  • Illumination Precautions: Frequent use runs down the battery. The auto light switch can be startling or distracting, especially when driving or cycling, and should be turned off in such situations.

Other Settings

  • Button Operation Tone: The tone that sounds when buttons are pressed can be turned on or off. Alarms, hourly time signals, barometric pressure change alerts, and countdown timer alarms operate normally regardless of this setting.
  • Power Saving: This function helps conserve battery life by entering a sleep state in the dark, as described in the "Power and Charging" section.

Troubleshooting

The manual provides solutions for common issues, such as:

  • Incorrect Time Setting: Checking Home City, DST settings, or manual adjustment.
  • Sensor Errors: "ERR" display during sensor operations, suggesting malfunction or improper contact.
  • Incorrect Altitude/Direction Readings: Due to calibration errors, strong magnetism, or environmental factors.
  • Charging Issues: Watch not resuming operation after exposure to light due to very low power.
  • Signal Reception Problems: "ERR" display, auto receive not working, or incorrect time/day after successful reception, often related to watch position, reception conditions, or Home City/DST settings.

This comprehensive guide ensures users can effectively utilize and maintain their CASIO watch, leveraging its advanced features for various outdoor activities and daily use.

Casio RANGEMAN GW9400 Specifications

General IconGeneral
ModelGW9400
BrandCasio
CategoryWatch
Water Resistance200 meters
Triple SensorYes
Tough SolarYes
Radio ControlledYes
Shock ResistantYes
Display TypeDigital
Case MaterialResin
Band MaterialResin
Weight93 grams
ThermometerYes
World TimeYes
StopwatchYes
Countdown TimerYes
AlarmYes
BacklightYes
Mud ResistanceYes
Atomic TimekeepingYes
Case Size55.2 x 53.5 x 18.2 mm
SeriesG-Shock
Battery LifeApprox. 7 months on full charge (without further exposure to light)

Related product manuals