Do you have a question about the Casio WS1400H and is the answer not in the manual?
Configures the watch's time, date, and year settings for accurate timekeeping.
Switches time format (12/24hr) and adjusts for Daylight Saving Time.
Measures and displays elapsed time, including hours, minutes, seconds, and 1/100th seconds.
Records lap times and total elapsed time during measurements.
Captures the times for the first and second finishers in a race.
Manages stored stopwatch data, including capacity and log creation.
Retrieves, views, and removes stored lap/split time records and logs.
Starts and operates the countdown timer, with alarm upon reaching zero.
Sets the countdown duration and enables/disables the auto-repeat function.
Explains alarm modes and how to set alarm times.
Manages alarm sounding, snooze, testing, and hourly signal.
Sets and adjusts the time for a secondary time zone, including DST.
Activates the watch's backlight for viewing in low light conditions.
Selects between 1.5-second or 3-second illumination time.
Enables or disables the audible beep sound made when buttons are pressed.
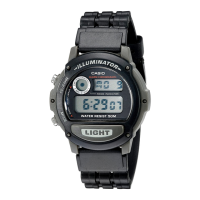
This document describes the operation of a CASIO watch, model 3511, providing a comprehensive guide to its various functions and features. The manual is structured to help users understand how to set up and utilize each mode effectively.
The manual itself is a detailed guide, identified as MA2111-EA, published by CASIO COMPUTER CO., LTD. in 2022. It includes illustrations of the watch display and button operations, denoted by letters (A, B, C, D, E). The sample displays in the manual typically show dark figures on a light background, though the actual watch display may vary, showing either dark figures on a light background or light figures on a dark background depending on the specific model. Users can find additional operational procedures and information on the CASIO website by visiting the provided URL: https://support.casio.com/global/en/wat/model/3511/.
The CASIO watch model 3511 offers several key features, including a Stopwatch, Timer, Alarm, and Dual Time. These functions are accessible through different modes. To switch between modes, the user simply presses the 'C' button. In any mode, except when a setting screen is active, pressing the 'B' button will illuminate the watch face, aiding visibility in low-light conditions. The manual provides a visual representation of how to navigate between Timekeeping Mode, Stopwatch Mode, Recall Mode, Timer Mode, Alarm Mode, and Dual Time Mode.
The Timekeeping Mode is the primary mode for viewing and setting the current time and date. The display shows the day of the week, month, day, hour, minute, second, and a PM indicator for 12-hour format.
Setting the Time and Date: To set the time and date, the user must first enter the setting screen by holding down button 'A' until the seconds start to flash. Once in the setting screen, button 'C' is used to cycle through the various settings: seconds, DST (Daylight Saving Time), hour, minute, day, month, and year. Buttons 'D' and 'E' are used to change the flashing value. For instance, pressing 'D' resets the seconds to 00. For other settings like hour, minute, year, month, and day, buttons 'D' (for incrementing) and 'E' (for decrementing) are used. After making all necessary adjustments, pressing button 'A' exits the setting screen. The day of the week is automatically updated based on the set date.
12-hour/24-hour Timekeeping: The watch allows users to toggle between 12-hour and 24-hour timekeeping formats by pressing button 'D' in the Timekeeping Mode. In the 12-hour format, a 'P' indicator signifies PM (noon to 11:59 p.m.), and an 'A' indicator signifies AM (midnight to 11:59 a.m.). The 24-hour format displays times from 0:00 to 23:59 without any AM/PM indicators. The selected timekeeping format applies across all other modes, though the 'A' and 'P' indicators are not shown in Timer Mode and Dual Time Mode screens.
Daylight Saving Time (DST) Setting: The watch supports Daylight Saving Time, which advances the time by one hour from Standard Time. To toggle DST, the user holds down button 'A' in Timekeeping Mode until the seconds flash, then presses 'C' once to access the DST setting screen. Pressing 'D' toggles DST between 'On' and 'OF' (Off). The DST indicator appears on the Timekeeping and Alarm Mode screens when DST is active.
The Stopwatch Mode is designed for measuring elapsed time, lap times, split times, and two finishes. It has a display range of 99 hours, 59 minutes, and 59 seconds. All operations in this mode are performed by pressing button 'C' to enter the Stopwatch Mode. The stopwatch continues to run even if the user exits the mode and will restart from zero after reaching its limit.
Measuring Elapsed Time: To measure elapsed time, the user presses 'D' to start the stopwatch and 'D' again to stop it. The measurement can be resumed by pressing 'D' again. To clear the stopwatch to all zeros, button 'E' is pressed.
Measuring Elapsed Time with Lap Times: From an all-zeros stopwatch display, pressing 'E' displays the lap time screen (indicated by 'LAP'). Pressing 'D' starts the elapsed time measurement, with both upper and lower displays showing identical times. Pressing 'E' records the time of the first lap. The current lap time freezes in the upper display for about eight seconds, while the total elapsed time and next lap time continue to be measured internally. The lap number is shown in the lower display. After eight seconds, the ongoing elapsed time measurement reappears in the lower display. This process can be repeated to record multiple lap times. Lap numbers increment automatically from 1 to 99, then restart from 00.
Measuring Elapsed Time with Split Times: Similar to lap times, from an all-zeros stopwatch display, pressing 'E' displays the split time screen (indicated by 'SPL'). Pressing 'D' starts the elapsed time measurement. Pressing 'E' records the time of the first split. The current split time appears in the lower display for about eight seconds, while the total elapsed time, next lap time, and next split time continue to be timed internally. The split number is shown in the upper display. After eight seconds, the ongoing lap time measurement appears in the upper display and the ongoing elapsed time measurement appears in the lower display. This process can be repeated for multiple split times. Split numbers increment automatically from 1 to 99, then restart from 00.
Timing First and Second Place Finishes: To time first and second place finishes, the user starts the stopwatch from the split time screen. Press 'E' when the first finisher crosses the finish line; this freezes the first finisher's time in the lower display for about eight seconds. Press 'E' again when the second finisher crosses the finish line; the second finisher's time appears in the lower display, and the difference between the first and second finisher's times appears in the upper display. Press 'E' to clear the stopwatch to all zeros.
The watch has a memory capacity of 60 records for stopwatch data. A new log is created each time a new elapsed time measurement is started in Stopwatch Mode. Each log contains a title screen and records of all lap or split times. If the memory becomes full, adding a new record automatically deletes the oldest log to make room.
How Stopwatch Data is Stored:
Recall Mode: The Recall Mode allows users to view and delete stored logs and records from the Stopwatch Mode. To enter Recall Mode, the user presses 'C'. The newest log appears first, or "---" if no logs are in memory. The Recall Mode can be used even while a stopwatch measurement is in progress, though currently measured data will not appear.
Recalling Stopwatch Time Records: First, ensure the stopwatch display is at all zeros. Then, use 'E' to select either the lap time screen or the split time screen. Press 'C' to enter Recall Mode. Use 'A' to scroll through log title screens from newest to oldest. Use 'D' (forward) and 'E' (back) to scroll through records within a log by lap number sequence.
Deleting a Log: In Recall Mode, display the title screen of the log to be deleted. Hold down 'E' until "CLR" stops flashing. This deletes the log and all its records. Deleting a log causes newer logs to shift up, reducing their log numbers by one.
The Timer Mode allows setting a countdown timer from one minute up to 24 hours. An alarm sounds when the countdown reaches zero. The watch also supports an auto-repeat function, which automatically restarts the countdown from the original set value.
Using the Countdown Timer: Press 'D' in Timer Mode to start the countdown. When the countdown ends and auto-repeat is off, an alarm sounds for 10 seconds or until any button is pressed. The countdown time then resets to its starting value. If auto-repeat is on, the countdown restarts automatically without pausing, and the alarm sounds when zero is reached. The countdown continues even if the user exits Timer Mode. To pause the countdown, press 'D'. Press 'D' again to resume. To stop completely, pause it with 'D' and then press 'E'. This returns the countdown time to its starting value.
Configuring Countdown Start Time and Auto-Repeat: While the countdown start time is displayed in Timer Mode, hold down 'A' until the hour setting flashes. Press 'C' to cycle through settings: start time (hours), start time (minutes), and auto-repeat on/off. Use 'D' and 'E' to change the start time (0:00 for 24 hours). For auto-repeat, press 'D' to toggle between 'On' and 'OF'. Press 'A' to exit the setting screen. The auto-repeat on indicator appears on the Timer Mode screen when active. Frequent use of auto-repeat and the alarm can drain battery power.
The watch features up to three independent multi-function alarms, with one having a snooze feature. An Hourly Time Signal can also be activated, causing the watch to beep twice every hour.
Alarm Types:
Setting an Alarm Time: In Alarm Mode, use 'C' to scroll through alarm screens (1 through 3) and the Hourly Time Signal screen (:00). Alarm 1 has a snooze feature, which repeats every five minutes. Select an alarm and hold down 'A' until the hour setting flashes. This automatically turns on the alarm. Press 'C' to cycle through settings: hour, minute, month, and day. Use 'D' and 'E' to change values. For daily or monthly alarms, set '-' for month. For daily or 1-month alarms, set '-' for day. Ensure correct AM/PM setting for 12-hour format. Press 'A' to exit.
Alarm Operation: The alarm sounds for about 10 seconds. If snooze is on for Alarm 1, it sounds seven times, every five minutes, until turned off. Pressing any button stops the alarm tone. Displaying the Timekeeping Mode setting screen or Alarm 1 setting screen during a 5-minute interval between snooze alarms cancels the current snooze alarm.
Testing the Alarm: In Alarm Mode, hold down 'E' to sound the alarm.
Selecting Alarm 1 Operation: In Alarm Mode, select Alarm 1. Press 'A' to cycle through: Alarm on, Snooze feature on, Alarm off. The alarm on indicator appears in all modes when an alarm is active. The snooze indicator flashes when the snooze alarm is sounding and during the 5-minute intervals. Displaying the Alarm 1 setting screen while snooze is on automatically turns it off.
Turning Alarms 2 and 3 On/Off: In Alarm Mode, use 'C' to select alarm 2 or 3. Press 'D' to toggle the alarm on/off. The alarm on indicator appears in all modes when active.
Turning the Hourly Time Signal On/Off: In Alarm Mode, use 'C' to select the Hourly Time Signal (:00). Press 'D' to toggle it on/off. The hourly time signal on indicator appears in all modes when active.
The Dual Time Mode allows tracking time in a different time zone. The seconds count is synchronized with the Timekeeping Mode.
Setting the Dual Time: Press 'C' to enter Dual Time Mode. Hold down 'A' until the DST setting flashes. Press 'C' to cycle through: DST, hour, and minute. Use 'D' to toggle DST on/off. Use 'D' and 'E' to change hour and minute. Press 'A' to exit. The DST indicator appears on the Dual Time Mode screen when active.
The watch features an LED (light-emitting diode) to illuminate the display for easy reading in the dark.
To Illuminate the Display: In any mode, press 'B' to turn on illumination. The illumination remains on for approximately 1.5 or 3 seconds, depending on the current duration setting.
Specifying Illumination Duration: In Timekeeping Mode, hold down 'A' until the seconds flash. While seconds are flashing, press 'D' to toggle between 1.5 seconds (-) and 3 seconds (=). Press 'A' to exit.
Auto Return Feature: If a setting screen with flashing digits is left untouched for two or three minutes, the watch automatically saves any settings made and exits the screen. Similarly, if no operation is performed in Recall Mode or Alarm Mode for two or three minutes, the watch automatically returns to Timekeeping Mode.
Button Operation Tone: The watch produces a button operation tone whenever a button is pressed. This tone can be turned on or off. To toggle it, hold down 'E' in any mode (except a setting screen). Holding 'E' also changes the watch's current mode. The mute indicator appears in all modes when the button operation tone is off. Multi-function alarms and the Timer Mode alarm will still sound even if the button operation tone is off.
Scrolling: Buttons 'D' and 'E' are used to scroll through data in various modes and setting screens. Holding them down during scrolling allows for high-speed data navigation.
Timekeeping Notes:
Illumination Precautions:
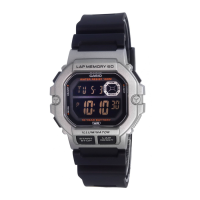
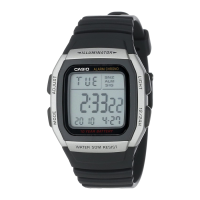
| Brand | Casio |
|---|---|
| Model | WS1400H |
| Water Resistance | 100 meters |
| Alarm | Yes |
| Chronograph | Yes |
| World Time | Yes |
| Accuracy | ±30 seconds per month |
| Case Material | Resin |
| Band Material | Resin |
| Stopwatch Function | Yes |
| Display Type | Digital |
| Type | Digital |
| Battery Life | 10 years |
| Calendar | Full auto-calendar |
| Alarm Function | Daily alarm |