CASTEL thanks you to choose our PACK EASY XE.
You will find in this document, the steps to follow to put it into service
PRODUCT OVERVIEW
Products references: 590.8900 (PACK EASY XE) - 590.8980 (PACK EASY XE BLE)
The packaged solutions offered by Castel are complete and ready to use including:
• A Full IP / SIP pre-set audio-video door entry station
• A pre-set intercom reception monitor
• SIP extensions
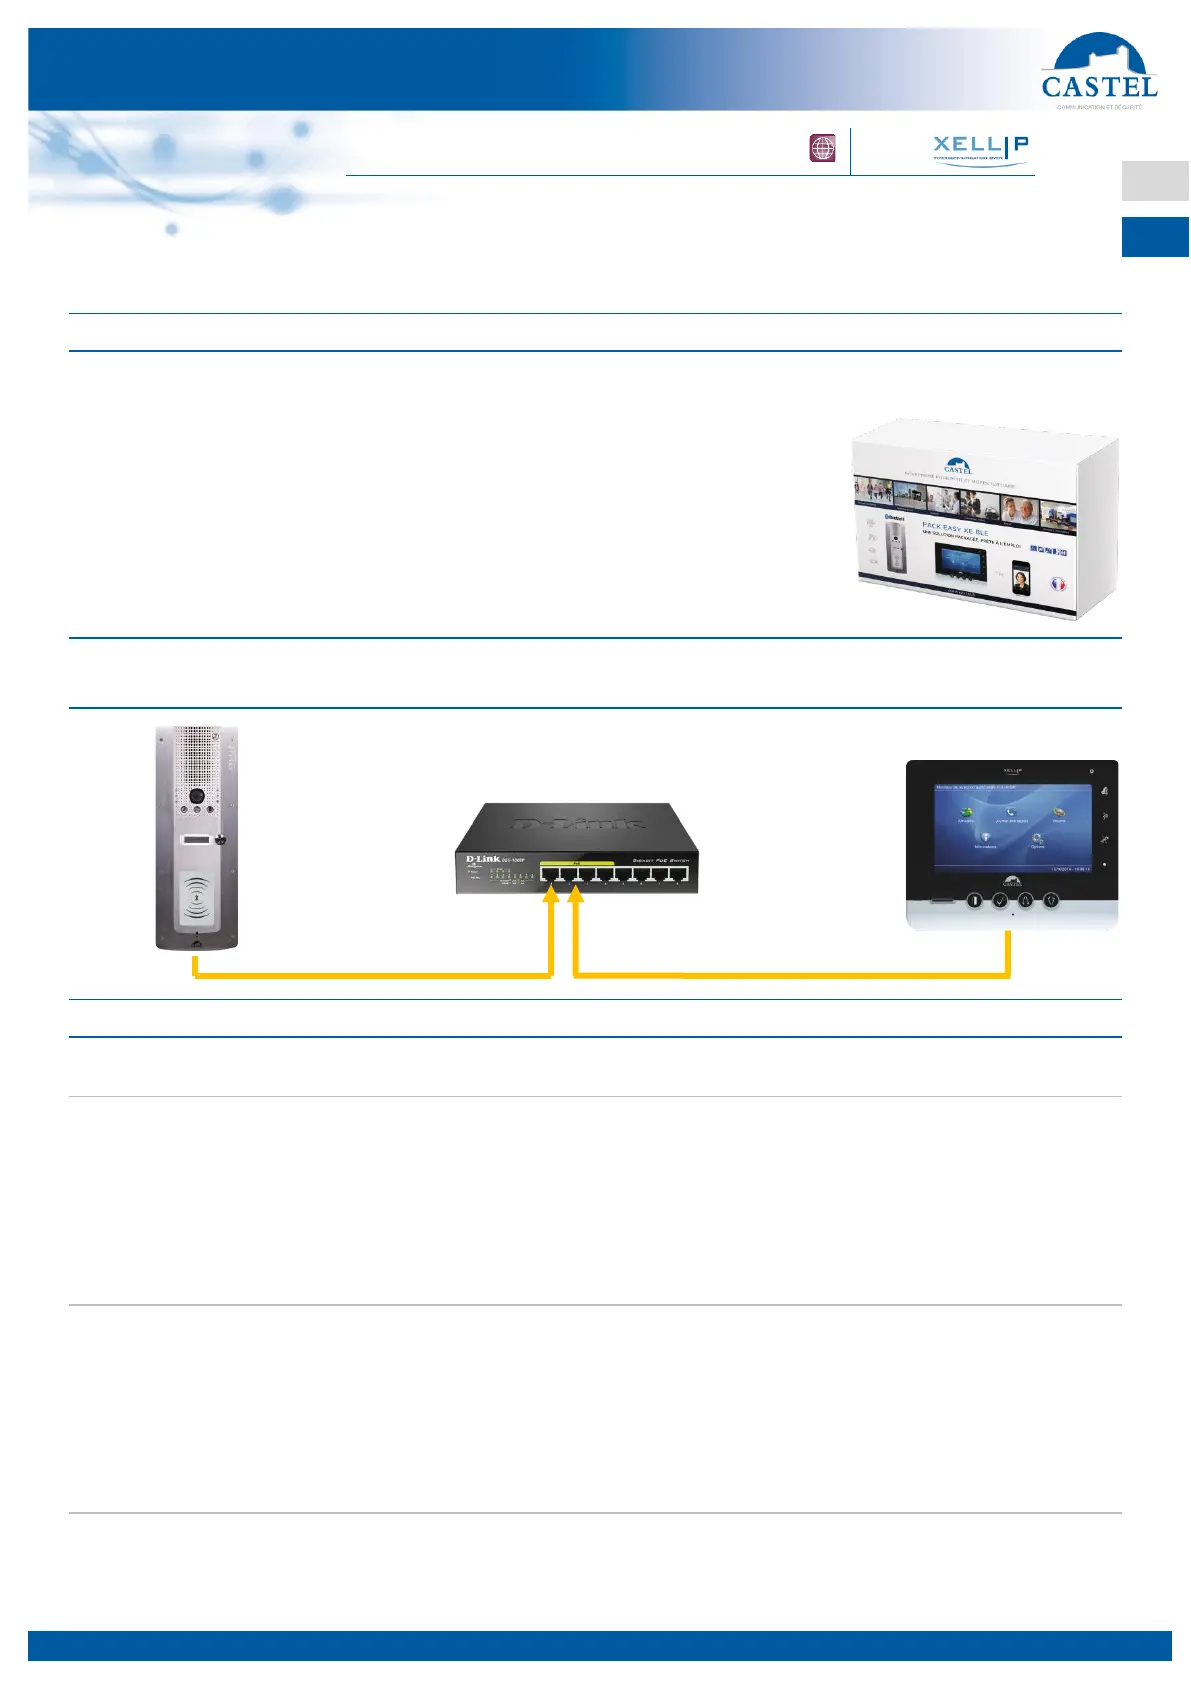
FUNCTIONAL DIAGRAM 1: A CALL FROM THE DOOR ENTRY STATION TO
THE MONITOR PRE-SET
PROCEDURE TO FOLLOW
Installing your door entry station
Your factory pre-set door entry station is programmed to call your intercom reception monitor.
It is configured by default with the fixed IP address 192.168.2.100.
Connect the door entry station to one of the PoE/PoE+ ports on the switch provided (ports 1 to 4).
When installing and connecting your door entry station, please refer to the technical data sheet (included in
the product packaging).
Installing your monitor
Your factory pre-set intercom monitor is programmed to receive calls from your door entry station.
It is configured by default with the fixed IP address 192.168.2.101.
Connect the intercom monitor to one of the PoE/PoE+ ports on the switch provided (ports 1 to 4).
When installing and connecting your intercom monitor, please refer to the technical data sheet (included in
the box of this one).
Operational Test
Press the button on the door entry station. The incoming call should appear on the monitor.
When using your intercom monitor, please refer to the technical data sheet (included in the box of this one).
 Loading...