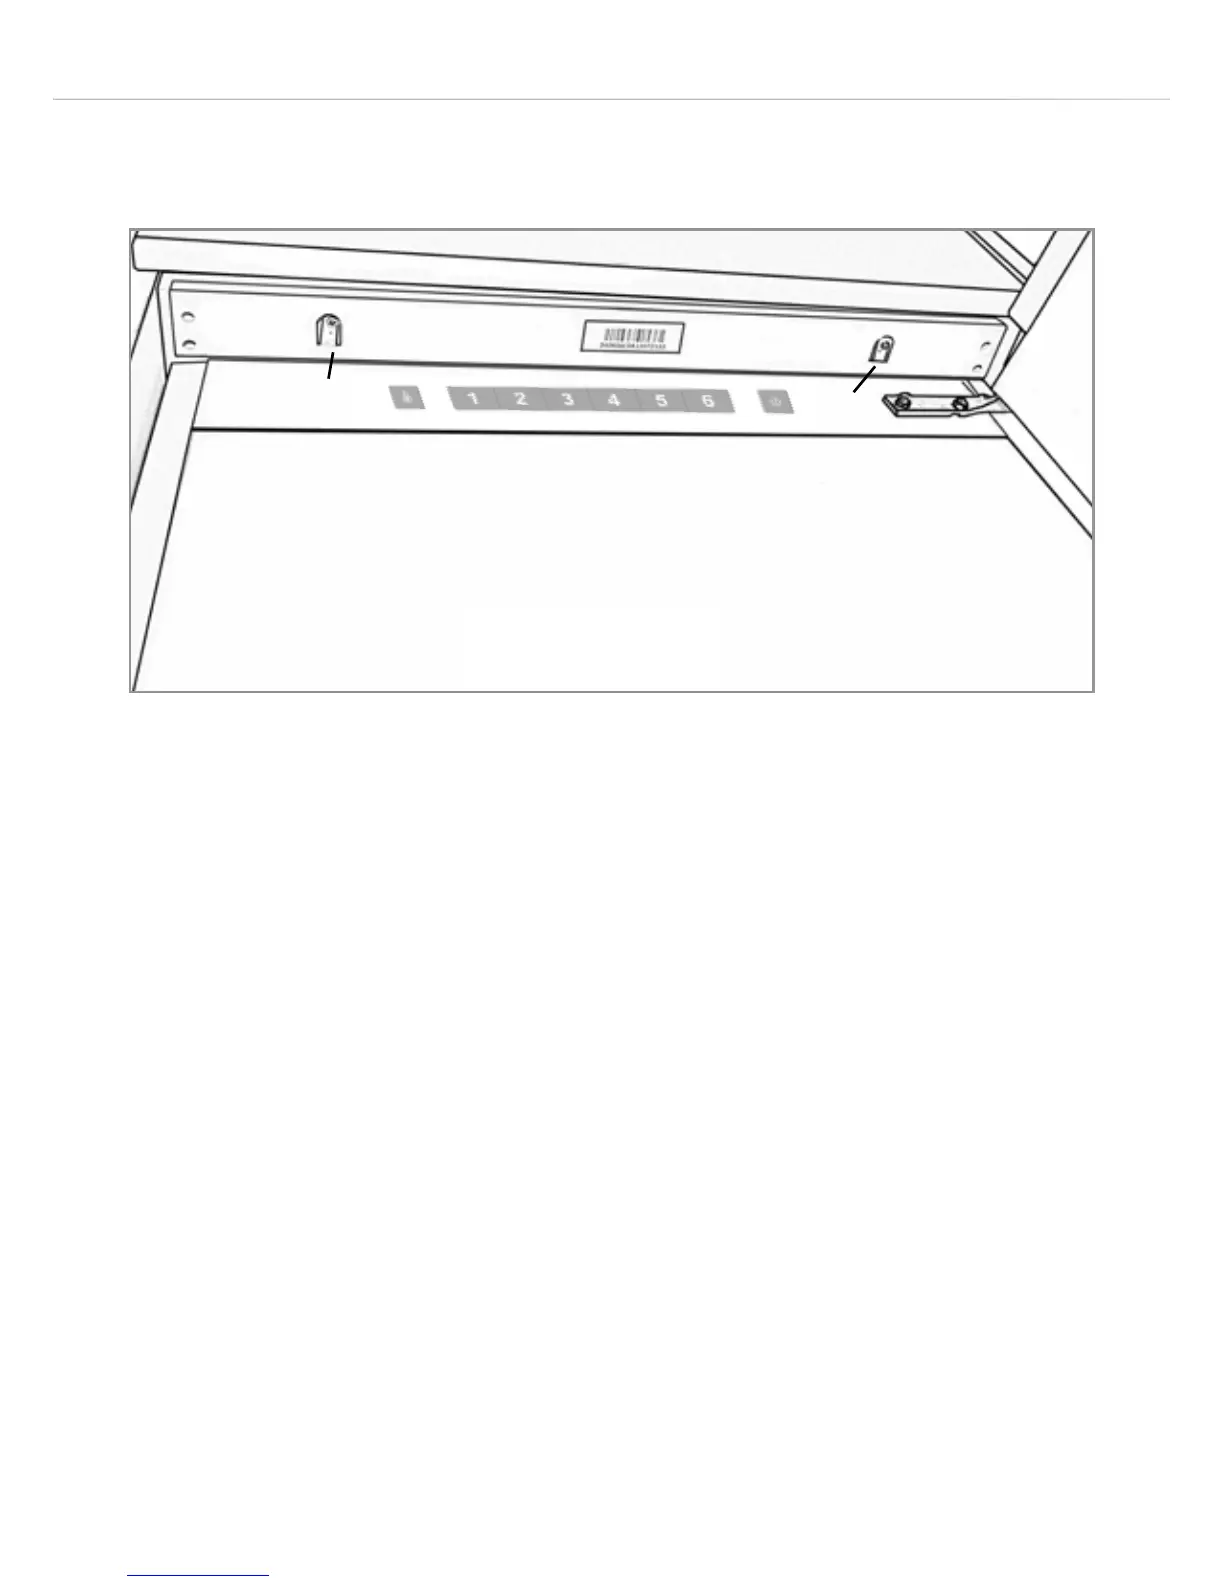
18
Secure the top of the appliance to the top of the cabinet through the
metal trim screw holes marked ‘T’ in fig 10.
Remove the white spacers from the base plates and secure the plates
to the cabinet base using four of the supplied screws. Replace the
spacers.
Mounting the fascia doors
• Ensure that there is a gap of 3 to 4mm between the non-hinged
side and the cabinet wall.
• Locate the slider in the bracket and fix the slider to the fascia
door 20 to 22mm from the edge of the fascia as shown in figure
11, ensuring that the slider is positioned centrally and horizontally
within the bracket. Tighten securely by hand.
• Fill the gap on the non-hinged side with the gasket/seal strip
provided, as shown in Fig. 12.
• The finished look for the door sliders should be similar to those
shown in Fig. 14, which shows 2 sliders in place.
• Ensure the appliance doors open, close and seal properly.
T
T
Fig. 10
Trim