fig. 13
fig. 12
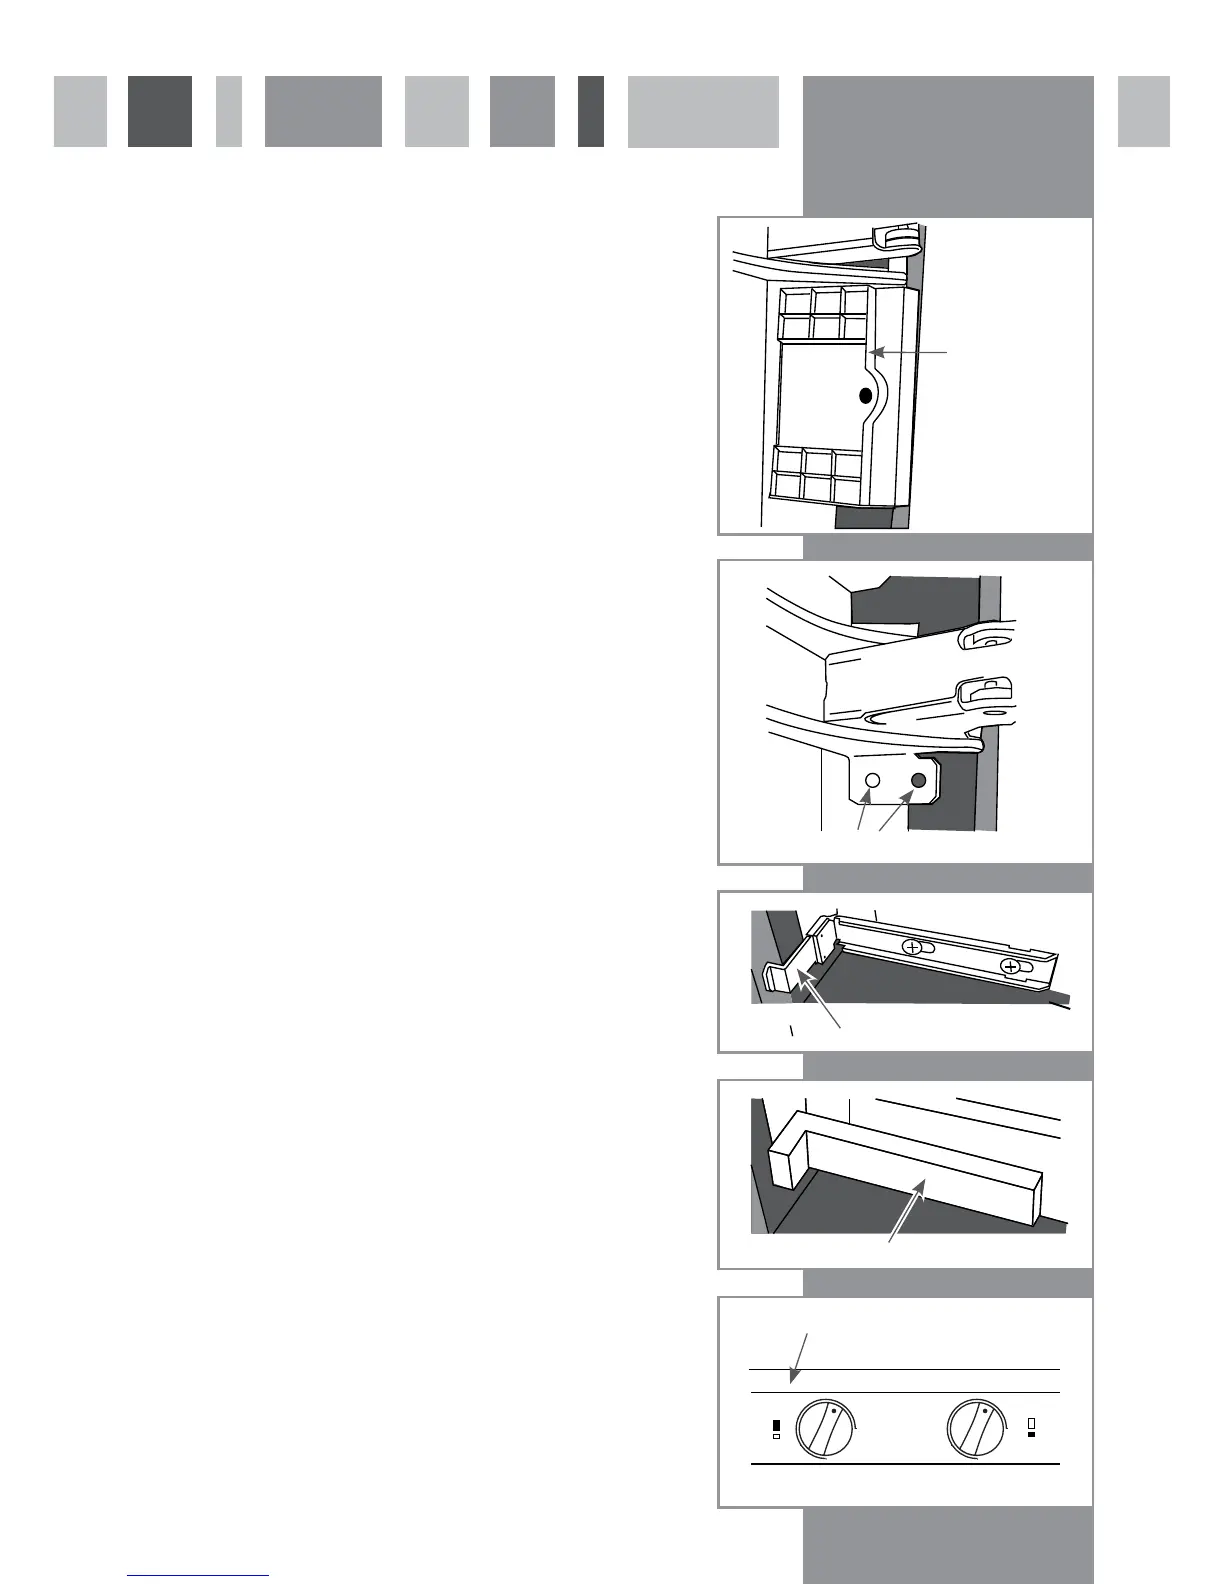
fig. 11
10
8. Fitting the bottom cabinet fixing bracket:
A sliding bracket is provided to secure the non-hinge side of the product
to the cabinet. This is fitted to the bottom of the product using two
machine screws, as shown below. A guide piece is also provided to ensure
the unit is aligned when installed. Fit the bracket and guide, as shown but
do not tighten the securing screws to allow the bracket to slide left
and right.
9. Positioning the product in the housing:
At this stage the product can be pushed into the housing unit, ensuring
that the two guide pieces are fitted in the hinges and the guide is fitted to
the lower fixing bracket. When the guides are flush against the front face
of the cabinet sides the product is at the correct depth in the unit.
At this stage ensure that the product is centrally aligned within the
housing and then remove the guide pieces from the hinges.
10. Securing the product to the housing:
Secure the product to the housing at the hinge side by using two screws
in each hinge. The fixing holes in each hinge as shown in figure 10.
11. Securing the bottom fixing bracket:
With the lower guide piece in place slide the lower bracket against the
housing unit and tighten the two screws to lock the bracket in position
(use a good quality screwdriver of the correct size for this). When done,
secure the bracket to the cabinet side wall with a single screw, then snap
off the guide piece and fit the bracket cover trim.
12. Securing the product to the top shelf:
Finally, secure the product to the top support shelf using the fixing
brackets fitted in step 2. When done, push the front shelf trim into
position to cover the fixing brackets and any gaps.
fig. 9
fig. 10
Mid
High
S.Cool
Low
REF
.
FRZ.
Mid
High
Low
S.Frz
Guide piece simply
slotted in to the
fixing bracket
The fixing holes
Pull towards the fridge to
break off the guide
Decorative bracket trim fitted in place
Slide the top cover into place so that
it is flush against the top shelf

 Loading...