Do you have a question about the CDA fw872 and is the answer not in the manual?
Details on the appliance rating plate for reference and guarantee purposes.
Compliance with EEC Directive 2006/95/EEC and EMC Directive 2004/108/EEC.
End-of-life product must not be disposed of as urban waste; requires specialised disposal.
Remove door seals, latch or bolt lock before disposing of an old appliance.
Do not store flammables, corrosives. Keep away from petrol. Avoid microwaves on top.
Do not allow children to play near appliance. Designed for 10-32°C ambient temperatures.
Allow 24 hours settling time. Clean interior with bicarbonate of soda and warm water.
Default settings 5°C fridge, -18°C freezer. Initial odour will disappear as appliance cools.
Appliance runs continuously. Wait 5 mins before restarting. Frost on back wall is normal.
Do not store uncovered liquids or hot foods. Ensure food is clean and dry. Wrap food to retain moisture.
Avoid rear wall contact. Sort food by use-by date. Do not overfill. Thaw frozen foods in fridge.
Store only frozen food. Cool hot foods before freezing. Follow food packaging instructions.
Store in small packages. Wrap dry. Label food. Do not refreeze thawed food unless cooked.
No bottles/cans. Check max freezing capacity. Use Super Freeze for rapid freezing.
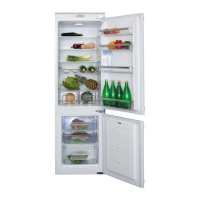
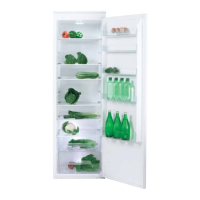
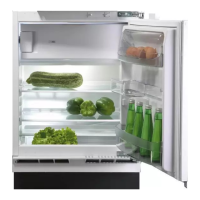
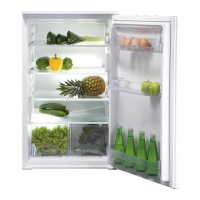
Short-term storage (0-10°C). Temperature varies between sections due to cold air circulation.
Specific zones for butter, jars, drinks, cooked food, dairy, meat, fish, and produce.
Shelves can be moved by lifting the front section and pulling outwards.
Adjusts fridge temperature (2-10°C) via button A. Display shows set and actual temperatures.
Display B shows the current actual temperature in the refrigerator compartment.
Display C shows freezer compartment temperature. Flashes if above 0°C.
Display D indicates Super Freeze activation for quick freezing. Button E controls freezer temperature and function.
Button E regulates freezer temp (-25°C to -15°C). Press/hold for 3s to activate/deactivate Super Freeze.
Disconnect power. Use bicarbonate of soda and lukewarm water. Avoid abrasive cleaners.
Wash shelves and balconies by hand with mild detergent. Do not place in dishwasher.
Periodically clean the water drain hole and evaporating tray to prevent blockages.
Unplug and clean if unused long-term. Leave doors ajar to prevent mildew and odors.
The fridge is self-defrosting. Ensure the rear channel is kept clear for water drainage.
Do not use heaters/sprays or sharp objects. Defrost when ice exceeds 5mm thickness.
Activate Super Freeze 24h prior. Wrap food, remove drawers, use warm water bowl to speed up.
Clean freezer with bicarbonate of soda/lukewarm water. Clean drawers separately by hand.
Check power, fuses, switch, and socket. Ensure appliance is not overloaded.
Verify thermostat setting, door closure, rear cooling system cleanliness, and ventilation.
Ensure level/stable unit. Check for obstructions. Note normal operational noises like bubbling.
Ensure the drain hole in the rear channel is clear of obstructions.
Some ice droplets are normal. Prevent items inside from touching the back wall.
Avoid heat sources, cookers, or damp locations for optimal performance and longevity.
Use adjustable feet for leveling. Ensure the cooling system at the rear does not touch the wall.
Maintain clearance above and behind the unit for proper air circulation, as shown in diagrams.
Dissipate heat effectively by providing air intake and outlet vents for natural air flow.
Follow specified vent opening sizes and rear space for condenser cooling, as illustrated.
Position appliance, ensure 3-4mm gap between side and cabinet wall.
Fix slider to fascia door 20-22mm from edge, centered and horizontal within bracket.
Fill the gap on the non-hinged side of the door with the provided seal strip.
Detailed instructions for swapping hinges, refitting doors, and adjusting sliders and covers.
Use a hair dryer (10cm distance) to expand compressed seals after door reversal for a proper fit.
Warning: This appliance must be properly earthed for electrical safety.
Follow steps to safely remove and replace the 13 Amp fuse in the mains plug.
Wire colours (Green/Yellow, Blue, Brown) must match terminal markings (E, N, L).
Consult a qualified electrician for connection doubts. Do not shorten the supply cable.
| Child lock | - |
|---|---|
| Door hinge | Right |
| Product color | White |
| Reversible doors | Yes |
| Shelves material | Glass |
| Custom panel-ready | No |
| Appliance placement | Built-in |
| Refrigerating medium | R600a |
| Refrigerating medium weight | 52 g |
| Noise level | 39 dB |
| Certification | WEEE |
| Climate class | SN-ST |
| Total net capacity | 242 L |
| Total gross capacity | 260 L |
| Lamp type | LED |
| Fridge net capacity | 182 L |
| Fridge gross capacity | 185 L |
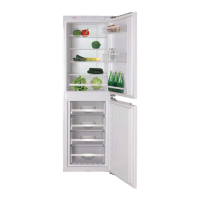
| Number of vegetable drawers | 2 |
| Fridge number of shelves/baskets | 4 |
| Star rating | 4* |
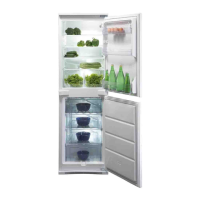
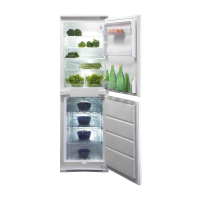
| Freezer position | Bottom-placed |
| Freezing capacity | 3.5 kg/24h |
| Freezer net capacity | 60 L |
| Freezer gross capacity | 75 L |
| Freezer number of shelves/baskets | 3 |
| Storage time during power failure | 11 h |
| Cord length | 1.8 m |
| Connected load | - W |
| Power plug type | Type G |
| AC input voltage | 220 - 240 V |
| AC input frequency | 50 Hz |
| Energy efficiency scale | A to F |
| Annual energy consumption | 256 kWh |
| Package width | 573 mm |
| Package height | 1840 mm |
| Width | 540 mm |
|---|---|
| Height | 1772 mm |
| Installation compartment depth | 550 mm |
| Installation compartment width | 560 mm |
| Installation compartment height | 1785 mm |