This document provides comprehensive instructions for the installation, use, and maintenance of the FWV451, FWV600, and FWV901 integrated wine coolers. These appliances are designed for the optimal storage and preservation of wine, offering features to maintain ideal conditions and ensure ease of use.
Function Description
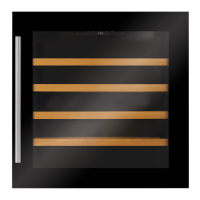
The FWV451, FWV600, and FWV901 are integrated wine coolers, meaning they are designed to be built into kitchen cabinetry, specifically tall larder-type cabinets. They are not suitable for installation below a worktop due to ventilation requirements. The primary function of these appliances is to store wine at precise temperatures and humidity levels, ensuring its quality and readiness for consumption.
The FWV451 and FWV600 models feature a single temperature zone, while the FWV901 model offers two independent temperature zones, allowing for the storage of different types of wine (e.g., red and white) at their respective optimal temperatures simultaneously. All models are equipped with a humidity system to maintain optimal internal humidity, which is crucial for cork preservation.
The cooling process is managed by a compressor, and the appliances are self-defrosting, simplifying maintenance. An internal light allows for easy viewing of the contents. The control panel, located on the front of the appliance, provides intuitive access to power, temperature settings, and lighting controls.
Usage Features
Initial Setup:
Before first use, it is crucial to allow the appliance to settle for at least twenty-four hours after installation before switching on the power. This allows the refrigerant to stabilize. It is also recommended to remove all internal and external packaging and clean the interior with a solution of bicarbonate of soda and warm water, then thoroughly dry it. A slight odor may be present initially, which will dissipate as the appliance cools.
Power On/Off:
To switch the wine cooler on, press and hold the power button for one second. To switch it off, press and hold the power button for five seconds. If the appliance is switched off, a five-minute delay is recommended before switching it on again to prevent damage to the compressor.
Temperature Control:
For single-zone models (FWV451 & FWV600), the temperature can be adjusted using the up and down buttons on the control panel. The preset temperature is 12°C / 54°F. The display shows the current internal temperature. To view the set temperature, touch the up or down button, and it will flash for five seconds.
For dual-zone models (FWV901), separate up and down buttons are provided for the upper and lower zones. The preset temperature is 10°C / 50°F for the upper zone and 16°C / 60°F for the lower zone. It is important to note that the temperature in the lower zone must be set either the same as or higher than the temperature in the upper zone. For optimal performance, the temperatures in the two zones should differ by at least 4°C.
The temperature display can be switched between Fahrenheit and Celsius by pressing and holding the light button for five seconds.
Optimal Temperature Selection:
While wine is generally best stored between 13°C and 15°C, these coolers allow for storage at drinking temperatures as well. For red wine, an ideal drinking temperature is between 15°C and 17°C, and for white wine, between 12°C and 13°C.
Internal Light:
The internal light can be switched on or off by pressing the light button. The wine cooler offers two options for the interior lights:
- Display mode: The interior lights remain on constantly, allowing for continuous visibility of the contents.
- Energy saving mode: The interior light only switches on when the door is opened.
Humidity System:
The wine coolers are equipped with a humidity system to maintain optimal humidity. Users should fill the humidity reservoir approximately 3/4 full with water and place it on the runners of the top shelf, ensuring it is correctly located to prevent spillage. The water level should be checked regularly and refilled as needed.
Dynamic Cooling and Silent Modes:
The appliance has two running modes:
- Silent mode: Once the required temperature is reached, the appliance operates without the fan. This is the factory default setting. To switch to silent mode from dynamic cooling, touch and hold the up key for approximately five seconds until the wine cooler beeps three times.
- Dynamic cooling mode: The fan cycles on and off to circulate air, ensuring consistent humidity and temperature distribution throughout the wine cooler. This mode is ideal for long-term storage but increases operational noise. To switch to dynamic cooling mode, touch and hold the down key for approximately five seconds until the wine cooler beeps five times.
Sabbath Mode:
Sabbath mode is available for religious observances. When activated, it switches off the displays, interior light, and audible alarms, while the cooling process continues. To activate Sabbath mode, touch and hold the power and light keys simultaneously for five seconds. The indicator light will flash four times to confirm activation. Sabbath mode automatically deactivates after 96 hours, but it can be manually switched off at any time by touching and holding the power and light keys simultaneously for five seconds.
Door Alarm:
An alarm will sound if the door is left open for more than 60 seconds. Pressing the power button will switch off the alarm. If the internal temperature rises beyond the set temperature, the display will flash until the temperature returns to the required level.
General Usage Guidelines:
- Only store wine in sealed containers.
- Do not overload the cabinet.
- Open the door only when necessary to maintain internal temperature.
- Do not cover shelves with aluminum foil or any material that obstructs air circulation.
- Ensure the door is fully open before removing shelves to prevent damage to the door seal.
- Do not pull shelves beyond the anti-stop position (approximately one-third out) when fully loaded.
- This appliance is exclusively for wine storage.
- In case of power failure, keep the door closed as much as possible. The wine cooler will remember temperature settings once power is restored.
- The appliance is designed for ambient temperatures between 16-32°C. Operation below 10°C may cause performance issues.
Maintenance Features
Cleaning:
Always disconnect the appliance from the mains electrical supply before any cleaning or maintenance.
- Do not use abrasive products or detergents. Rinse and dry thoroughly after washing.
- The exterior and door seal should be cleaned with mild soapy water and dried thoroughly.
- The interior cabinet should be cleaned with a solution of bicarbonate of soda and lukewarm water.
- Shelves should be cleaned separately by hand with soap and water; they are not dishwasher safe.
- When cleaning the control panel and electrical parts, use only a moist cloth and ensure all water is thoroughly dried off before reconnecting power.
- If the appliance will not be used for prolonged periods, unplug it, clean it thoroughly, and leave the door slightly ajar to prevent odors or condensation.
Removing and Replacing Shelves:
To remove a shelf, first remove all bottles. Pull the shelf forward until the groove on either side is level with the plastic peg on the cabinet. Then, lift the shelf up and pull it forward. To replace shelves, reverse these steps.
Troubleshooting:
The manual provides a troubleshooting guide to address common issues before contacting customer care.
- Appliance not working: Check power supply, fuses, circuit breakers, plug socket functionality, and ambient temperature (16-32°C).
- Appliance working but not well: Check for overloading, thermostat settings, proper door closure, clean door gasket, and adequate ventilation.
- Appliance noisy: Ensure the appliance is level and stable. Note that cooling gas will make some noise even when the compressor is not running.
- Light not working: Check power, fuses, and ensure the light button is not set to off. Note that LED lighting requires a service call for replacement.
- Door not closing properly: Check if the appliance is level, if the door was correctly refitted after removal, if the door seal is dirty, or if shelves are positioned correctly.
- Display shows “E1” or “E2”: This indicates a failed temperature sensor.
Door Reversal:
The door can be reversed if needed. This involves removing the glass door by unscrewing eight screws, gently placing it on a padded surface, unscrewing and relocating the roller to the opposite side, rotating the door 180°, and then refitting the screws, ensuring the door is level.
Handle Installation:
Carefully locate the handle over the fixing pins. Use the supplied allen key to tighten the securing grub screw. It is important not to overtighten screws or use power tools to avoid damaging the door, as such damage may not be covered by warranty.
Electrical Information:
The appliance must be earthed. It is fitted with a BS 1363A 13 amp fused plug. Instructions are provided for changing the fuse and connecting an alternative plug, emphasizing the correct wiring of green/yellow (Earth), blue (Neutral), and brown (Live) wires. The plug socket should be easily accessible.
Important Notes:
- The CDA Group Ltd is not responsible for injuries or losses due to incorrect use or installation.
- Incorrect installation, misuse, or commercial use may invalidate the guarantee.
- Servicing or maintenance requiring external cover removal should only be performed by qualified personnel.
- Do not use the appliance if the plug, mains cord, or appliance itself is damaged. Damaged mains cords must be replaced by the manufacturer or authorized service center.
- Children should be supervised to prevent them from playing with the appliance and to keep the mains cord out of reach.
- Failure to follow installation and ventilation instructions may invalidate the warranty. Air vents must never be blocked.
- For FWV600 models installed next to an oven or compact appliance, both must have individual and independent ventilation systems.
This comprehensive guide ensures users can effectively install, operate, and maintain their CDA integrated wine coolers for optimal performance and longevity.