10
Installing the Wine Cooler
This appliance is intended to be built in to a kitchen cabinet.
This appliance should be installed in a well ventilated, dry room.
This appliance must not be installed:
1. In direct sunlight
2. Adjacent to a heat source (oven or radiator)
3. Below a hob unit
Place your wine cooler in a location which is strong enough to
support its weight when fully loaded. To level the wine cooler,
adjust the front levelling legs at the bottom of the wine cooler.
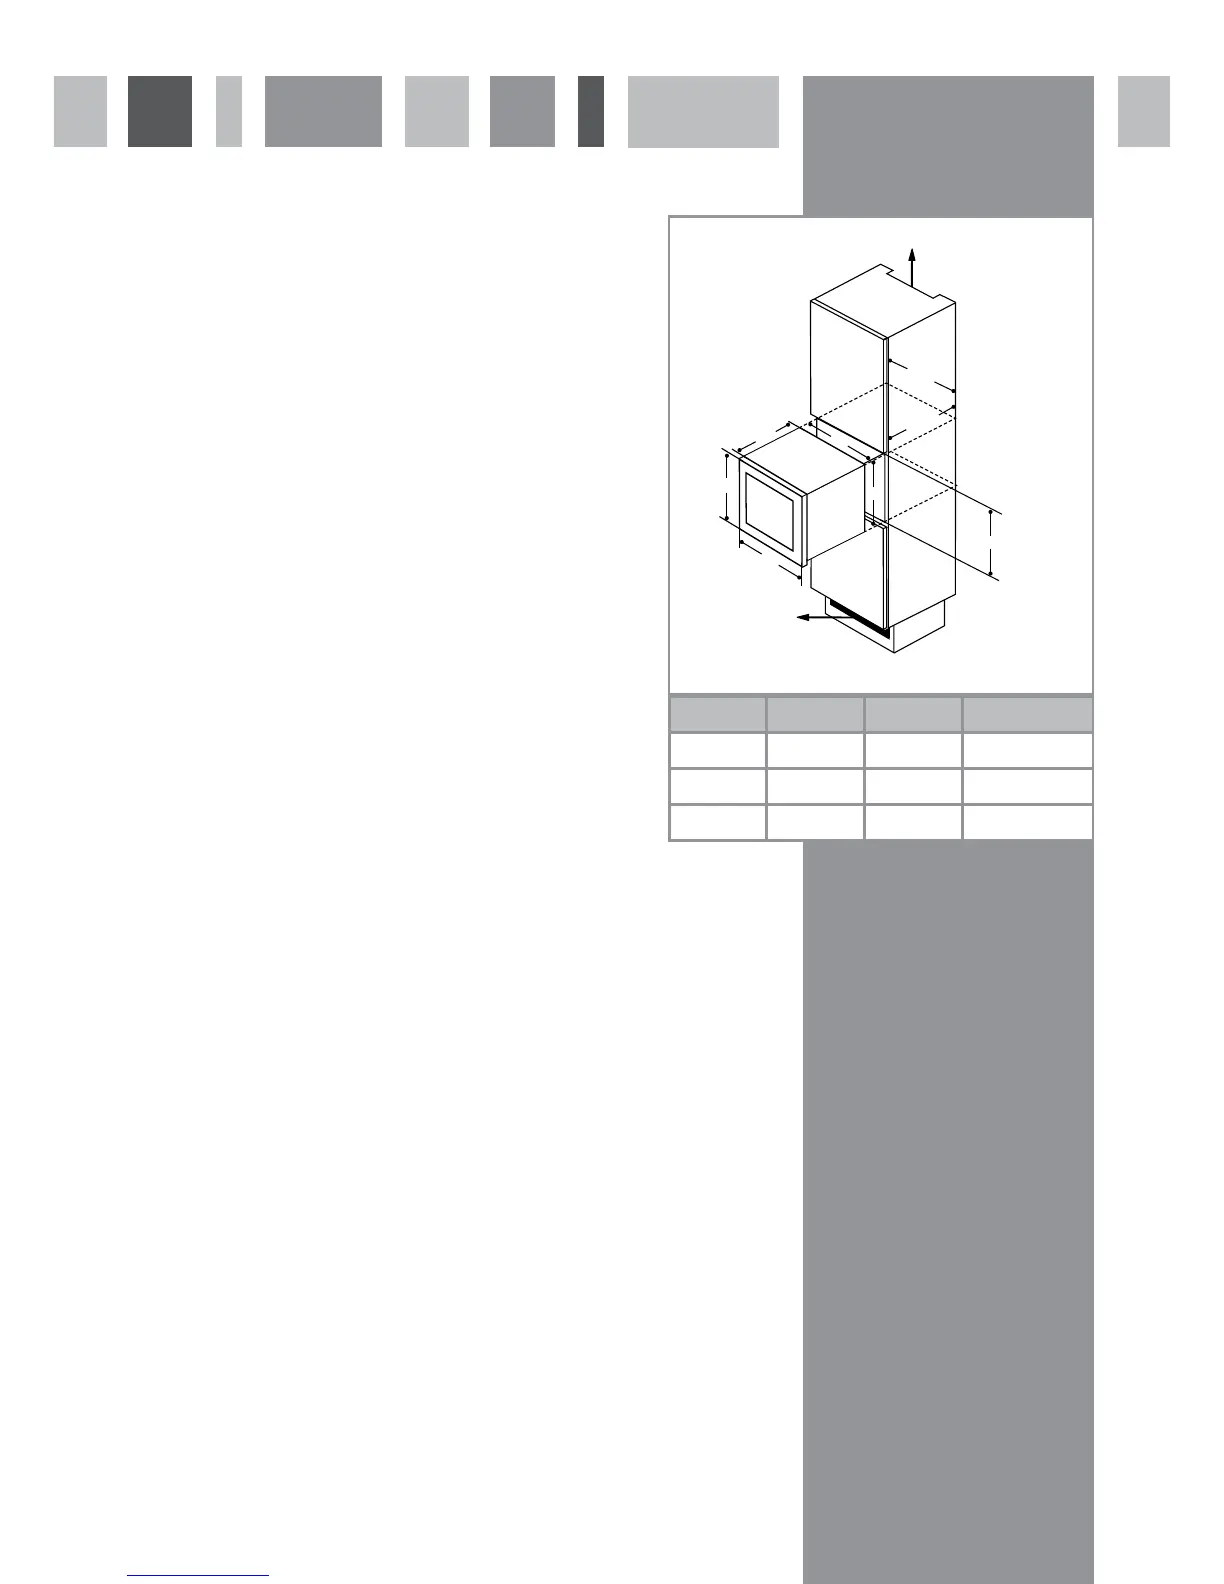
Ensure that there is an adequate flow of air at the rear of the
cabinet, as shown in the diagram.
Please note that a plinth vent of at least 200 cm² is
recommended to allow for sucient ventilation. If a ventilation
intake is provided elsewhere, the plinth vent may not be
necessary.
Fitting advice
- Ensure the unit is located centrally in the aperture.
- Secure the wine cooler in position using two screws to fix the
product to the underside of the top shelf.
IMPORTANT: Failure to follow the instructions regarding
installation and ventilation may invalidate the warranty
supplied with your appliance.
To ensure the proper functioning of the appliance, air vents
should never be blocked or covered.
To install the handle
IMPORTANT: Do not overtighten the screws, and do not use
power tools to install the handle.
1. Carefully locate the handle over the fixing pins.
2. Using the supplied allen key, tighten the securing grub screw
to fix the handle.
IMPORTANT: Take care when installing the handle not to
damage the door. Any damage caused may not be covered
by the warranty supplied with your appliance.
fig. 5
545
545
B
A
592
18
C
550 - 560
560 - 568
min. 200cm
2
min. 200cm²
A B C
45cm H 44.1 45.5 45
88cm H 87.1 88.5 87.3-87.8
122cm H 122.0 123.4 122.2-122.7
 Loading...