3cdvigroup.com
3
1
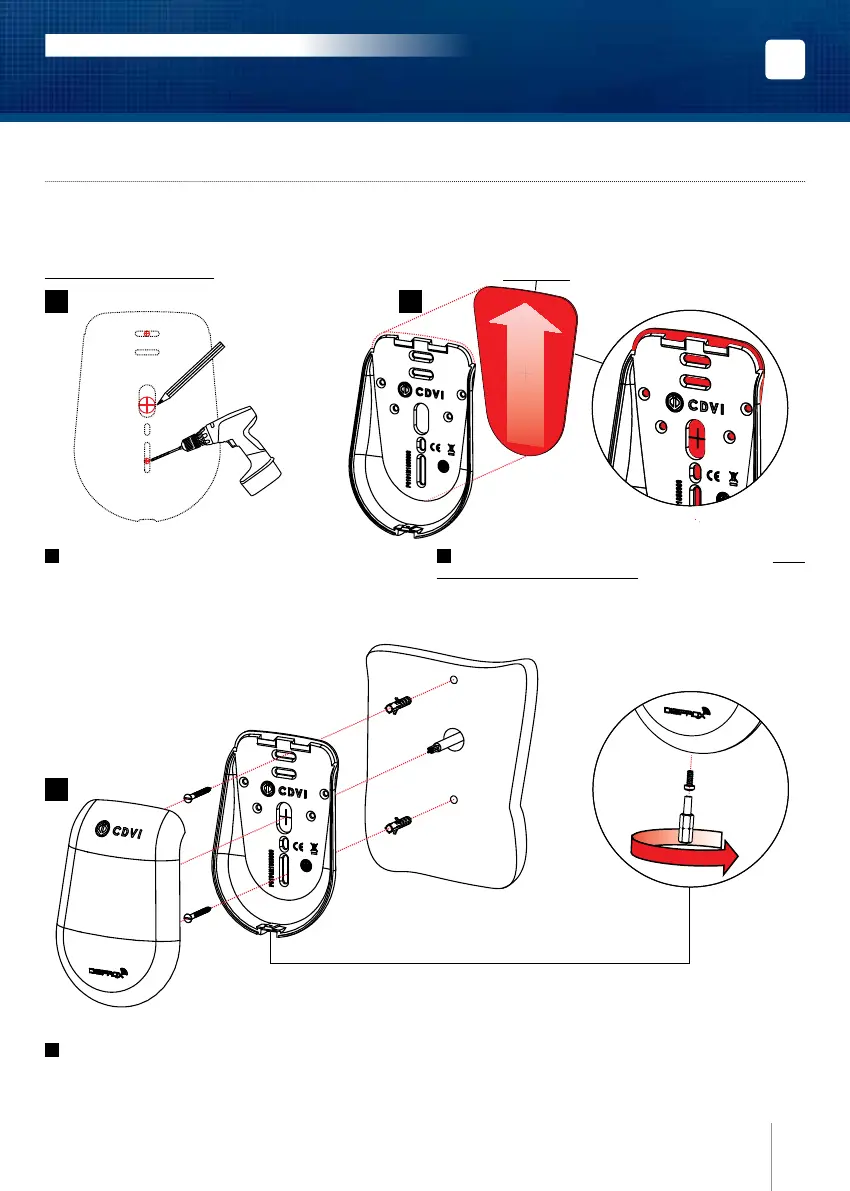
Measure and mark the center lines to determine the
reader position. Drill the xing screw holes (Diameter:
5mm). Drill the wiring access area (Diameter: 15mm).
2
Place the foam seal at the back of the reader. Take
care to begin from the bottom. (Sch. a). The foam seal
must be visible (about 2mm) on the top-back of the rea-
der (Sch. b).
4] MOUNTING
Ref: SOLARPW-SOLARPB
Make sure that there are no pieces missing from the mounting kit. Use the correct tools according to the installa-
tion (drill, screwdrivers, tape measure,...) and follow the mounting instructions of the reader.
1 2
Sch. a
Sch. b
g. c
Sch. c
Foam seal
3
Insert the plastic plugs in the mounting holes, connect the cable (refer to wiring diagram on page 11), then fasten
the reader with the TORX
®
screw using the TORX
®
bit (Sch. c). Make sure that the varistor is connected across the
lock (refer to page 8 “Reminders and recommendations”).
EN
SOLARPW-SOLARPB-STARPW-STARPB
Wiegand 125KHz Proximity Readers
INSTALLATION MANUAL