4 x #6 x 1” Wood Screw
1 x 3/8 x 4” Hex Bolt
(3/8” at washer x 2 & 3/8” lock nut)
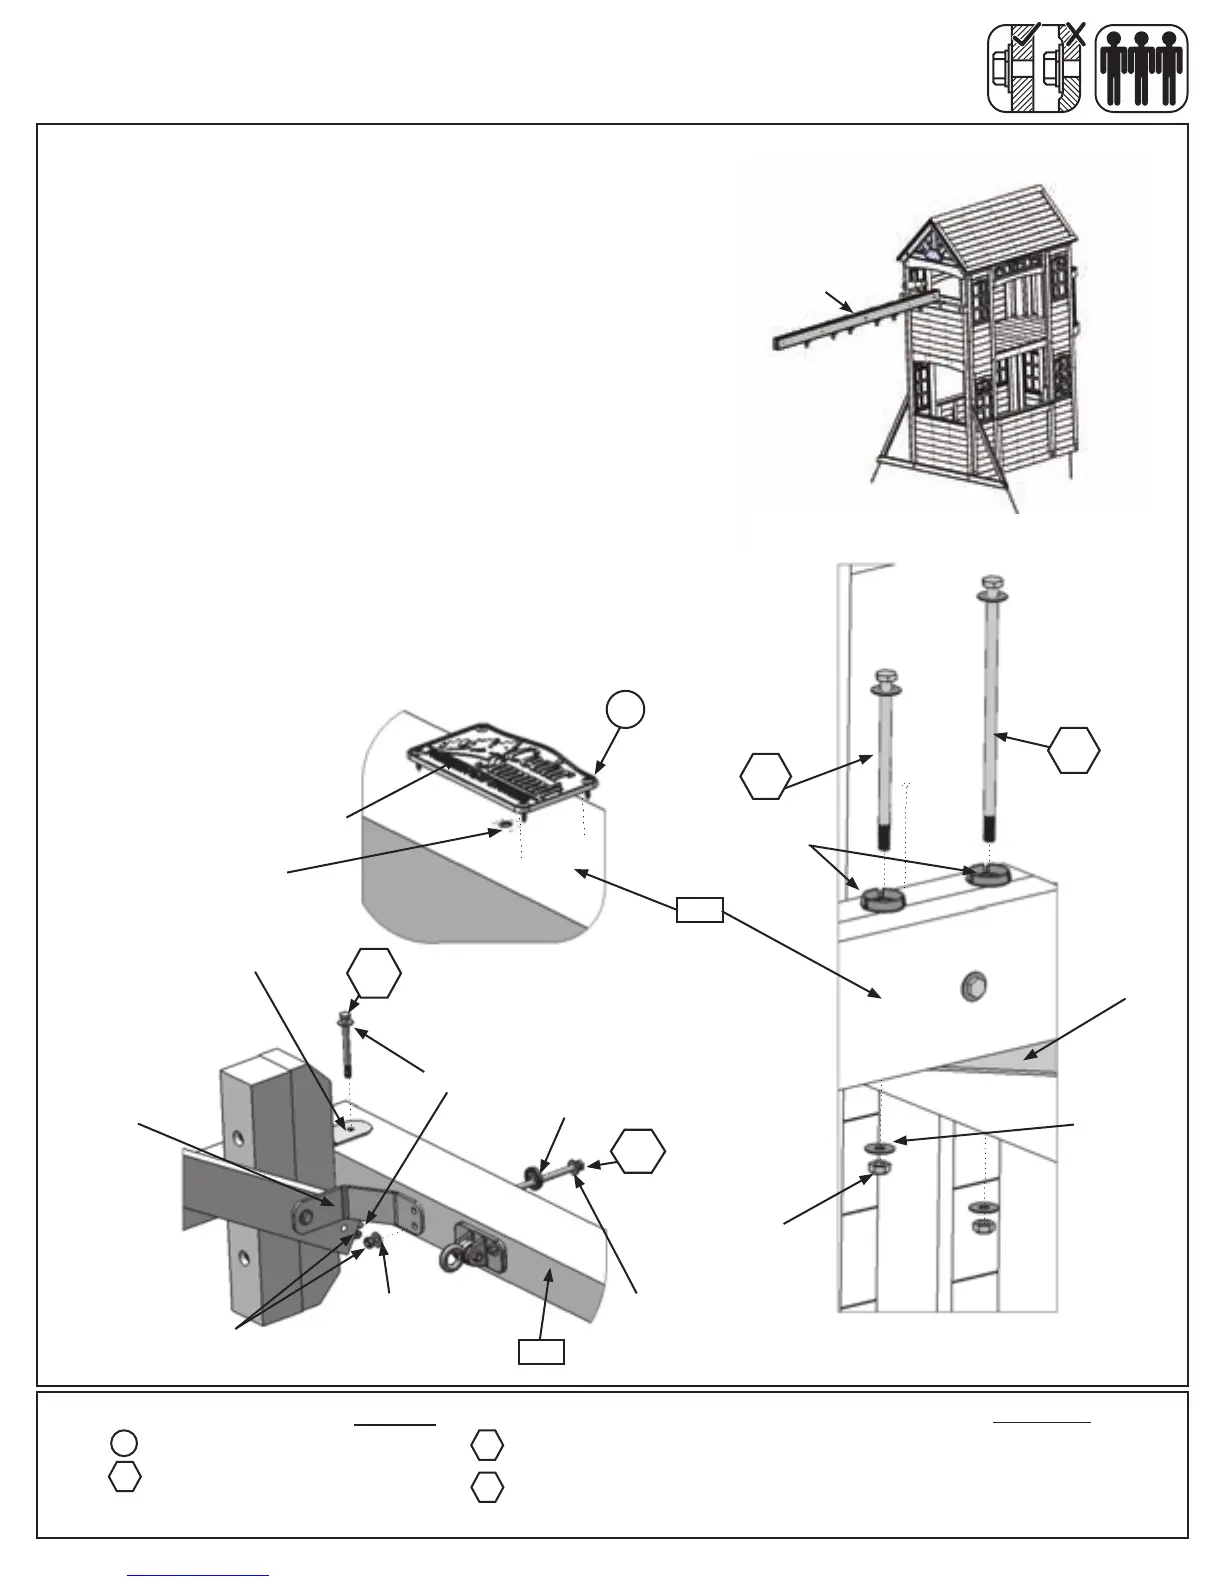
Step 28: Swing Post Assembly
Part 2
D: AttachCedarSummitplaquetocentreof(270)EngineeredSW
Beam(overtopoft-nut)using4(S18)#6x1”WoodScrews.(g.
28.6)
E:Place(270)EngineeredSWBeamonHeavyT-Bracketand
attachtofortwith1(G17)3/8x6”HexBolt(with2atwashers,
plasticformedwasherandlocknut)and1(G18)3/8x9”HexBolt
(with2atwashers,plasticformedwasherandlocknut)asshown
ing.28.7and28.8.
F:Place(270)EngineeredSWBeam(endwithoutWaferBoltfrom
Step27)inbetweenHeavyL-BracketsassembledinStepAmaking
sureholesarelinedupthenattachSwingPostAssemblytoSwing
BeamAssemblyusing1(G20)3/8x4”HexBolt(with2atwashers
andlocknut)throughHeavyL-Bracket.(g.28.9)
G: Attach(270)EngineeredSWBeamtoHeavyG-Bracketwith1
(G17)3/8x6”HexBolt(with2atwashers,plasticformedwasher
andlocknut).(g.28.9)
2 x 3/8 x 6” Hex Bolt
(3/8” at washer x 2, plastic formed washer & 3/8” lock nut)
1 x 3/8 x 9” Hex Bolt
(3/8” at washer x 2, plastic formed washer & 3/8” lock nut)
G17
Hardware
G18
Other Parts
1 x Cedar Summit plaque
G20
S18
Fig. 28.6
3/8”Flat
Washer
3/8”LockNut
Plastic
Formed
Washer
270
HeavyL-Bracket
Fig. 28.7
Fig. 28.8
Fig. 28.9
3/8”Flat
Washer
3/8”Flat
Washer
CedarSummitPlaque
x4
G18
G17
G20
Plastic
Formed
Washer
3/8”LockNut
3/8”Flat
Washer
T-Nut
270
G17
HeavyG-Bracket
S18
Heavy
T-Bracket
Front View
CedarSummit
Plaqueinfront
ofbeam
103 support@cedarsummitplay.com
 Loading...