4 x 5/16 x 2-3/8” Wafer Bolt
(5/16” at washer)
8 x 5/16 x 2-1/8” Wafer Bolt
(5/16” at washer)
Hardware
WB9
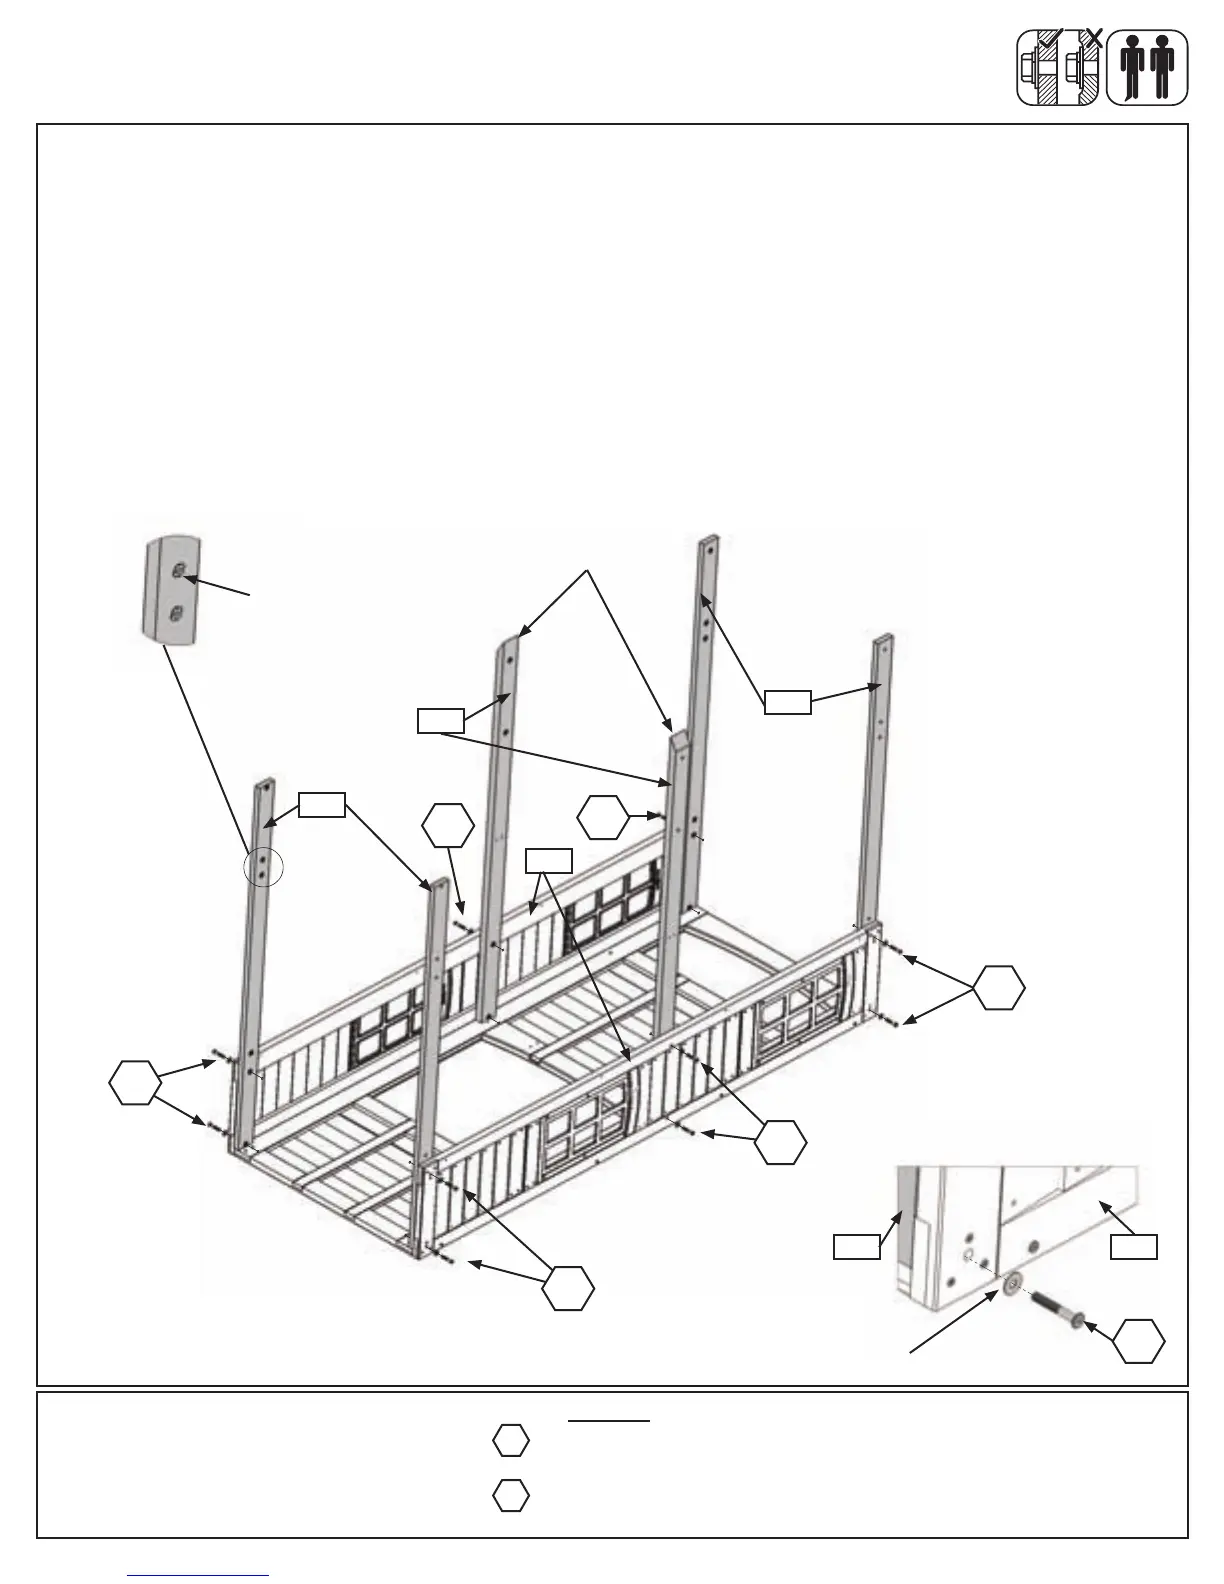
J:StartingatthebottomoftheSwingSideWallPanelAssembly,looselyattachboth(041)WallTiesto(030)
NarrowWindowPanels,makingsurethet-nutsarefacinginward(g.4.12),with2(WB9)5/16x2-1/8”Wafer
Bolts(withatwasher)perboard,asshowning.4.11and4.13.
K:Noticingtheanglededgesof(043)JoistSidesfacetowards(030)NarrowWindowPanelsandthet-nutsare
facinginwards,looselyattachboth(043)JoistSidestothe(030)NarrowWindowPanelswith2(WB8)5/16x
2-3/8”WaferBolts(withatwasher)perboard,asshowning.4.11.
L:Looselyattachboth(042)LongWallTiestothetopsof(030)NarrowWindowPanels,witht-nutsfacing
inwards,using2(WB9)5/16x2-1/8”WaferBolts(withatwasher)perboard,asshowning.4.11.
Step 4: Swing Side Wall Panel Assembly
Part 5
Fig. 4.12
Fig. 4.11
Fig. 4.13
041
NoticeT-Nutsare
facinginward
043
042
Top
Bottom
WB8
WB9
WB9
030
WB9
WB9
WB8
WB9
030040
5/16”Flat
Washer
Noticeangles
convergeatcentre
with5/16”
FlatWashers
WB8
39 support@cedarsummitplay.com
 Loading...