Fig. 6.4
061
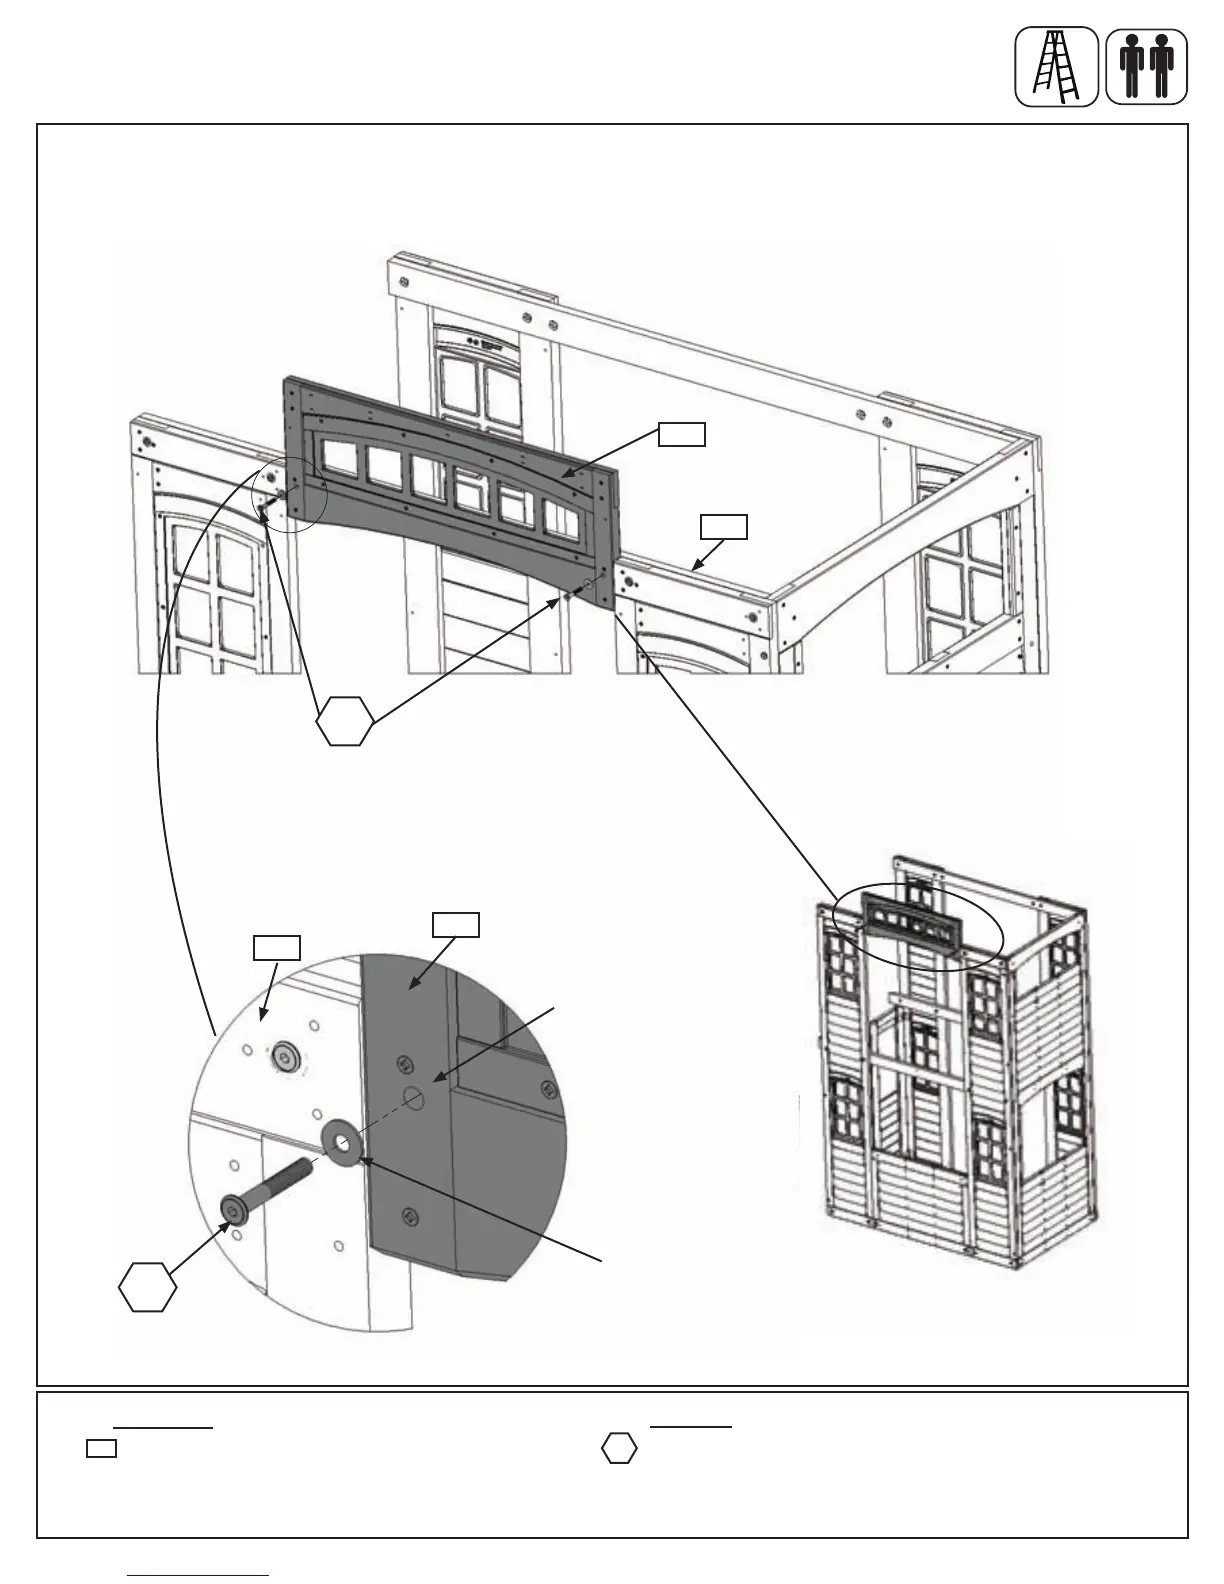
Step 6: Front Wall Assembly
Part 2
B:Atthetopoftheassembly,abovethe(060)HalfPanel,place(061)TransomPanelFrontbetweenSwingand
DoorWallAssembliessotheboltholesareatthebottomofthepanel.Looselyattachto(042)LongWallTiewith
2(WB9)5/16x2-1/8”WaferBolts(with5/16”atwasher-t-nutspreviouslyinstalled).(g.6.4and6.5).
061
5/16”Flat
Washer
Front
042
030
Fig. 6.5
Fig. 6.1
Noticeholeisatbottomof
theTransomPanelFront.
2 x 5/16 x 2-1/8” Wafer Bolt
(5/16” at washer)
Hardware
1 x Transom Panel Front FSC 1-1/4 x 13-1/2 x 35-7/8”
061
Wood Parts
WB9
WB9
WB9
43 support@cedarsummitplay.com
 Loading...