Step 11: Swing Wall Assembly
Part 3
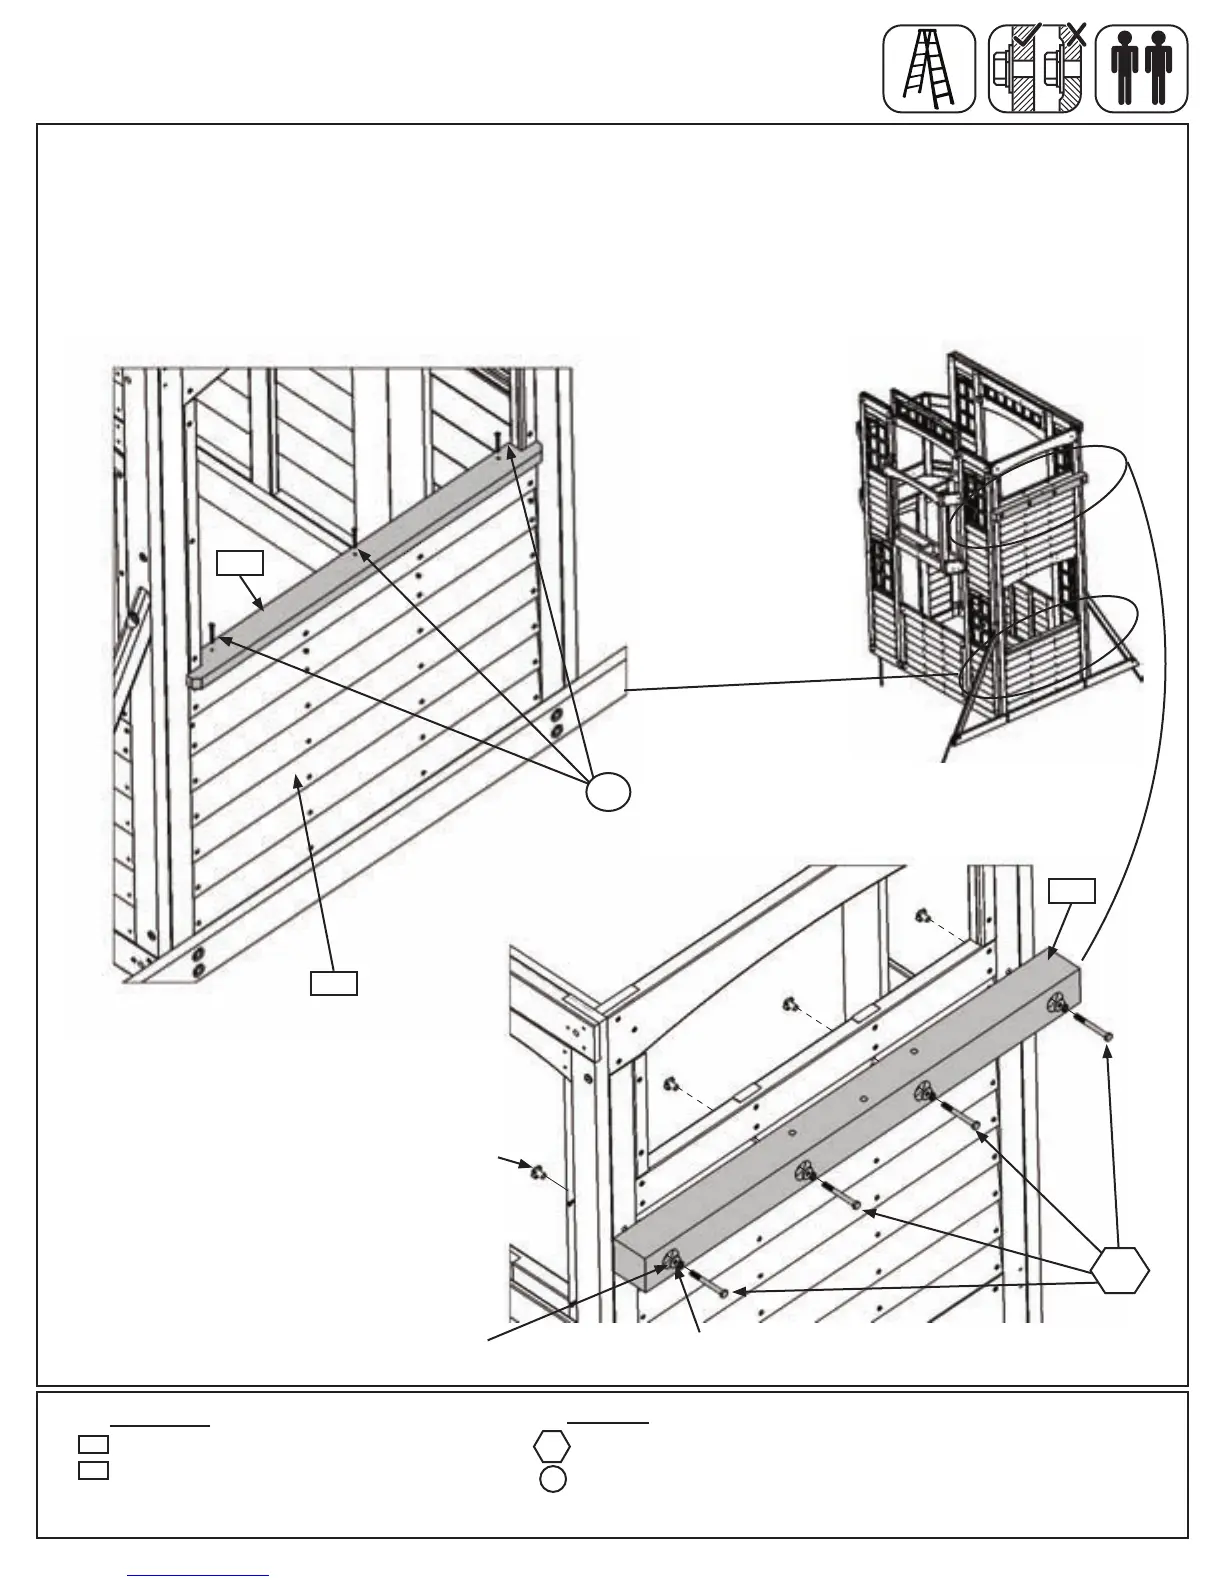
E:Intheopeningof(040)SWSidePanelattach(112)SWTableTop,tighttothecornerofthepanels,with3
(S15)#8x1-3/4”WoodScrewsasshowning.11.5and11.6.
F:Attach(113)SWWallto(040)SWSidePanelinthelocationshowning.11.5,usingtheboltholesasa
guide,with4(G21)5/16x3-3/4”HexBolts(withlockwasher,atwasherandt-nut).Makesureboltsaretight.
(g.11.7)
Wood Parts
Hardware
Fig. 11.6
112
1 x SW Table Top FSC 5/4 x 3 x 34-1/4”
1 x SW Wall FSC 4 x 4 x 41”
112
4 x 5/16 x 3-3/4” Hex Bolt (5/16” lock washer, 5/16” at washer, 5/16” t-nut)
3 x #8 x 1-3/4” Wood Screw
G21
5/16”Flat
Washer
5/16”Lock
Washer
5/16”T-nut
Fig. 11.7
Fig. 11.5
G21
113
113
S15
S15
040
65 support@cedarsummitplay.com
 Loading...