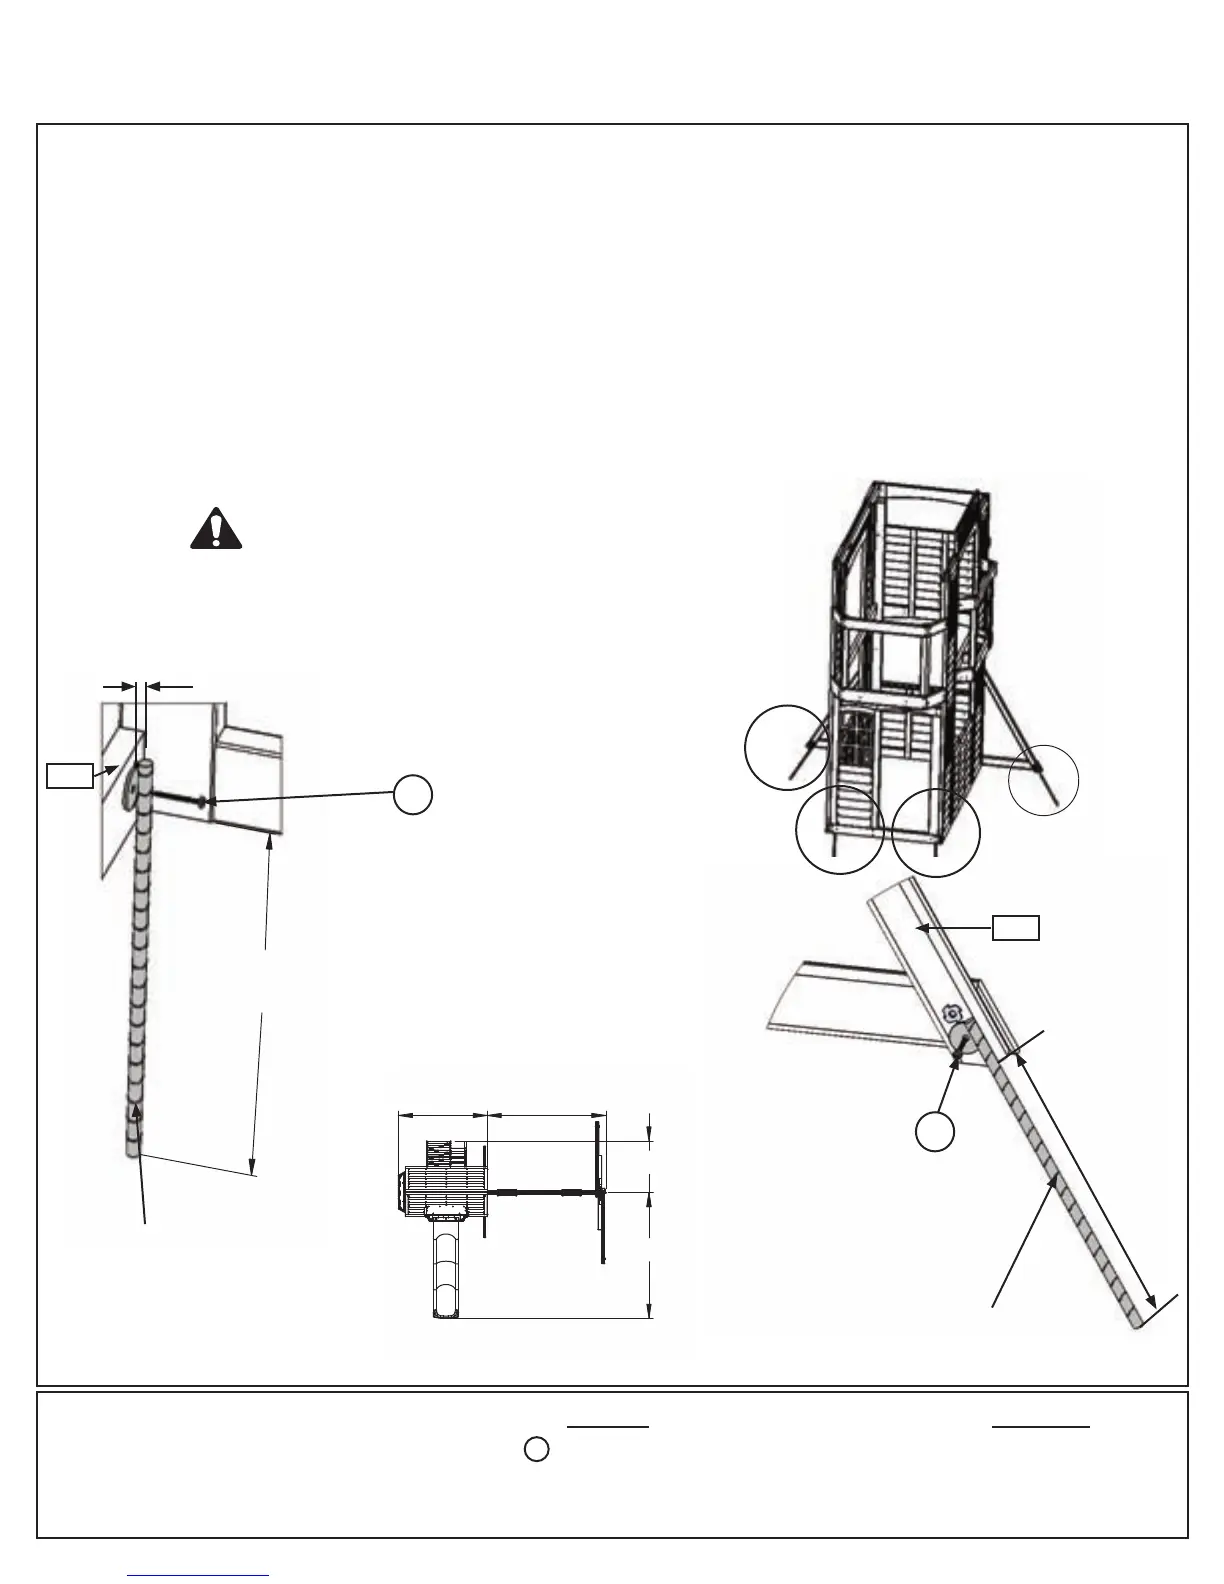
Warning! To prevent tipping and avoid potential
injury, stakes must be driven 13” into ground.
Digging or driving stakes can be dangerous if you
do not check rst for under-ground wiring, cables
or gas lines.
A:Inthe4placesshowning.12.1drivetheRebarGroundStakes13”intothegroundagainst(041)WallTies
and(111)Diagonal.Becarefulnottohitthewasherwhilehammeringstakesintothegroundasthiscouldcause
thewashertobreakoff.
B:Attachgroundstakesto(041)WallTiesand(111)Diagonalsusing1(S7)#12x2”PanScrewpergroundstake
asshowning.12.2and12.3.
C:Afterdrivingstakesintotheground,checkforsharpedgescausedbytheimpactofthehammer.Smoothany
sharpedgesfromimpactareaandtouchupwithoutdoorpaint.
Step 12: Install Fort Ground Stakes
MOVE FORT TO FINAL LOCATION PRIOR TO STAKING
FINAL LOCATION MUST BE LEVEL GROUND
Hardware
4 x #12 x 2” Pan Screw
S7
4 x Rebar Ground Stake
Other Parts
Fig. 12.2
13"
In Ground
81
115
109
47
13"
In Ground
81
115
109
47
13"
In Ground
81
115
109
47
Fig. 12.1
Fig. 12.3
SEEFRONTCOVERFORSAFETYCLEARANCE
13”
InGround
RebarGroundStake
1”fromcornerto
groundstake
Door Wall Side
S7
S7
111
041
RebarGroundStake
66 support@cedarsummitplay.com
 Loading...