1 x Chalk Table Top FSC 5/4 x 5 x 39”
1 x Chalkwall Upright FSC 2 x 3 x 27-11/16”
Wood Parts
4 x #8 x 1-3/4” Wood Screw
2 x #8 x 2-1/2” Wood Screw
Hardware
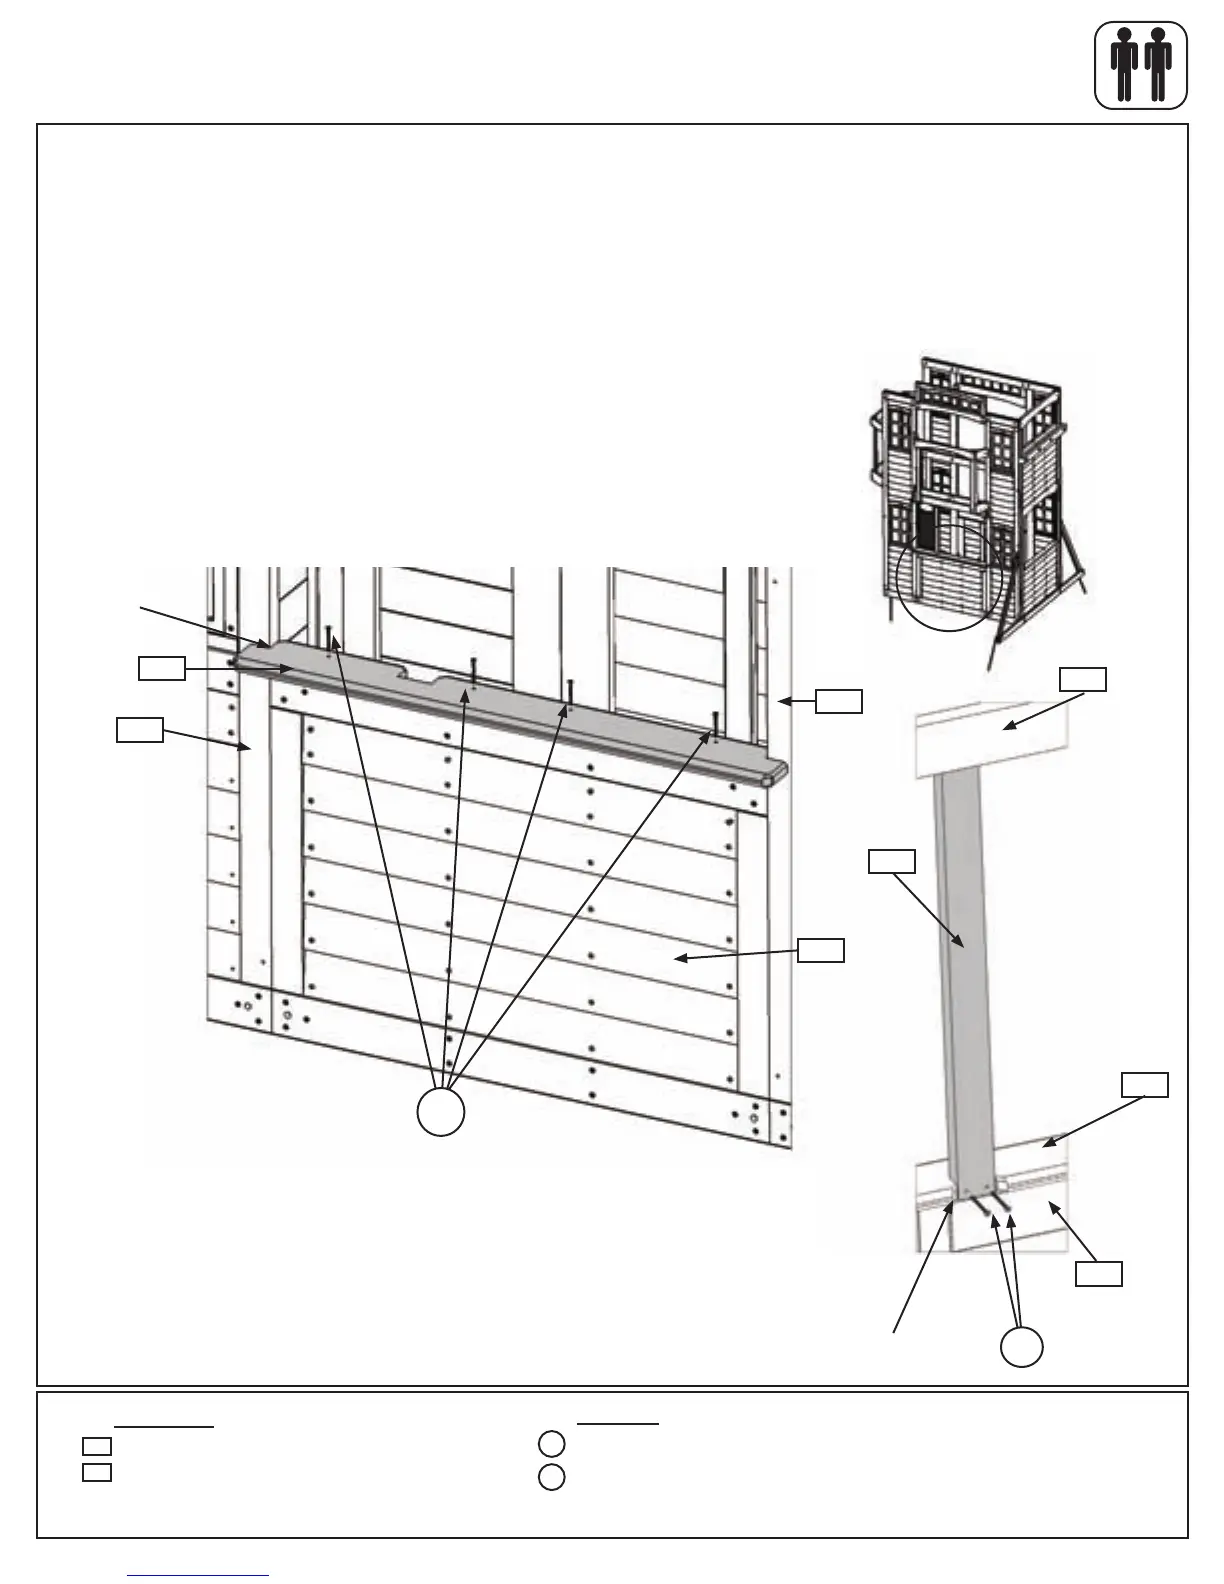
Fig. 13.2
030
S15
130
131
Step 13: Chalk Wall Assembly
Part 1
A:Place(130)ChalkTableTopontopof(060)HalfPanelatthefrontoftheassembly,soitistighttotheDoor
WallSide(030)NarrowWindowPanel.Attach(130)ChalkTableTopto(060)HalfPanelwith4(S15)#8x1-3/4”
WoodScrewsasshowning.13.1and13.2.Notice the orientation of the cut out section in (130) Chalk
Table Top.
B:Place(131)ChalkwallUprightinthecutoutsectionof(130)ChalkTableTopsoitsitstighttothetopof(060)
HalfPanelandinfrontof(043)JoistSide.Attach(131)ChalkwallUprightto(130)ChalkTableTopwith2(S3)#8
x2-1/2”WoodScrews.(g.13.3)
Fig. 13.1
Front
Tightatthis
Corner
S15
Door Wall Side
030
060
Front
Fig. 13.3
S3
060
130
131
S3
Tight
Inside view
130
043
67 support@cedarsummitplay.com
 Loading...