142
Fig. 14.7
Hardware
Wood Parts
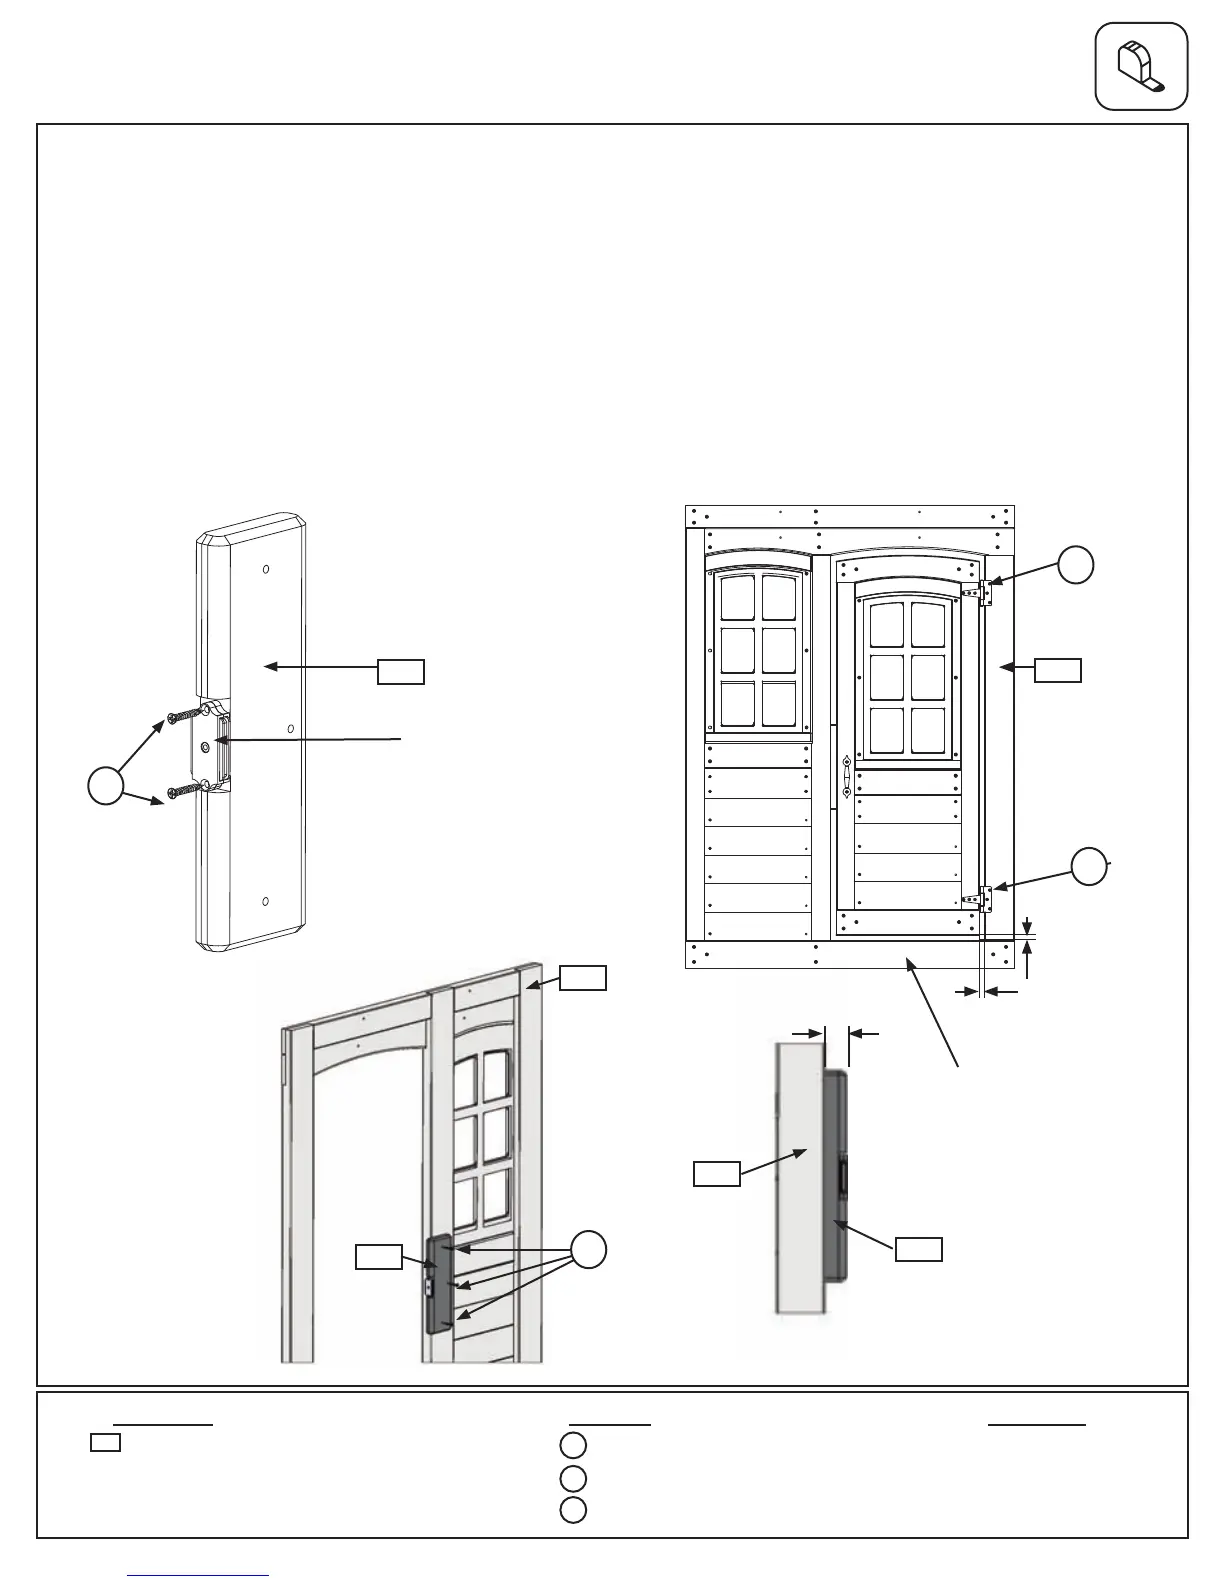
Step 14: Door Assembly
Part 4
F:Inthenotchedoutopeningof(142)DoorStopattachtheMagneticCatchusing2(S18)#6x1”WoodScrews.
(g.14.7)Important: Use a hand held screw driver and DO NOT over tighten.
G:Intheopeningforthedoor,measure5/8”fromthetopofDoorWallPanelbottomandmaximum9/16”from
(030)NarrowPanelontheDoorHingesideandattachtheremainingsideofthehingesto(030)NarrowWindow
Panelusing3(S13)#6x5/8”PanScrewsperhinge.(g.14.8)
H:Ontheinsideoftheassembly,attach(142)DoorStopto(031)DoorWallWindowPanelwith3(S15)#8x
1-3/4”WoodScrews,makingsure(142)DoorStopoverhangs(031)DoorWallWindowPanelby1”andisin
positiontoreceivetheCatchPlate.(g.14.9and14.10).
Fig. 14.9
Fig. 14.10
Fig. 14.8
S18
1 x Door Stop FSC 5/4 x 4 x 10”
142
2 x #6 x 1” Wood Screw
S18
3 x #8 x 1-3/4” Wood Screw
6 x #6 x 5/8” Pan Screw
S15
S13
031
S15
x3
S13
x3
S13
030
5/8”
142
031
142
1”
DoorWall
Panelbottom
MagneticCatch
Side View
Other Parts
9/16”
1 x Magnetic Catch
73 support@cedarsummitplay.com
 Loading...