Hardware
Fig. 15.3
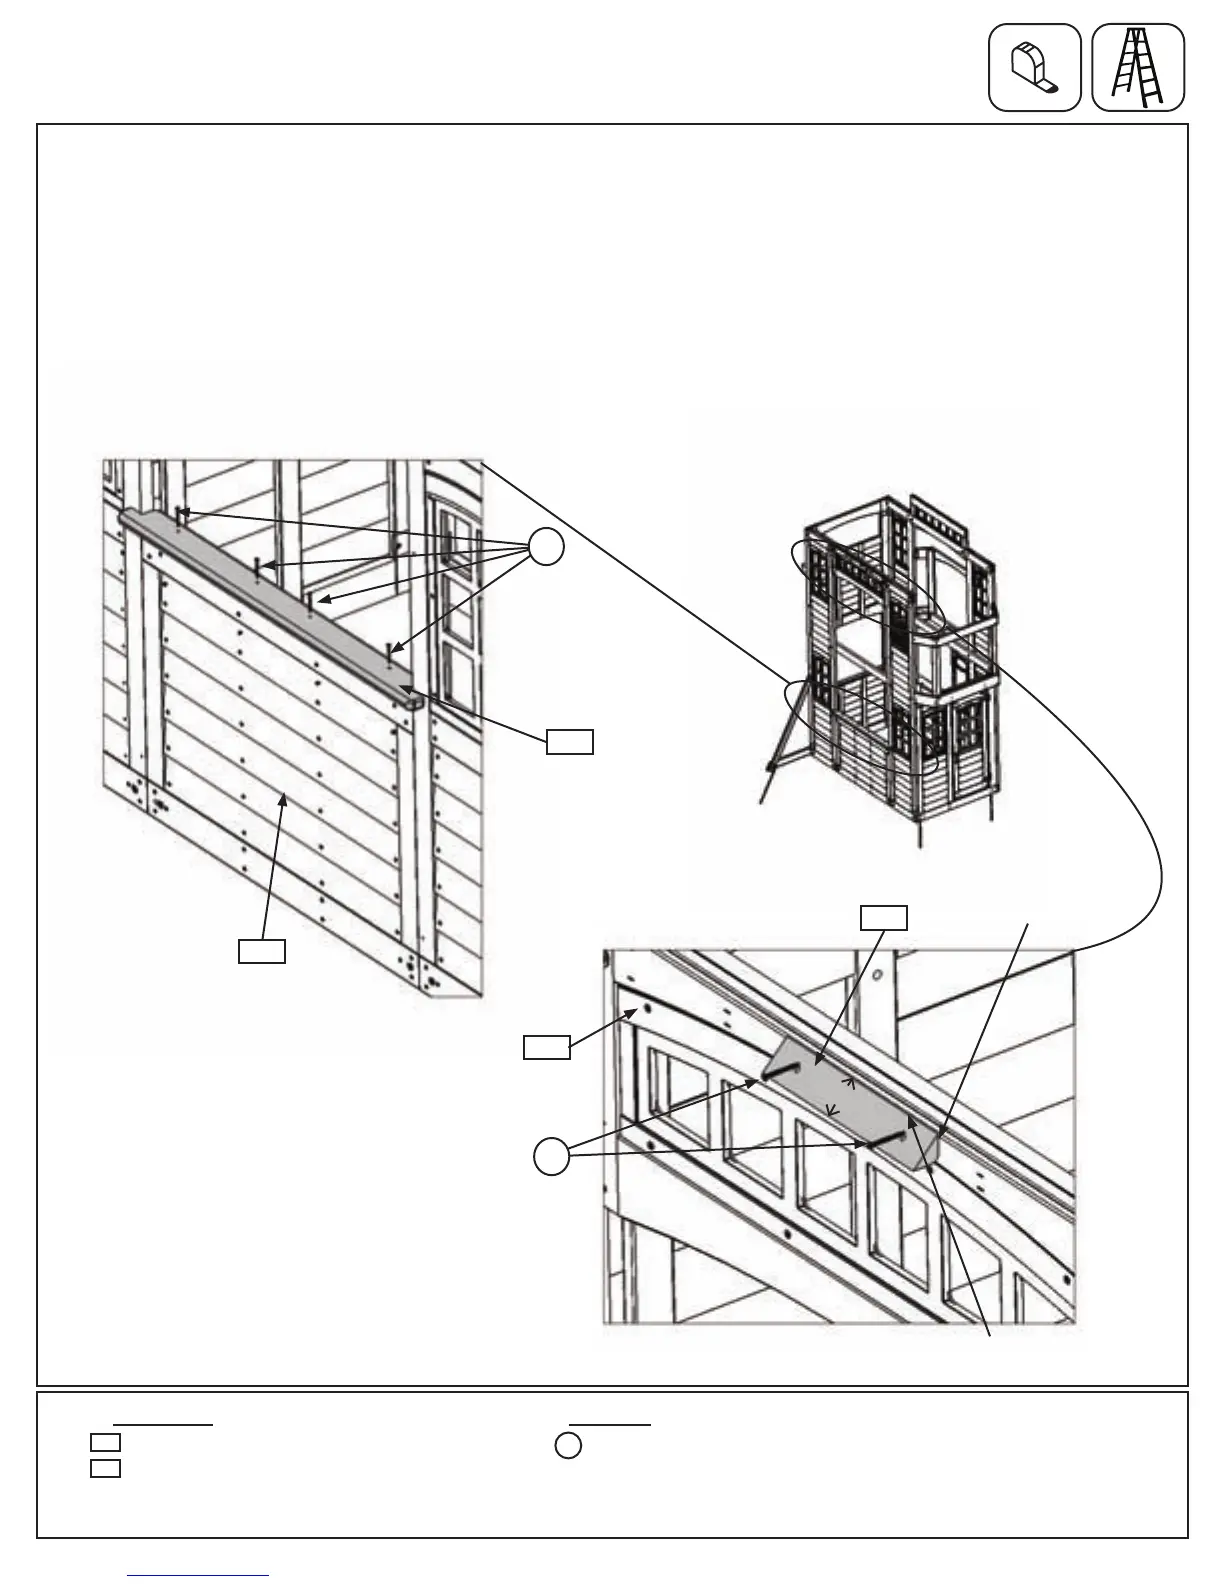
Step 15: Attach Roof Gusset and Table Top
A:Centredandushtothetopof(070)TransomPanelBackattach(150)RoofGussetwith2(S15)#8x1-3/4”
WoodScrews.Thesidethatmeasures1-1/4”sitsagainst(070)TransomPanelBackand1-3/4“sidefacesout.
(g.15.1and15.2)
B:Place(151)TableTopontopof(060)HalfPanelatthebackoftheassembly,sothenotchesaretightto(030)
NarrowWindowPanels.Attach(151)TableTopto(060)HalfPanelwith4(S15)#8x1-3/4”WoodScrewsas
showning.15.1and15.3.
Fig. 15.2
Fig. 15.1
Wood Parts
1 x Table Top FSC 5/4 x 4 x 39”
1 x Roof Gusset FSC 1-1/4 x 1-1/4 x 10”
151
6 x #8 x 1-3/4” Wood Screw
S15
150
060
Flush
151
S15
S15
070
150
Back
1-3/4”
1-1/4”Side
againstpanel
74 support@cedarsummitplay.com
 Loading...