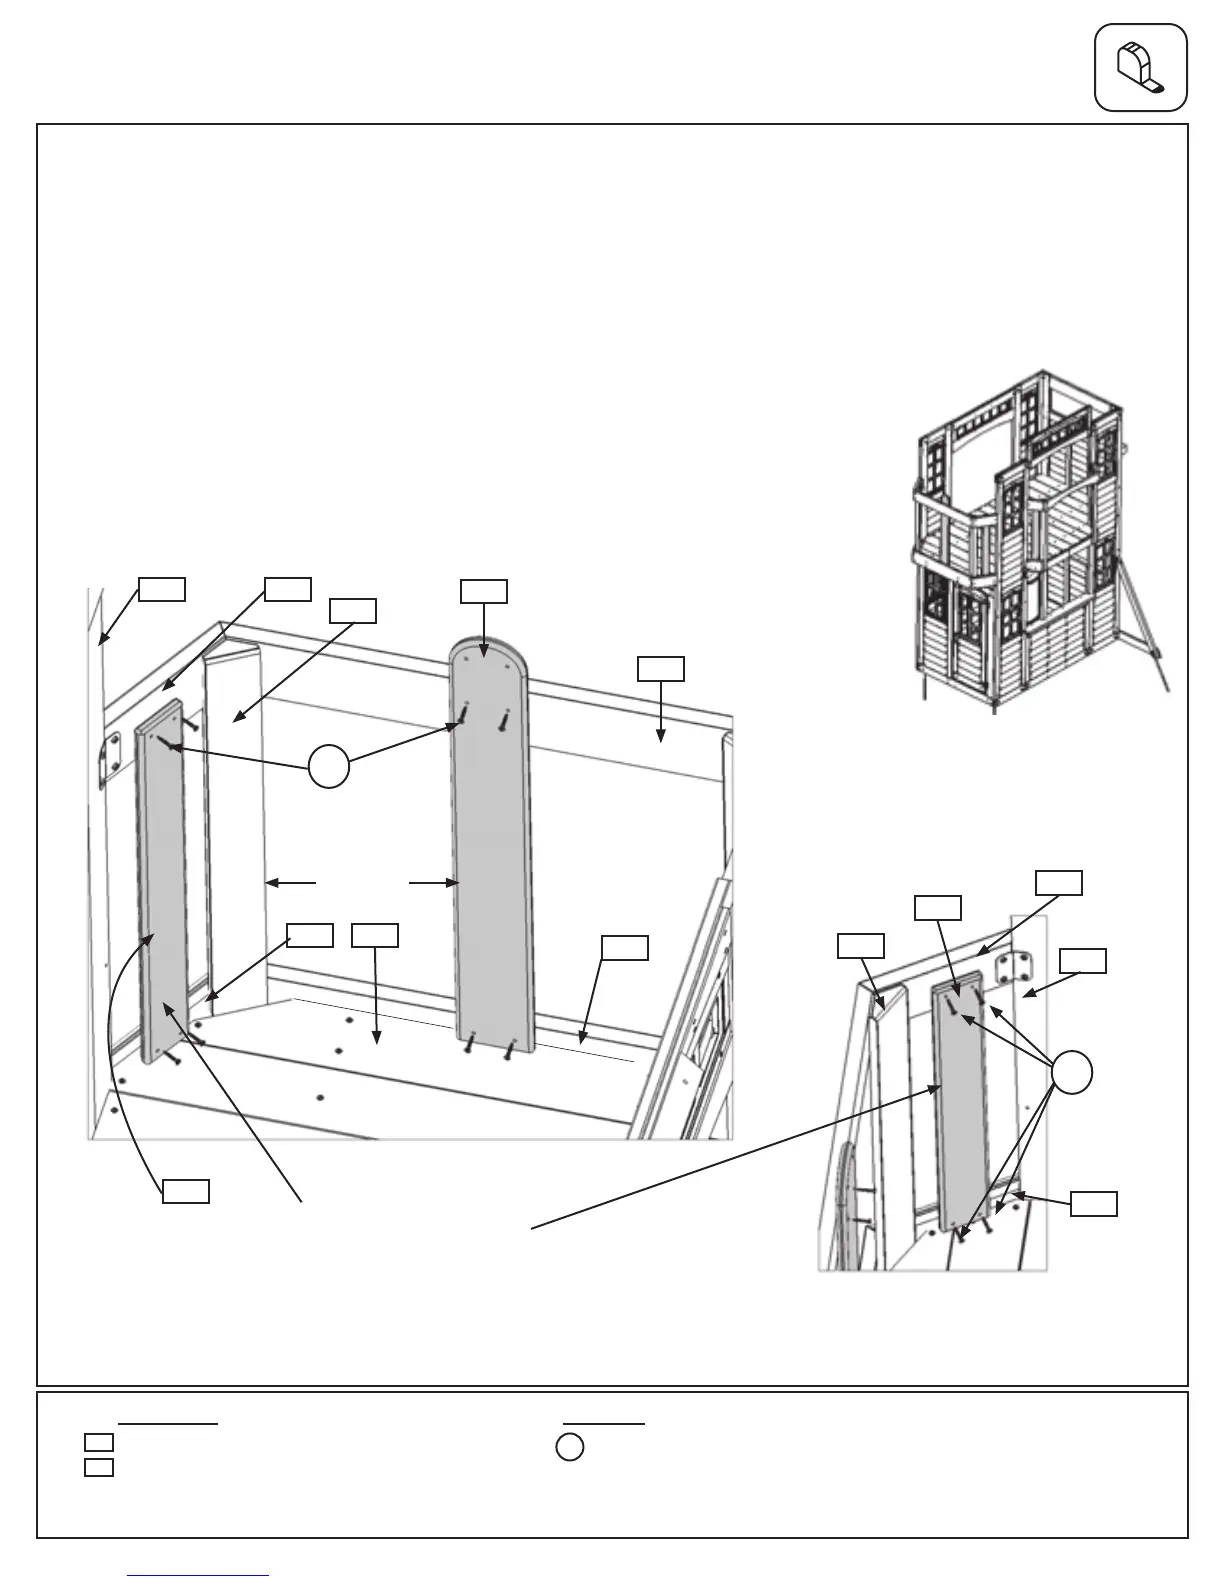
A:OntheDoorWallSideevenlyspace2(180)WallBoardsbetweeneach(030)NarrowWindowPanel
and(081)CrowsnestPostandtighttotheCrowsnestoorboardsthenattachto(100)and(101)Crowsnest
AssembliesRightandLeftandboth(103)CrowsnestR&Lwith4(S20)#8x1-3/8”WoodScrewsperwallboard.
(g.19.1,19.2and19.3)
B:Measure10-5/8”from(081)CrowsnestPostandattach(190)CentreWallBoardto(102)CrowsnestCentre
and(104)CrowsnestTopwith4(S20)#8x1-3/8”WoodScrews.(190)CentreWallBoardshouldbetightto
(174)CrowsnestFloor.(g.19.2)
Hardware
081
030
Fig. 19.3
Fig. 19.1
Step 19: Attach Wall Boards to Crowsnest Assembly
Part 1
12 x #8 x 1-3/8” Wood Screw
Wood Parts
S20
Fig. 19.2
190
Door Wall Side
2 x Wall Board FSC 1 x 4 x 26-1/2”
1 x Centre Wall Board FSC 1 x 5 x 32”
180
103
104
102
174100
180
081
030
103
101
180
S20
Evenlyspaceinopening.
S20
x4perboard
190
10-5/8”
Inside View
82 support@cedarsummitplay.com
 Loading...