Hardware
Step 22: Roof Support Assembly
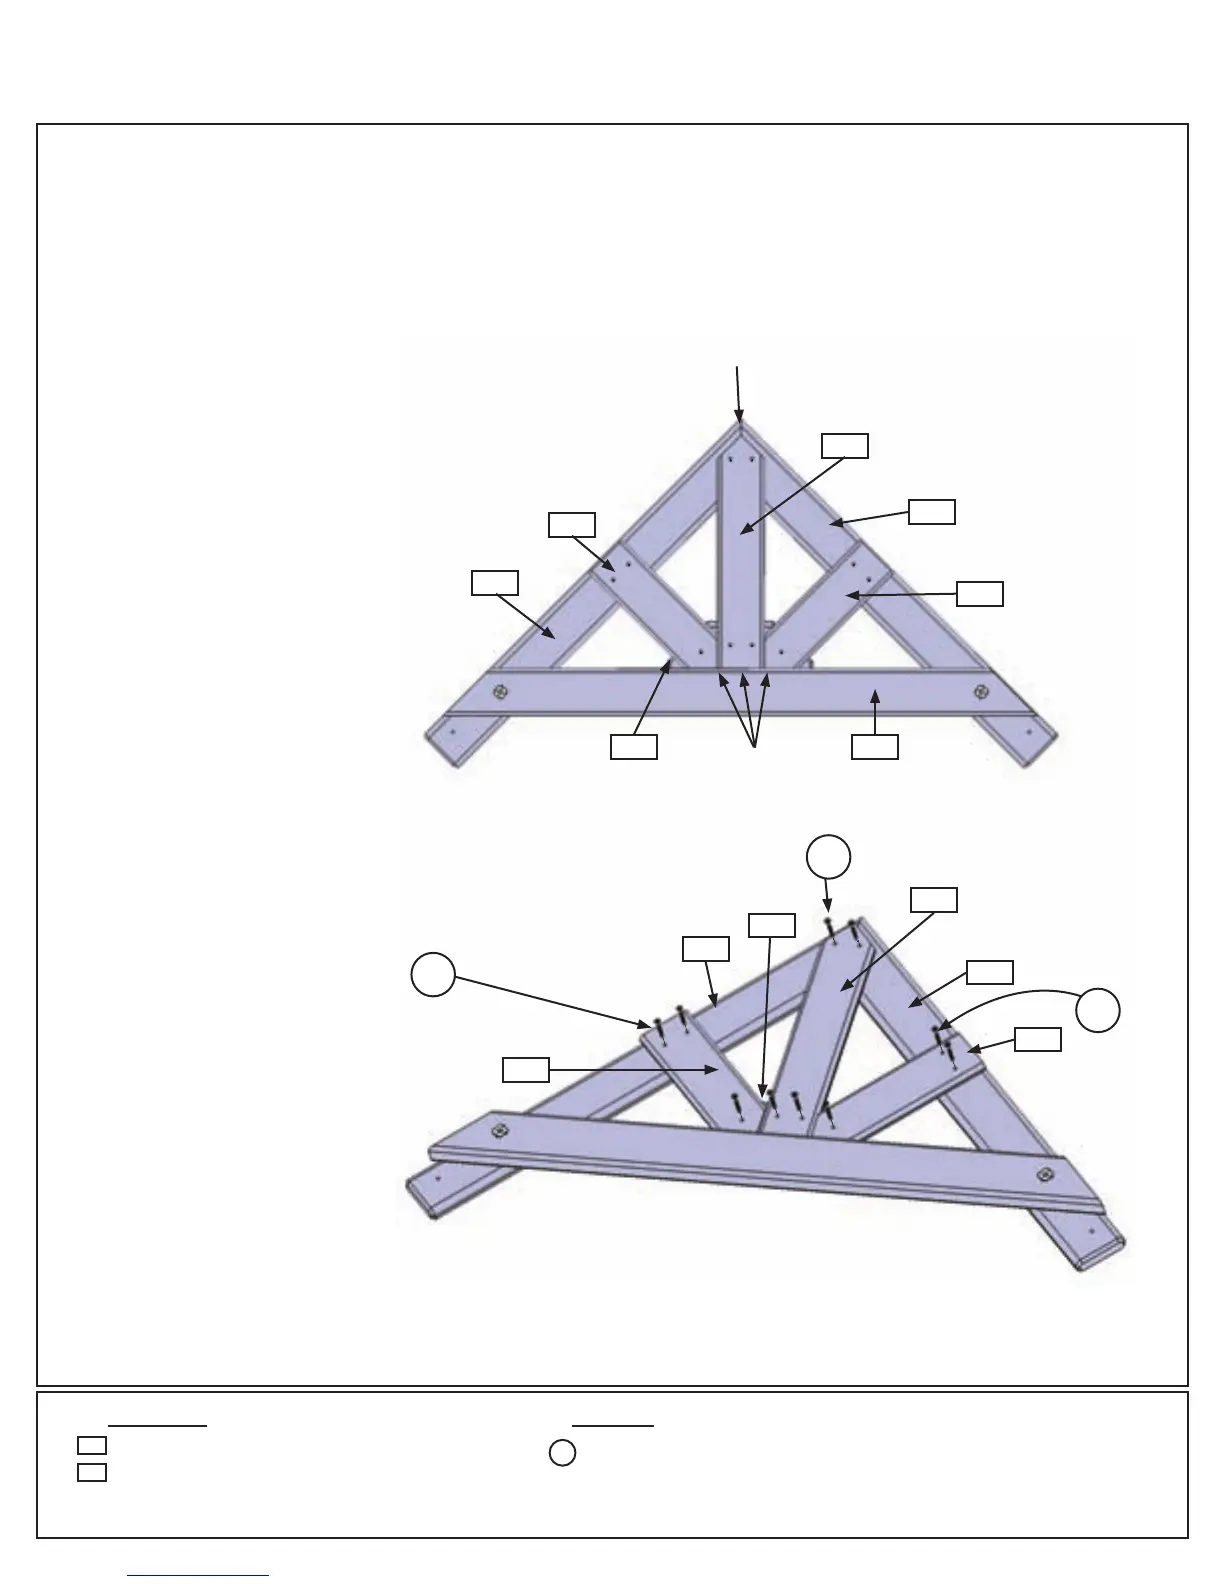
Part 3
F:Turntheassemblyoverandplace(224)CentreGableBoardon(223)Sunburst,tighttothetopof(222)
GableBottomsothetipiscentredatthepeakoftheRoofSupportAssembly.(g.22.6)
G:Place1(225)GableBoardAtighttoeachsideof(224)CentreGableBoardsotheyaretighttothetopof
(222)GableBottom.(g.22.6)
Fig. 22.6
H:Attach(224)CentreGable
Board,with4(S20)#8x1-3/8”
WoodScrews,andboth(225)
GableBoardA’s,with3(S20)
#8x1-3/8”WoodScrewsper
board,to(223)Sunburst,(220)
RoofSupportand(221)Roof
SupportLeft,asshowning.
22.7.
Repeat for both assemblies.
Fig. 22.7
221
20 x #8 x 1-3/8” Wood Screw
S20
225
224
220
225
223 222
Tight
225
221
220
225
224
223
S20
x3
Wood Parts
4 x Gable Board A FSC 1 x 4 x 10-15/16”
2 x Centre Gable Board FSC 1 x 4 x 16-1/8”
225
224
x4
S20
x3
S20
Centred
88 support@cedarsummitplay.com
 Loading...