Hardware
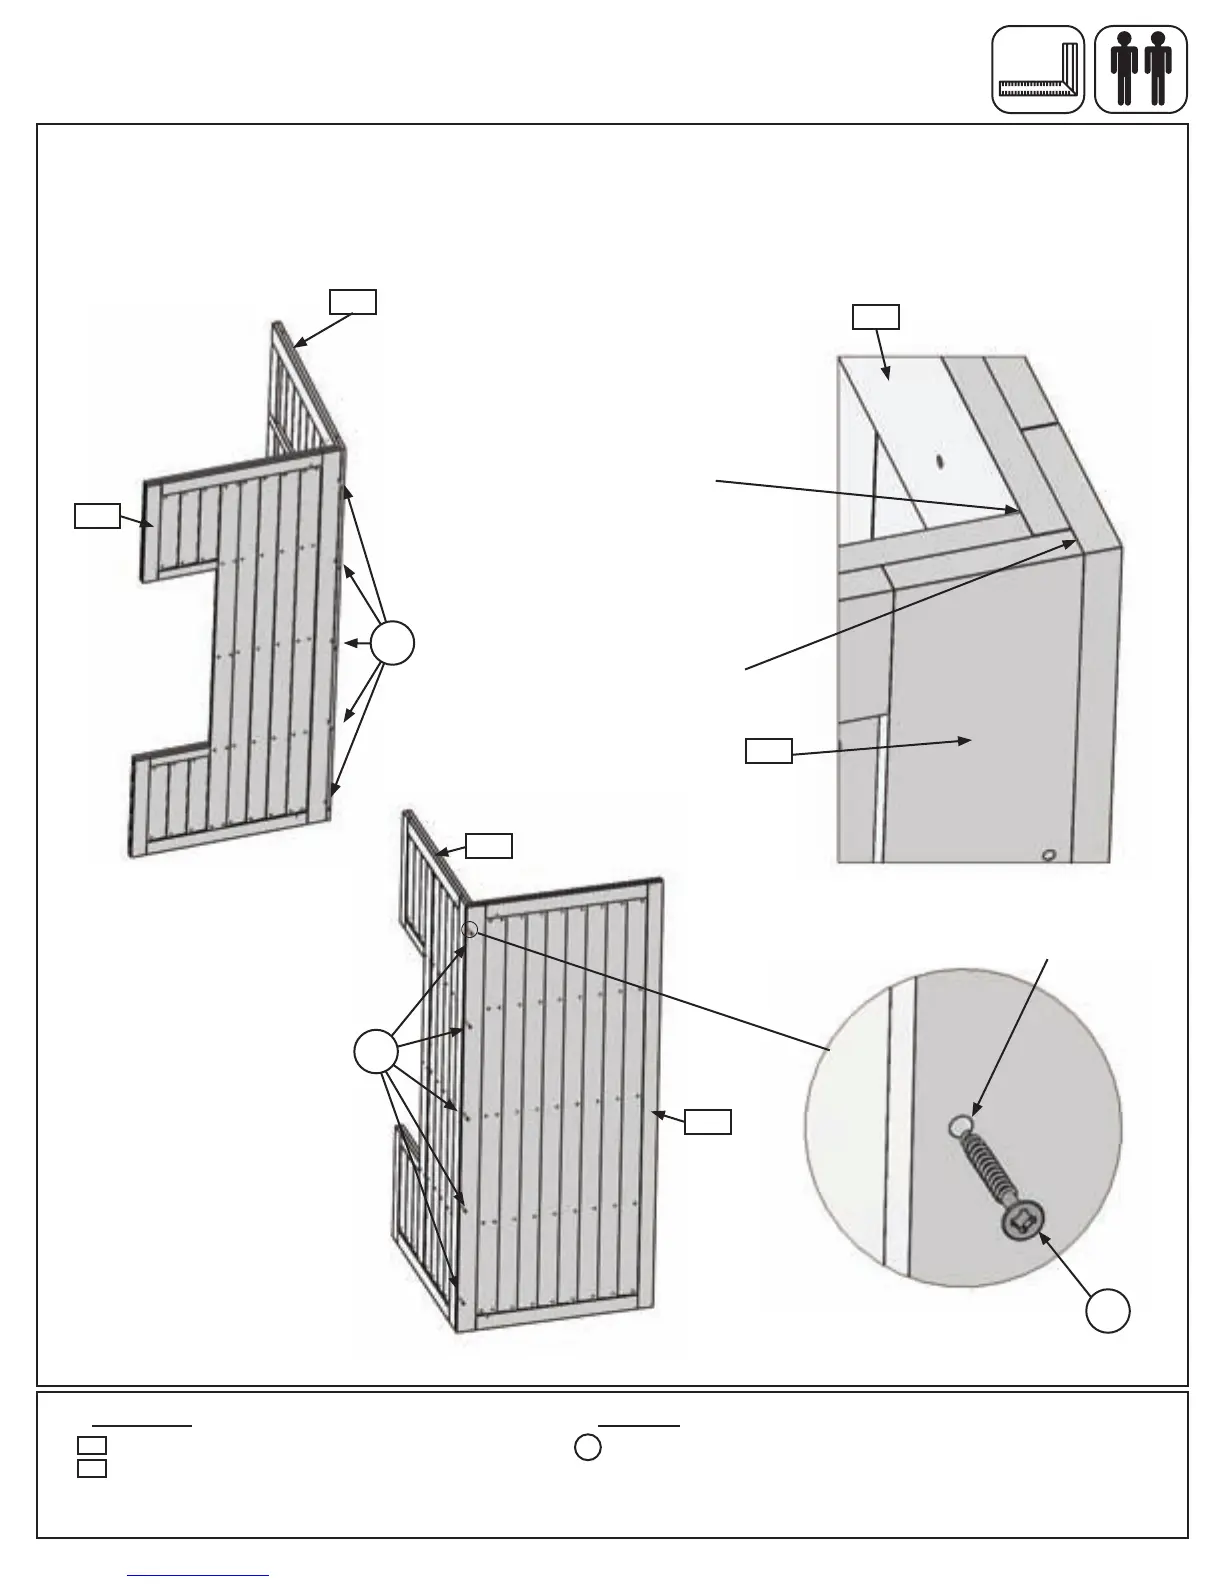
Step 23: Roof Assembly
Part 1
A:Fit(230)FrontRoofPanelto(231)BackRoofPanelsothebackpaneloverlapsthefrontandtheinsideangle
issquareandtight.Attachpanelstogetherwith5(S15)#8x1-3/4”WoodScrews.(g.23.1,23.2and23.4)
B:Attach(231)BackRoofPanelto(230)FrontRoofPanelwith5(S15)#8x1-3/4”WoodScrews.(g.23.3and
23.4)
Fig. 23.1
231
Fig. 23.2
Fig. 23.3
Fig. 23.4
IMPORTANT!
Overlapbackover
front.
230
231
230
230
231
Factorydrilledholesin
eachroofpanel.
S15
S15
S15
Square,
ushandtight
10 x #8 x 1-3/4” Wood Screw
1 x Front Roof Panel FSC 1-1/4 x 32-1/8 x 75”
1 x Back Roof Panel FSC 1-1/4 x 32-1/8 x 75”
230
Wood Parts
231
S15
89 support@cedarsummitplay.com
 Loading...