Hardware
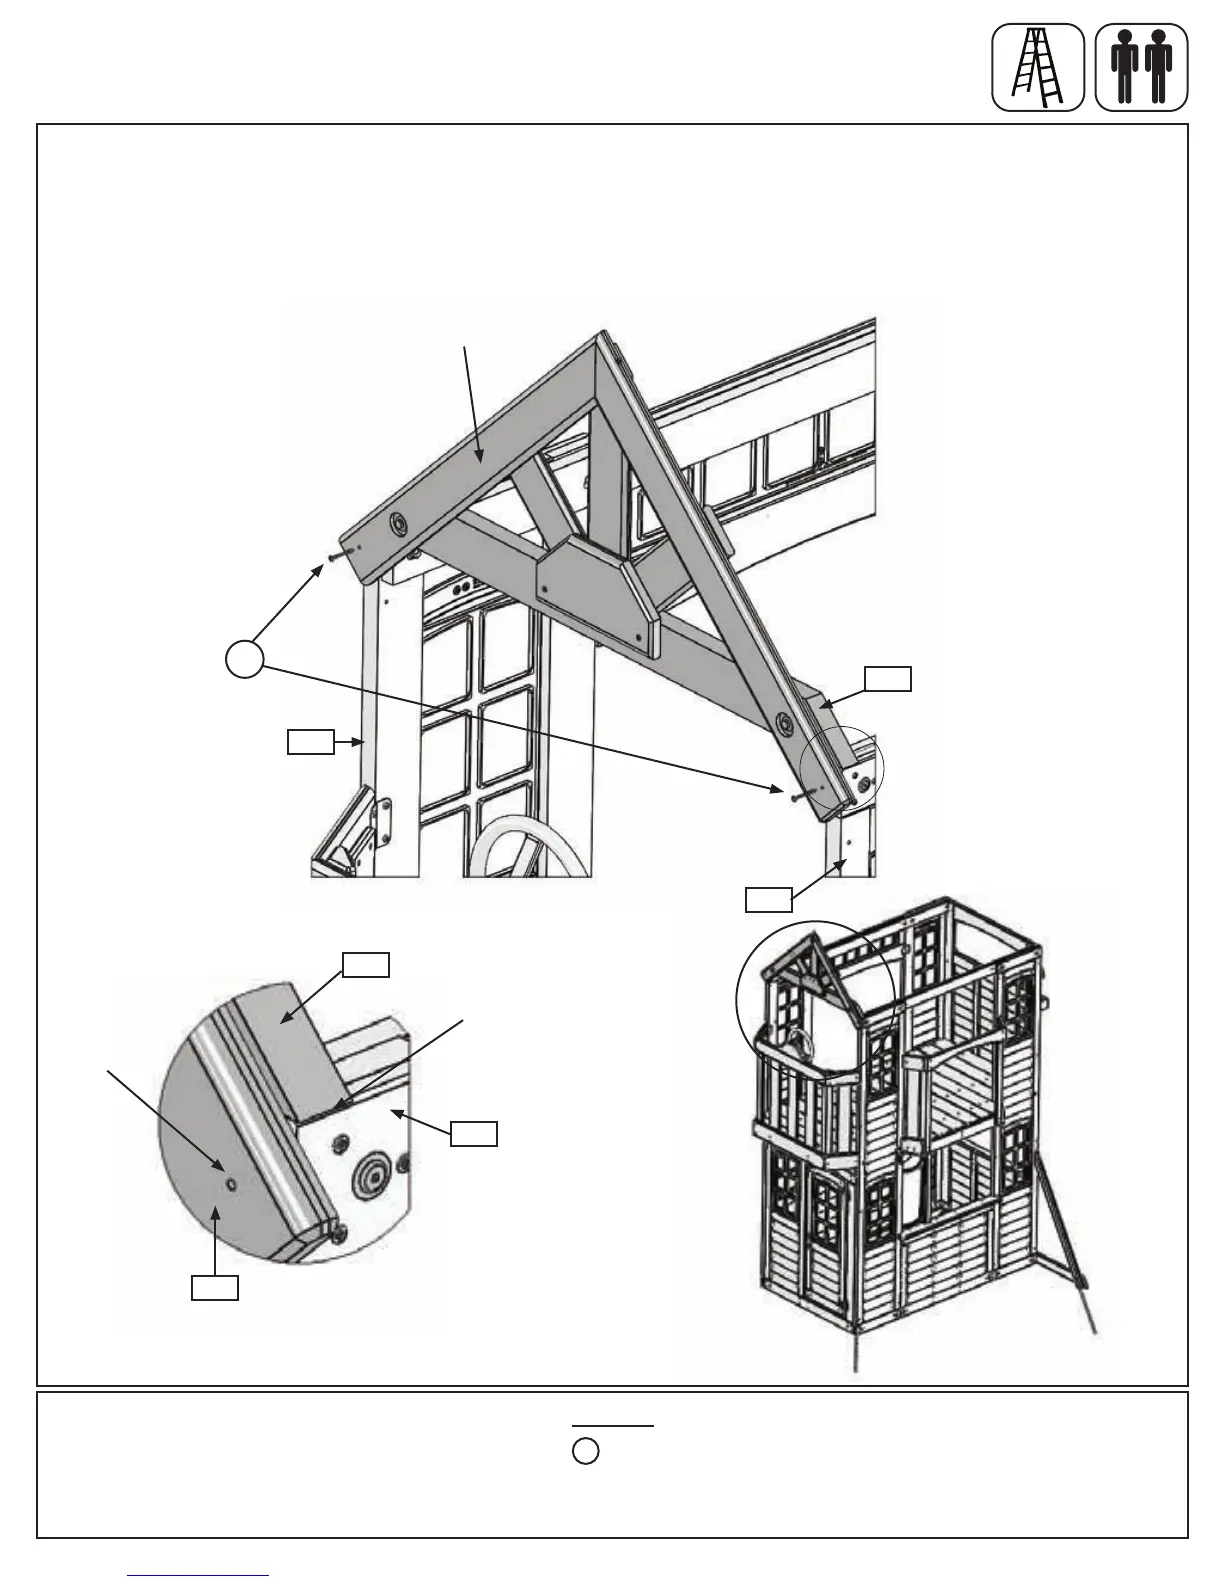
A:Fromtheoutside,ontheDoorWallSide,attach1RoofSupportAssemblytothetopof(030)NarrowWindow
Panelswith1(S3)#8x2-1/2”WoodScrewperside.(g.24.1and24.2)
Note: Thelongpointof(222)GableBottomshouldbeushtotheoutsidefaceof(030)NarrowWindowPanels.
(g.24.2and24.3)
Step 24: Attach Roof Support Assembly
Part 1
Fig. 24.2
Fig. 24.3
222
Fig. 24.1
030
RoofSupportAssembly
2 x #8 x 2-1/2” Wood Screw
S3
222
030
030
220
Factory
drilledhole.
Flush
Door Wall Side
S3
92 support@cedarsummitplay.com
 Loading...