20 support@cedarsummitplay.com
2 x 1/4 x 2-1/4” Hex Bolt (1/4” lock washer, 1/4” at washer, 1/4” t-nut)
2 x 1/4 x 3” Lag Screw (1/4” at washer)
2 x #8 x 3” Wood Screw
4 x #8 x 2” Wood Screw
Hardware
Wood Parts
2 x SW Ground 5/4 x 4 x 14-1/4”
2 x Diagonal 1-1/4 x 3 x 22”
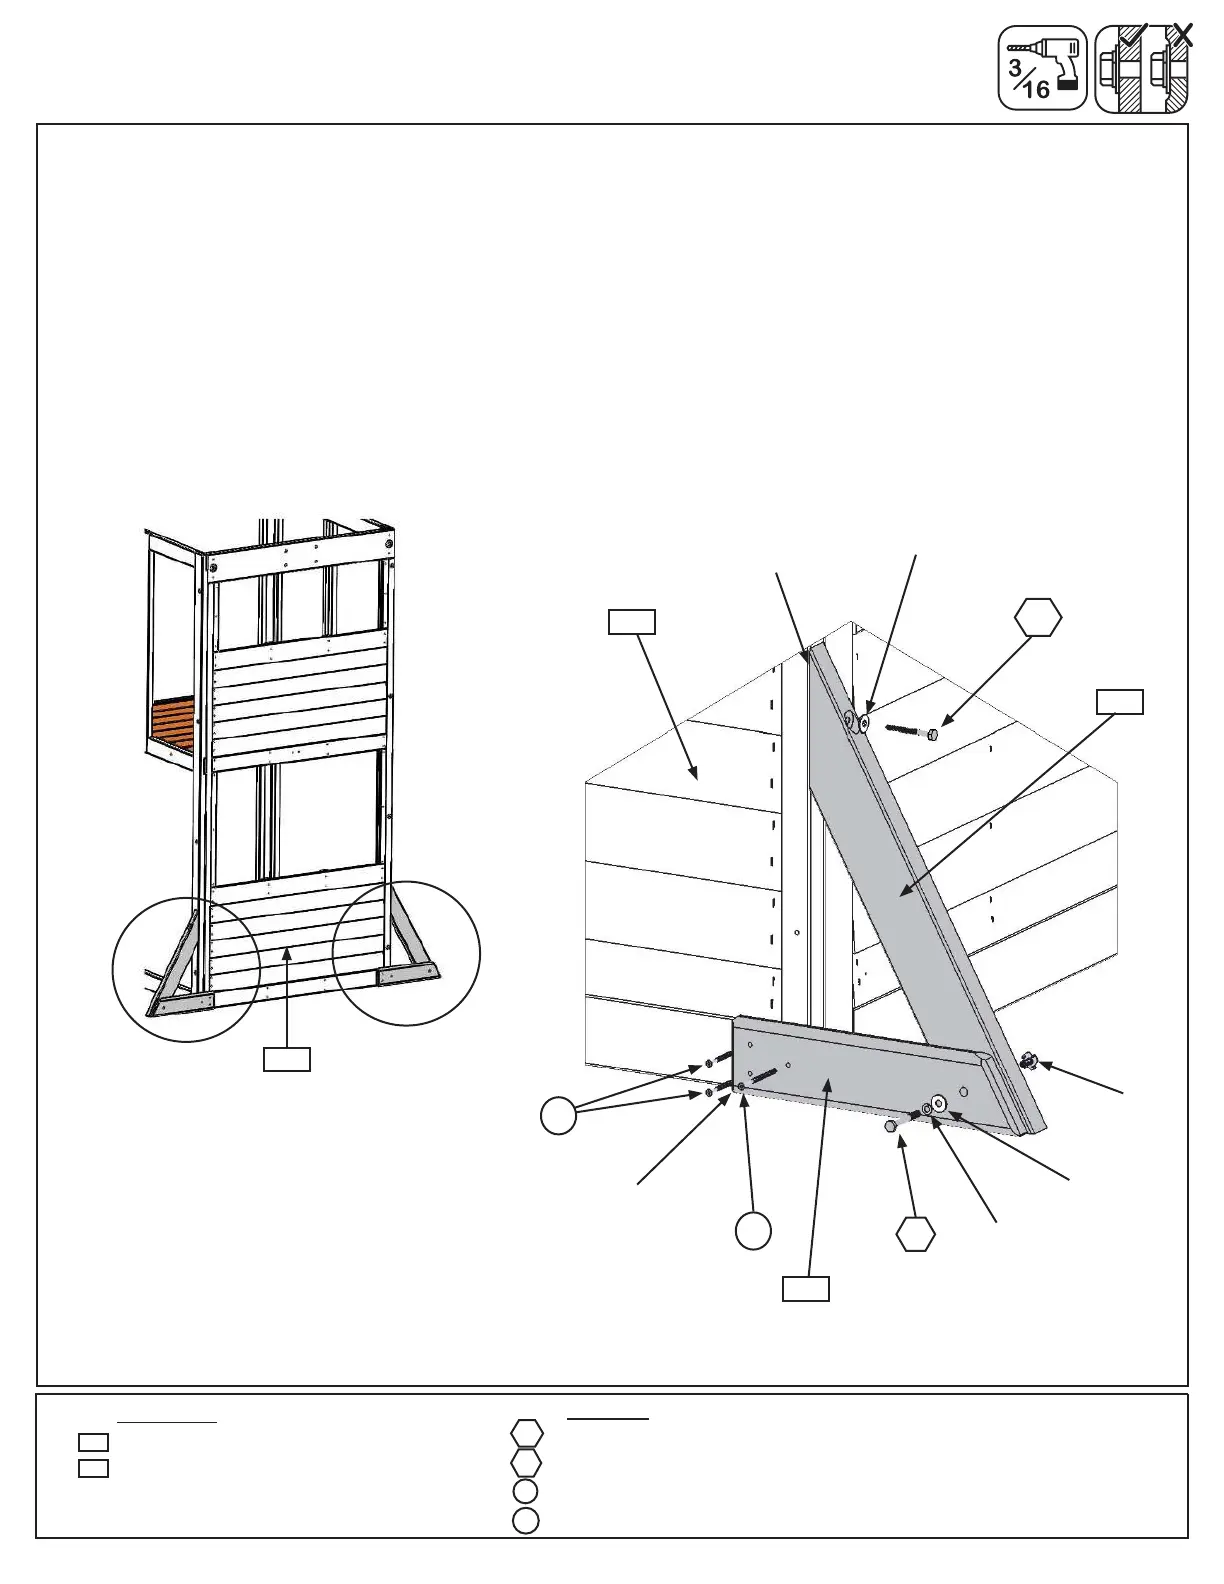
A: Loosely attach 1 (2606) SW Ground to each (2607) Diagonal with 1 (H10) 1/4 x 2-1/4” Hex Bolt (with lock
washer, at washer and t-nut) per board then place each (2607) Diagonal tight and ush to the front of (2627) SW
Wall Panel. (2606) SW Grounds to be ush to the bottom of (2627) SW Wall Panel. (g. 4.1 and 4.2)
B: Pre-drill pilot hole with a 3/16” drill bit then attach each (2607) Diagonal to (2627) SW Wall Panel with 1 (LS3)
1/4 x 3” Lag Screw (with at washer) per board, checking that they remain ush to outside edge. (g. 4.1 and 4.2)
C: Make sure bottom of each (2606) SW Ground is ush to bottom of (2627) SW Wall Panel then attach with 2
(S11) #8 x 2” Wood Screws and 1 (S4) #8 x 3” Wood Screw per board. Tighten all bolts. (g. 4.1 and 4.2)
1/4”
T-Nut
1/4” Flat
Washer
1/4” Lock
Washer
1/4” Flat
Washer
LS3
S11
S4
S4
Flush
Flush
Step 4: Attach SW Ground and Diagonal
LS3
2606
2607
S11
Fig. 4.1
2627
Fig. 4.2
2606
2607
2627
H10
H10