96 support@cedarsummitplay.com
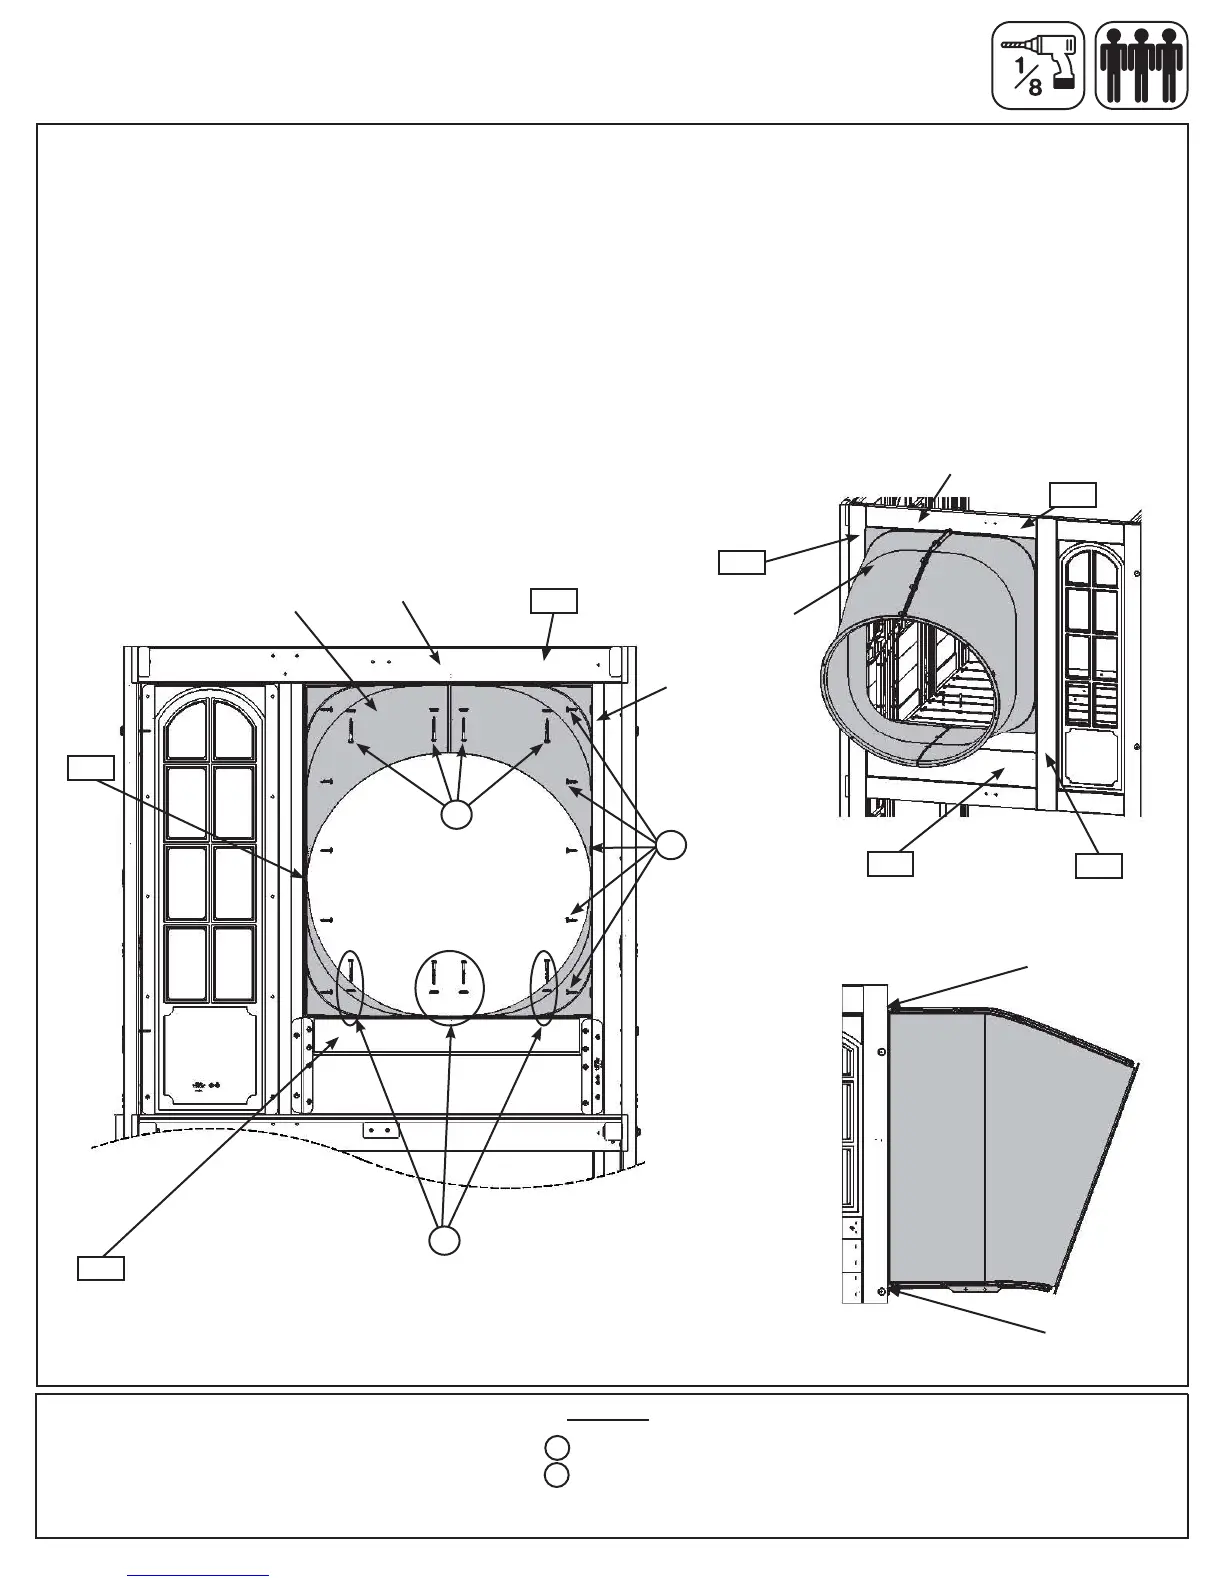
Fig. 32.2
Fig. 32.1
Step 32: Attach Flange Assembly to Fort
Part 1
Hardware
14 x #12 x 1” Pan Screw
4 x #12 x 2” Pan Screw
8 x #12 Screw Bezel
S7
(5 per side)
S6
A: With a helper place the Flange Assembly ush to the top opening in the Front Wall on Unit A as shown in g.
32.1, then pre-drill 1/8” pilot holes in (8935) Lower SL Insert for the 4 bottom mounting locations (approximate
spots where circles are on gure), making sure the pre-drilled holes are a minimum of 1” deep. (g. 32.2)
B: Attach Flange Assembly to (8935) Lower SL Insert using 4 (S7) #12 x 2” Pan Screws (with #12 Screw Bezel)
in the pre-drilled holes. (g. 32.2) Make sure the at surfaces of the Flange Assembly are ush to (2769) Panel
BT Frame, (2770) End Post Left and (2602) Upper Jamb as shown in g. 32.3.
C: Attach the Flange Assembly ush to top of (2769) Panel BT Frame using 4 (S6) #12 x 1” Pan Screws (with
#12 Screw Bezel) and to (2602) Upper Jamb and (2770) End Post Left using 5 (S6) #12 x 1” Pan Screws per
side. (g. 32.2)
Flange
Assembly
w/ #12 Screw
Bezel
Top
Bottom of
slideushwith
(8935) Lower
SL Insert
Top of End Wall
opening
Outside View
Inside View
Top
S6
S6
Side
2769
w/ #12 Screw
Bezel
S7
Flange
Assembly
Fig. 32.3
2602
8935
2602
8935
Large Fort
Front Wall
2769
2770


 To Next Page