Getting Started
English - 7 -
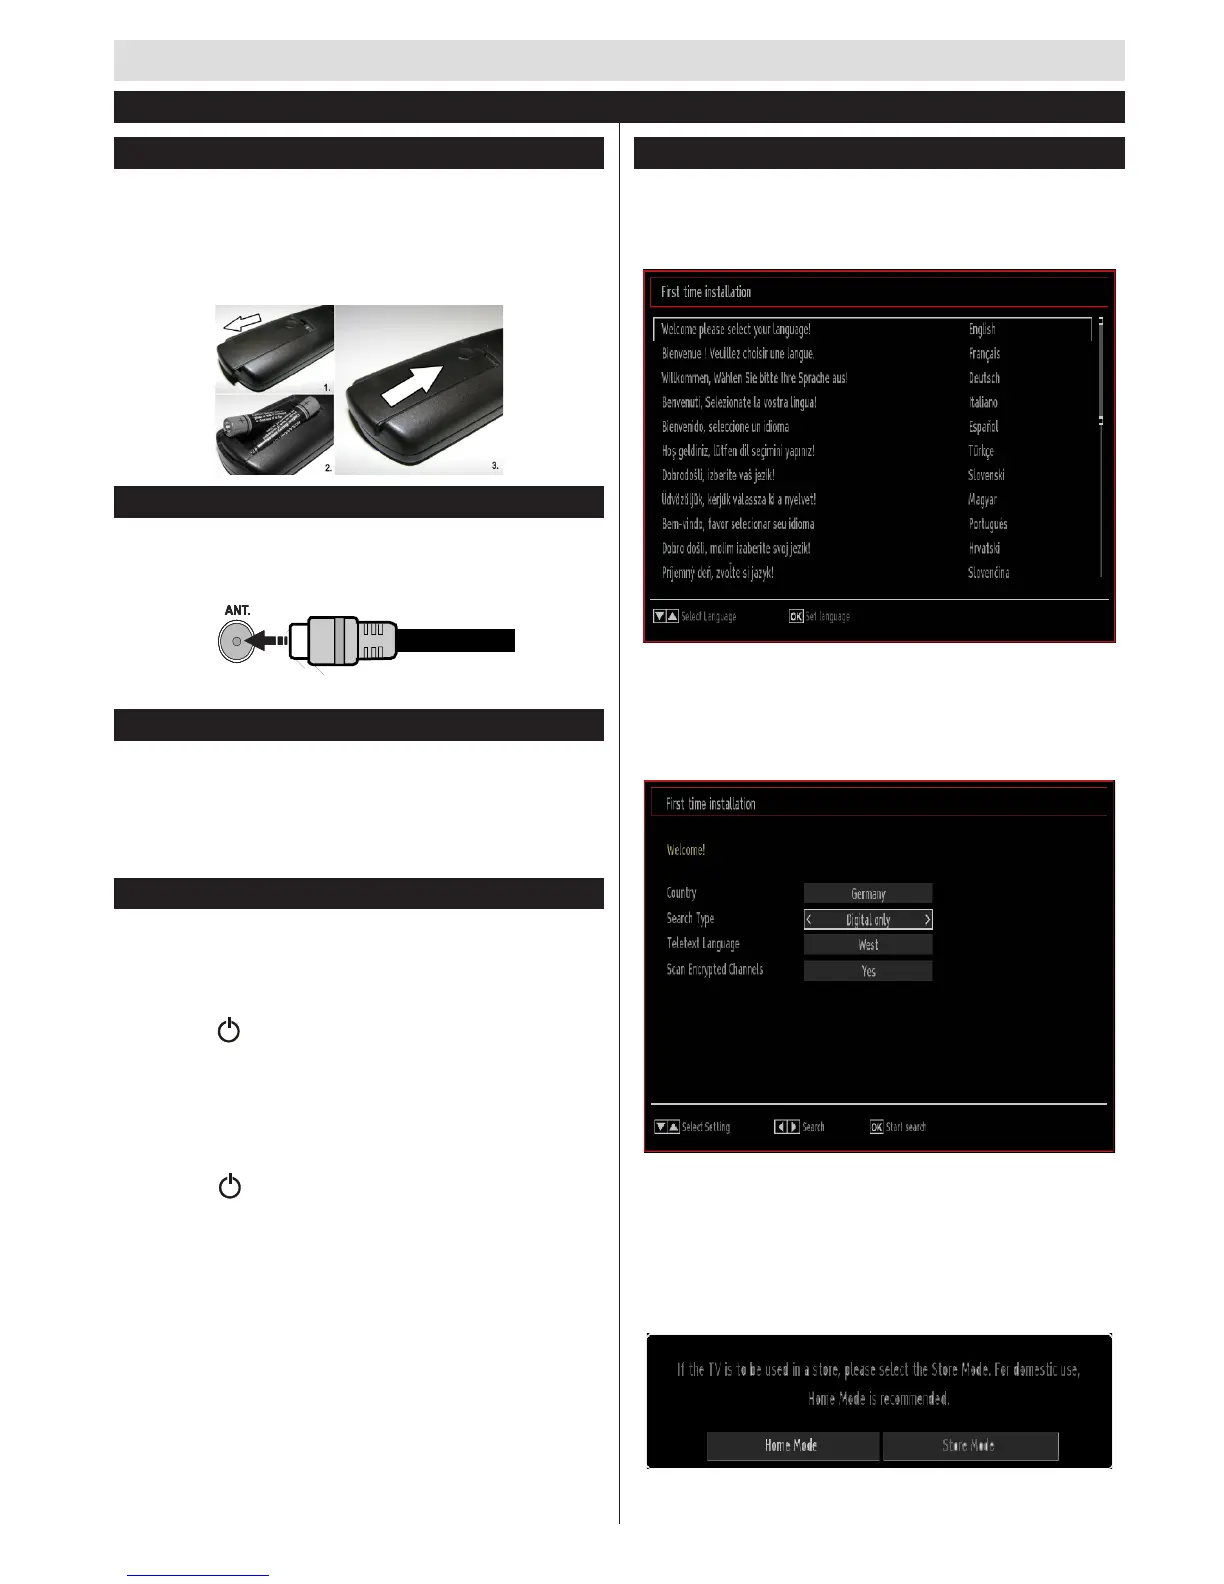
Inserting the Batteries into the Remote Control
Lift the cover on the back of the remote upward gently.
Install two AAA batteries. Make sure to match the +
and - ends of the batteries in the battery compartment
(observe the correct polarity) Replace the cover.
Antenna Connection
Connect the “aerial” plug to the AERIAL INPUT (ANT)
socket located on the back of the TV.
Connect Power
IMPORTANT: The TV set is designed to operate on
220-240V AC, 50 Hz socket. After unpacking, allow
the TV set to reach the ambient room temperature
before you connect the set to the mains. Plug the
power cable to the mains socket outlet.
Switching On/Off
To Switch the TV On
Connect the power cord to the 220-240V AC, 50 Hz.
To switch on the TV from standby mode either:
Press the “ ” button, P+ / P- or a numeric button on
the remote control.
Press the side function switch until the TV comes on
from standby.
To Switch the TV Off
Press the “ “ button on the remote control or press
the side function switch until the TV switches into
standby mode.
To power down the TV completely, unplug the
power cord from the mains socket.
Note: When the TV is switched to standby mode, the standby
LED can blink to indicate that features such as Standby
Search, Over Air Download or Timer is active. The LED can
also blink when you switch on the TV from standby mode.
First Time Installation
When turned on for the first time, the language
selection screen is displayed. Select the desired
language and press OK.
The First Time Installation (FTI) screen will be
displayed next. Set your preferences using the
QDYLJDWLRQEXWWRQV DQGZKHQ¿QLVKHG SUHVV2. WR
continue.
You can activate Store mode (optional) option to
be available in “Other settings” menu and your TV’s
features will be illustrated on the top of the screen.
$FRQ¿UPDWLRQVFUHHQZLOOEHGLVSOD\HG6HOHFWYES
to proceed.
First Time Installation