Do you have a question about the Celestron NexStar SE and is the answer not in the manual?
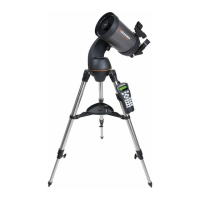
Ensure all components of your NexStar SE telescope are present before assembly.
Spread tripod legs, attach accessory tray, extend legs to desired height, and level the tripod.
Align the telescope mount base hole with the tripod's positioning pin and align feet with recesses.
Tighten the captive mounting bolts under the tripod head to firmly secure the telescope mount.
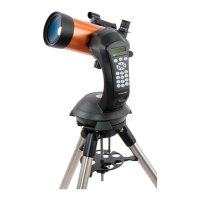
Install StarPointer finderscope, star diagonal, and 25mm eyepiece, ensuring secure attachment.
Insert AA batteries into the mount base and turn on the telescope's power switch.
Remove lens cap and focus the telescope on your subject for initial viewing.
Use hand control directional buttons to slew the telescope; avoid forcing by hand.
Align the finderscope with the main telescope optics using a distant daytime object.
Select language and confirm readiness for the SkyAlign alignment procedure.
Input observing site location and time, then align with three bright celestial objects.
Use the SKY TOUR button to find visible objects and OBJECT INFO to read details.
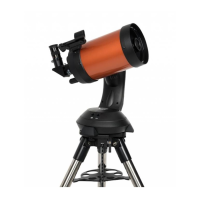
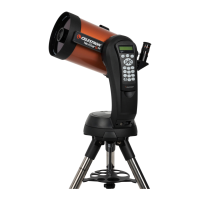
| Optical Design | Schmidt-Cassegrain |
|---|---|
| Mount Type | Single Fork Arm Altazimuth |
| Finderscope | StarPointer finderscope |
| Computerized | Yes |
| Aperture | 6 inches (150mm) |
| Focal Length | 1500mm |
| Focal Ratio | f/10 |
| Tripod | Steel |
| Highest Useful Magnification | 354x |
| Lowest Useful Magnification | 21x |
| Limiting Stellar Magnitude | 13.4 |
| Resolution (Rayleigh) | 0.93 arcseconds |
| Resolution (Dawes) | 0.77 arcseconds |
| Light Gathering Power | 459x |
| Secondary Mirror Obstruction by Area | 14% |
| Database of Objects | 40, 000+ |
| Alignment Procedures | SkyAlign, Two-Star Align, Solar System Align |
| Tracking Rates | Sidereal, Solar, Lunar |
| Communication Ports | RS-232 |
| Power Requirements | 12 VDC (Tip positive) |
| Tracking Modes | Alt-Azimuth |