4
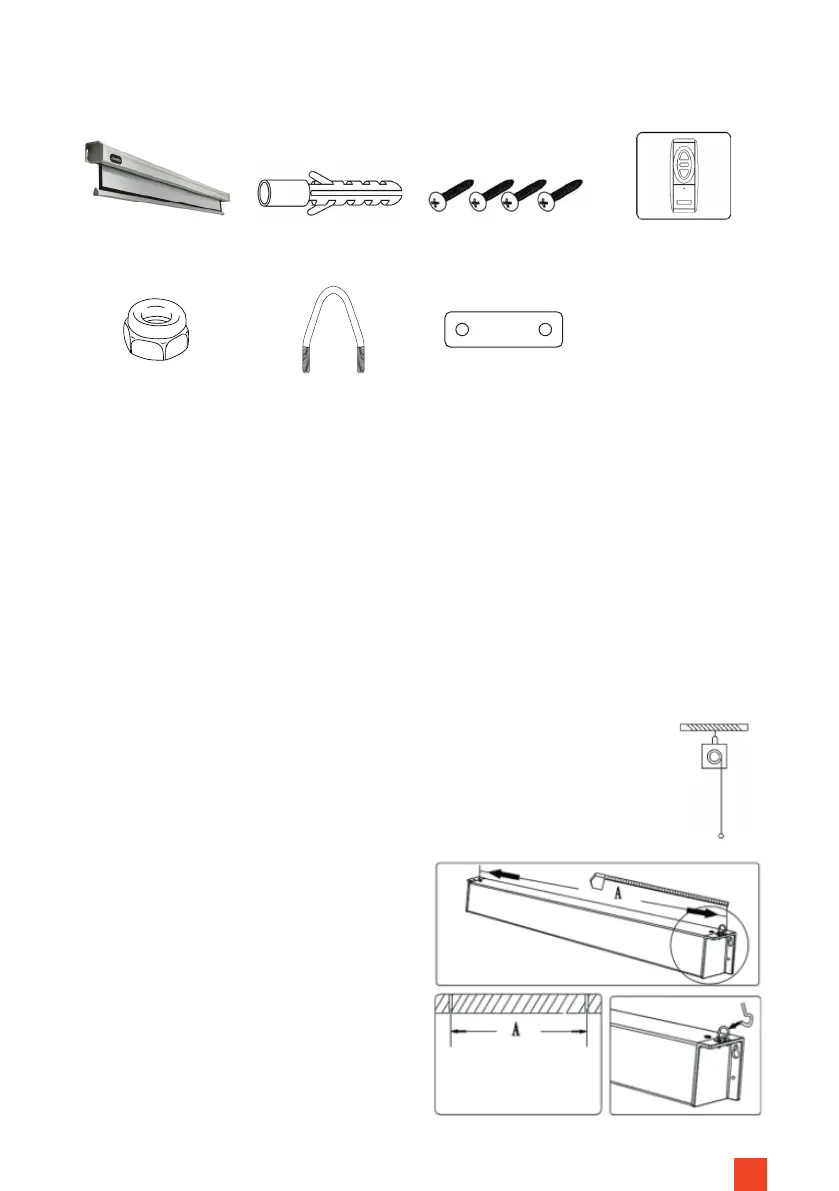
IN THE BOX
1x Screen 4x Plastic dowels
4x Screws 1x IR remote control incl.
Batteries
Attach the eyelets with the washers
and the plates and the nuts to the two
side caps and measure the distance
between the eyelets. Mark the points
on the ceiling and make sure
that the eyelets are aligned with each
other and parallel to the wall.
MOUNTING ON THE CEILING (VIA EYELETS)
INSTALLATION NOTES
Install the screen in a position that is fully visible to all viewers! The optimum
installation height corresponds to the position of the viewers in the centre of
the screen with the screen fabric extended: eye level = lower third of the screen
surface.
The screen can be installed on the wall/ceiling or attached to the ceiling on
hanging closed ring eyelets plus screwable karabiners (not included in the
box). Please make sure that the metal plates are also used for wall and ceiling
installation, otherwise a safe installation cannot be guaranteed.
The enclosed mounting material is intended for a solid stone wall, If necessary,
procure suitable mounting material for your installation surface.
4x Nuts 2x Suspension loops 2x Metal plates