The CellarPro cooling unit is designed to maintain optimal conditions for wine storage and aging, including steady, cool temperatures, high humidity, minimal vibration and light, and clean air. It is intended for use in wine cellars and wine cabinets, and is not designed to maintain serving temperatures for white and sparkling wines, which are typically colder than storage temperatures. The unit is programmed with a 3-minute delay at startup to protect its internal components.
Function Description:
The CellarPro cooling unit operates by pulling warm air from inside the cellar across evaporator coils, removing heat, and then discharging cold air from the bottom of the unit to circulate downward. Simultaneously, hot air is exhausted from the unit, either through the top (top-vent configuration) or the rear (rear-vent configuration). The unit is designed to cool gently without stripping moisture from the cellar environment. It is normal for the cooling unit to run up to 75 percent of the time to maintain proper conditions, especially initially, when it may run continuously for up to a week until the cellar reaches equilibrium.
Important Technical Specifications:
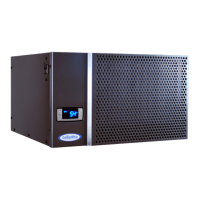
The CellarPro 1800 series includes several models: 1800 QTL, 1800QT, 1800XT, 1800XTS, and 1800XTSx.
- Dimensions (W" x D" x H"):
- 1800 QTL, 1800QT, 1800XT, 1800XTS: 18 x 16.5 x 10.5 inches
- 1800 XTSx: 18.1 x 22 x 10.6 inches
- Weight (lbs):
- 1800 QTL, 1800QT, 1800XT, 1800XTS: 60 lbs
- 1800 XTSx: 70 lbs
- Operating Amps: 3 Amps for all models.
- Required Circuit: 15-Amp Dedicated for all models.
- Ambient Environment:
- Interior cooling units (1800 QTL, 1800QT, 1800XT, 1800XTS) are designed to operate in ambient temperatures between 45°F and 95°F. They are for internal use only and not designed for exposure to the exterior.
- Exterior-rated 1800XTSx is designed to operate in ambient temperatures between 20°F and 90°F.
- Insulation Requirements for Wine Cellars:
- Interior walls and floor: Minimum R-11 insulation with a vapor barrier on the warm side.
- Exterior walls and ceiling: Minimum R-19 insulation with a vapor barrier on the warm side.
- Exterior walls exposed to direct sunlight: R-30 insulation.
- Doors should be insulated and tightly sealed with weather stripping.
- All walls, joints, doors, windows, electrical outlets, pipes, vents, and light fixtures should be sealed to prevent ambient air and moisture infiltration.
- Condensate Drain Line (Optional): Available for installations in warm and/or humid environments. Requires a condensate trap that must be charged with water.
Usage Features:
- Installation:
- Units are designed for "through the wall" installation with ample open space on the sides and rear.
- A hole 1/4 inch larger than the unit's width and height should be cut.
- Horizontal 2x4 braces should be installed above and below the unit. Vertical braces may be needed if studs are cut.
- Units must be mounted upright and tilted slightly to the rear for condensate flow.
- A minimum of 8 inches of the front of the cooling unit must protrude inside the cellar for proper airflow, unless installed with a front intake hood directly above the cellar.
- Minimum 3 inches clearance inside the cellar at the front, and 8 inches below the cold air discharge.
- The rear of the unit should be flush with the outside wall unless a duct kit is used.
- The rear of the unit requires an open space at least as large as the wine cellar, unless intake and exhaust are ducted. Avoid corner installations.
- Optional mounting clips are available for purchase. Alternatively, a shelf and diagonal brace can support the unit, with the shelf positioned on the right side to avoid restricting the exhaust vent.
- Butyl sealant tape should be used to seal the cavity around the unit to prevent air leaks.
- Ducting (Optional):
- For rear-vent configuration, a duct hood can be attached to two 6-inch ducts (one for intake, one for exhaust).
- A 6-inch inline fan can be powered by the cooling unit.
- Ducting should be 6-inch diameter (or equivalent) from start to finish with no reducers.
- The hot side of the unit can be ducted up to 50 equivalent feet with a 90-degree turn counting as 8 feet.
- The cold side (evaporator coils) can also be ducted for specific installations, requiring a front intake hood.
- Control Panel:
- Power On/Off Button: Turns the unit on/off. Indicator lights show when the compressor and fan are running.
- Up and Down Buttons: View high/low recorded temperatures. Press "Set" for three seconds while "Hi" or "Lo" is displayed to reset.
- Set Button: View/change the Minimum Set Point. Factory preset to 58°F with a 4°F temperature differential (unit turns on at 62°F, off at 58°F). Recommended range is 53-60°F.
- Energy Saver Button: Activates "Energy Saver" mode. The unit runs in "Energy Saver" mode, and the Minimum Set Point and Temperature Differential remain unchanged.
- Quick Chill Button: Activates "Quick Chill" mode for three seconds. The unit runs continuously for 6 hours (or until the unit reaches set point). Useful for loading "warm" bottles.
- Auto Defrost Mode: Factory default cycle every 24 hours for 20 minutes. Indicator light (top row) turns on.
- Manual Defrost: Hold defrost button for 3 seconds to initiate a 20-minute defrost cycle.
- Light: Turns on/off the light function (2nd row).
- Energy Saver: Indicator light for energy saver mode.
- Remote Thermostat (Optional): Overrides the internal thermostat. Can measure air or liquid temperatures.
- For air temperature, place in cellar with good airflow. Differential (HY) should be set to "4".
- For liquid temperature, insert probe into a bottle with 80-90% water and 10-20% rubbing alcohol, seal, and place in cellar. Differential (HY) should be set to "1".
- Advanced Operation (Settings):
- Humidity (Fon): Factory preset to "3".
- Temperature Differential (HY): Factory preset to "4" without a bottle probe, and "1" with a probe.
- High Temperature Alarm (ALU): Factory preset to "70". This setting designates the high temperature inside the cellar at which the alarm is triggered.
- Low Temperature Alarm (ALL): Factory preset to "45". This setting designates the low temperature inside the cellar at which the alarm is triggered.
- Energy Savings Mode Differential (HES): Factory preset to "4". This setting increases or decreases the Temperature Differential for the Energy Savings Mode.
Maintenance Features:
- Condenser Coils: Must be cleaned periodically to prevent blockages and maintain proper airflow. Dirty coils can lead to reduced performance and trigger HA2 alarms.
- Air Filter: Replace the filter, or clean the fiberglass membrane, every 3 to 9 months depending on conditions. Blue filters face the cooling unit, white filters face away. Replacement filters can be purchased from CellarPro.
- Troubleshooting:
- Cooling Unit Runs Constantly: Check insulation, setpoint, condenser coils, fans, ducting (if applicable), and ensure not in Energy-Saver mode. Increase cool air supply to the hot side.
- Cooling Unit Won't Turn On: Check for the 3-minute startup delay.
- HA2 Alarm (Condenser temperature too high, above 140°F):
- Check if the hot-side fan is operating and if fan blades spin freely.
- Confirm proper installation: hot side completely separated from cellar, cold side completely captured.
- Check for appropriate ventilation at the rear of the unit; space should not be too small or restricted.
- Check for obstructions to intake and exhaust.
- If ducted, ensure auxiliary fan is operating and ducting is 6" diameter without reducers.
- If recessed, separate exhaust from intake with an insulated board.
- Remove restrictive grills/vent covers.
- If the problem persists, contact CellarPro with pictures of the installation.
- P1, P3 Alarm (Probe Failure): Call CellarPro.
- HA Alarm (Cellar temperature too warm, above 70°F for >1 hour): Check seals, if door was left open, lower ambient temperatures.
- LA Alarm (Cellar temperature too cold, below 45°F): Raise ambient temperature, ensure cold air discharge has sufficient clearance, raise Minimum Set Point.
- LA2 Alarm (Condenser coils temperature too cold): Call CellarPro.
- Cooling Unit Is Dripping: Raise Minimum Set Point to 58 degrees or above. Check seals, especially at the door(s). Ensure ducting is tight and well-sealed. Confirm unit is tilted slightly to the rear. If using a drain line, ensure it has a properly set up condensate trap.
Warranty:
- 1800 QTL / QT / XT / XTS: Five years from original delivery, covering all parts and labor for defects in materials or workmanship.
- 1800XTSx: Five years for the internal compressor, and two years for all other parts and labor for defects in materials or workmanship.
- CellarPro will repair or replace the original unit with a new or refurbished one. The original unit must be returned.
- Service must be performed by a designated repair center. Purchaser is responsible for shipping costs and removal/reinstallation.
- Warranty applies only to units purchased from the factory or an authorized dealer. It does not cover damage from negligence, commercial use, accident, improper use, maintenance, installation, service, or repair.
- CellarPro is not responsible for consequential or incidental damages.
- Contact CellarPro at 1.877.726.8496 for parts/service or to find a repair facility.