BIO X6 User Manual v. 1.0 112
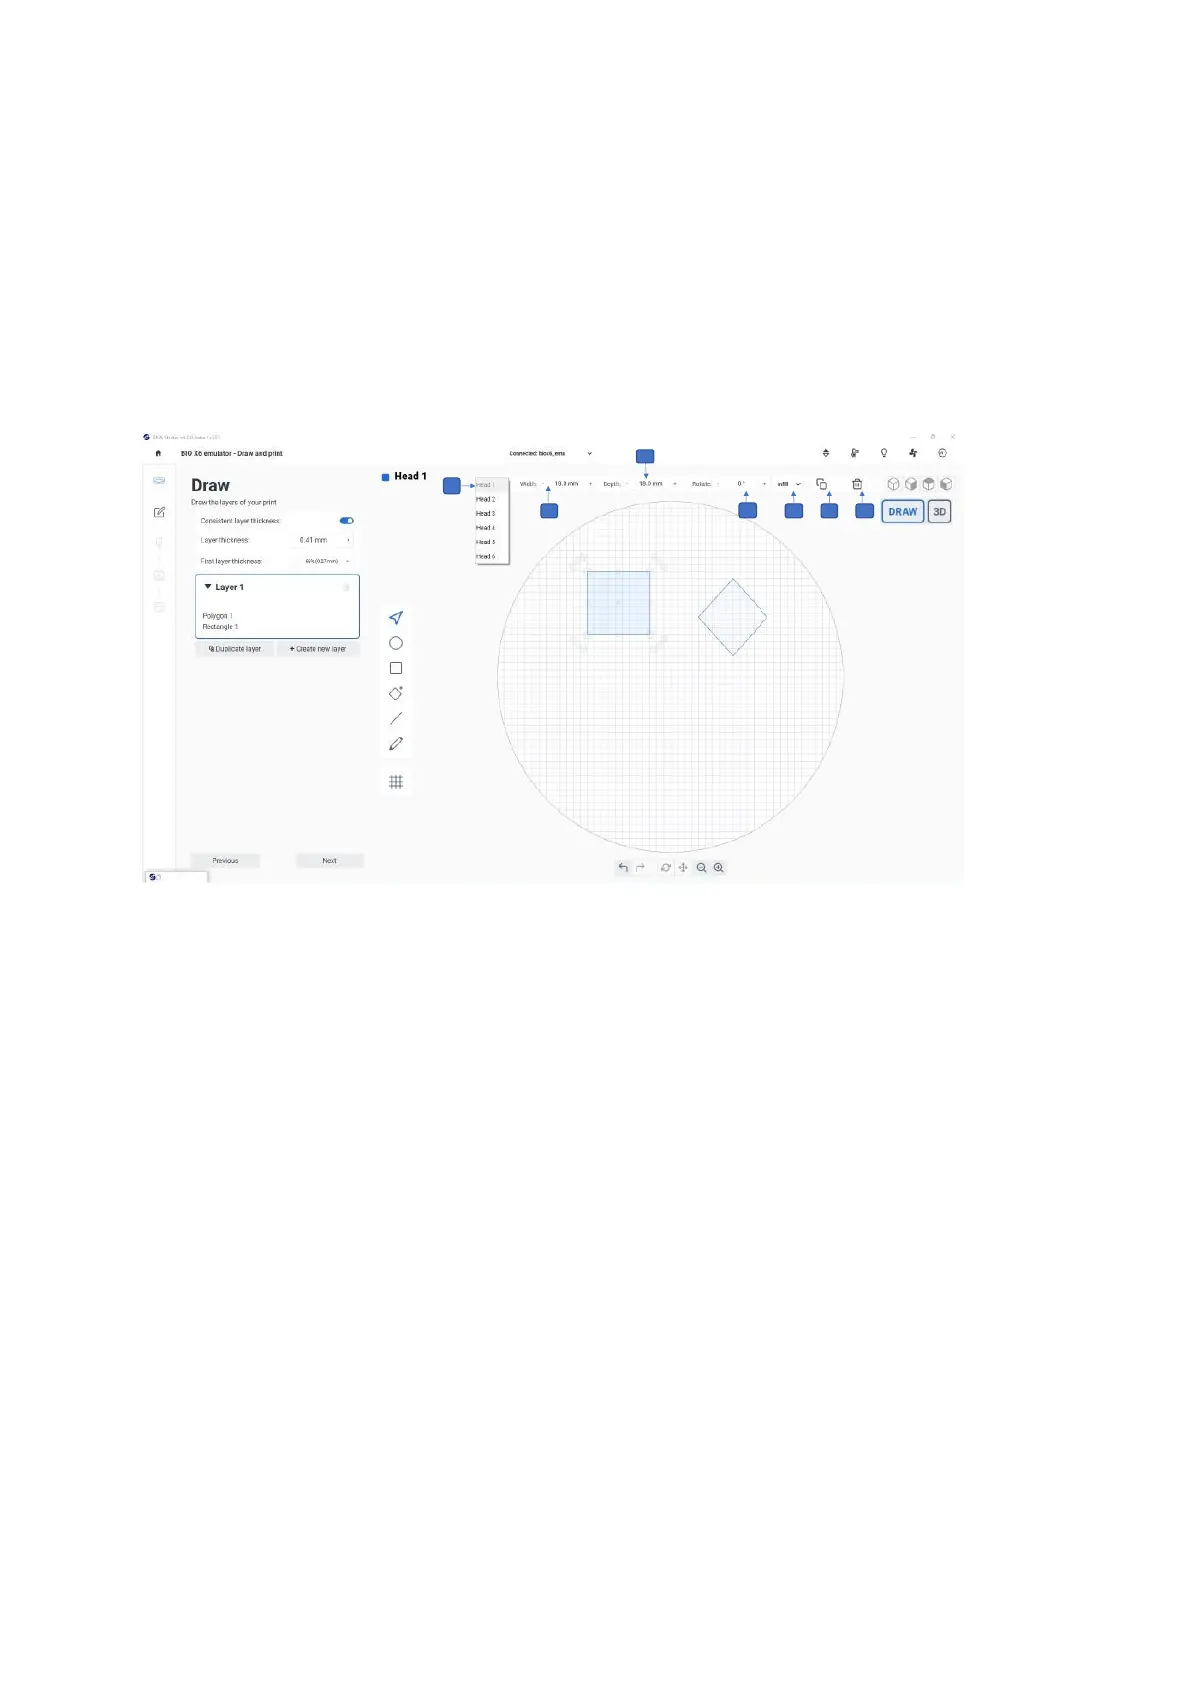
6.2.3 Shape Parameters bar
The shape parameter bar on the top of the screen offers different settings for existing
shapes. Use this bar to assign a printhead to the current layer and to adjust the width and
depth of the selected shape. You can also add infill and rotate, copy, or delete a shape.
Note: Except for the Head option, these tool bar options are only available when a shape
has been selected using the Selector tool.
Figure 84 Shape Parameters bar
1. Head: Tap to select the printhead you want to use to print the shape.
2. Width: Select the required shape with the selector tool. Tap + - to change the width of
the shape. Alternatively: Select the shape, hold the mouse pointer on the corner
square and drag the shape to update the value.
3. Depth: Select the required shape with the selector tool. Tap + - to change the depth
of the shape. Alternatively: Select the shape, hold the mouse pointer on the corner
square and drag the shape to update the value.
4. Rotate: Select the required shape with the selector tool. Tap + - to rotate the shape in
±180 direction. Alternatively: Select the shape, hold the mouse pointer on the corner
arrows and drag the shape.
5. Infill: Tap to apply patterns and density to the shape (see screenshot below).
 Loading...