SKU 32418 Page 8For technical questions, please call 1-800-444-3353.
5. When testing is complete, remove Test Leads and store them and the meter in a
safe, dry location.
AC Voltage Measurements
Measure AC voltages up to 1,000 V.
1. Turn the Range Selector Switch to 1000 ACV.
Always start with the highest range if the voltage is unknown.
2. Follow the directions on the previous page under
DC Voltage Measurements
(except for the polarity directions, they are unnecessary with AC).
DC Current Measurements
Measure DC conductors carrying up to 500 mA (.5 A).
1. Turn the Range Selector Switch to the 500 DCmA position. Plug the red lead
into the + Jack. Plug the black lead into the -Com Jack.
Note: Testing current should ONLY be done in series, with the circuit con-
nected and current flowing.
3. Carefully connect the test leads to the circuit or the load being tested.
4. If the Amperage is less than 25 mA (.025 A), set the Range Selector Switch to
the next lower range until the meter pointer is mid-range on the scale.
5. When testing is complete, remove Test Leads and store them and the meter in a
safe, dry location.
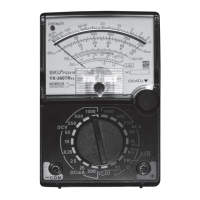
Resistance (Ohm) Measurements
Circuit resistance can be measured on ranges from meter reading times 1 to meter
reading times 1,000.
Note: Testing resistance should ONLY be done with the power to the circuit
disconnected. Test to make sure no voltage is present first. If voltage is
applied while testing, disconnect the tester immediately, otherwise the fuse
may blow and the tester may be damaged-see
Fuse Replacement
under
Maintenance,
page 11.
1. Turn the Range Selector Switch to the Ohm testing position (between x1
ΩΩ
ΩΩ
Ω and
K
ΩΩ
ΩΩ
Ω) you will be measuring at.
2. Plug the red lead into the + Jack. Plug the black lead into the -Com Jack.
3. Short the Test Leads together. The meter should read “0” Ohms.
4. If the meter does not read “0” Ohms, the ohmmeter needs to be calibrated to
enable accurate measurements.
a. With the test leads held together, adjust the Ohm Zero Adjust Knob until the
meter’s pointer aligns on “0”.
b. If the pointer can’t align with zero, the batteries may need to be replaced-see
Battery Replacement
under
Maintenance
, page 10.