Page 7For technical questions, please call 1-888-866-5797.Item 40211
SAFETYOPERATIONMAINTENANCE INSTALLATION
Installation
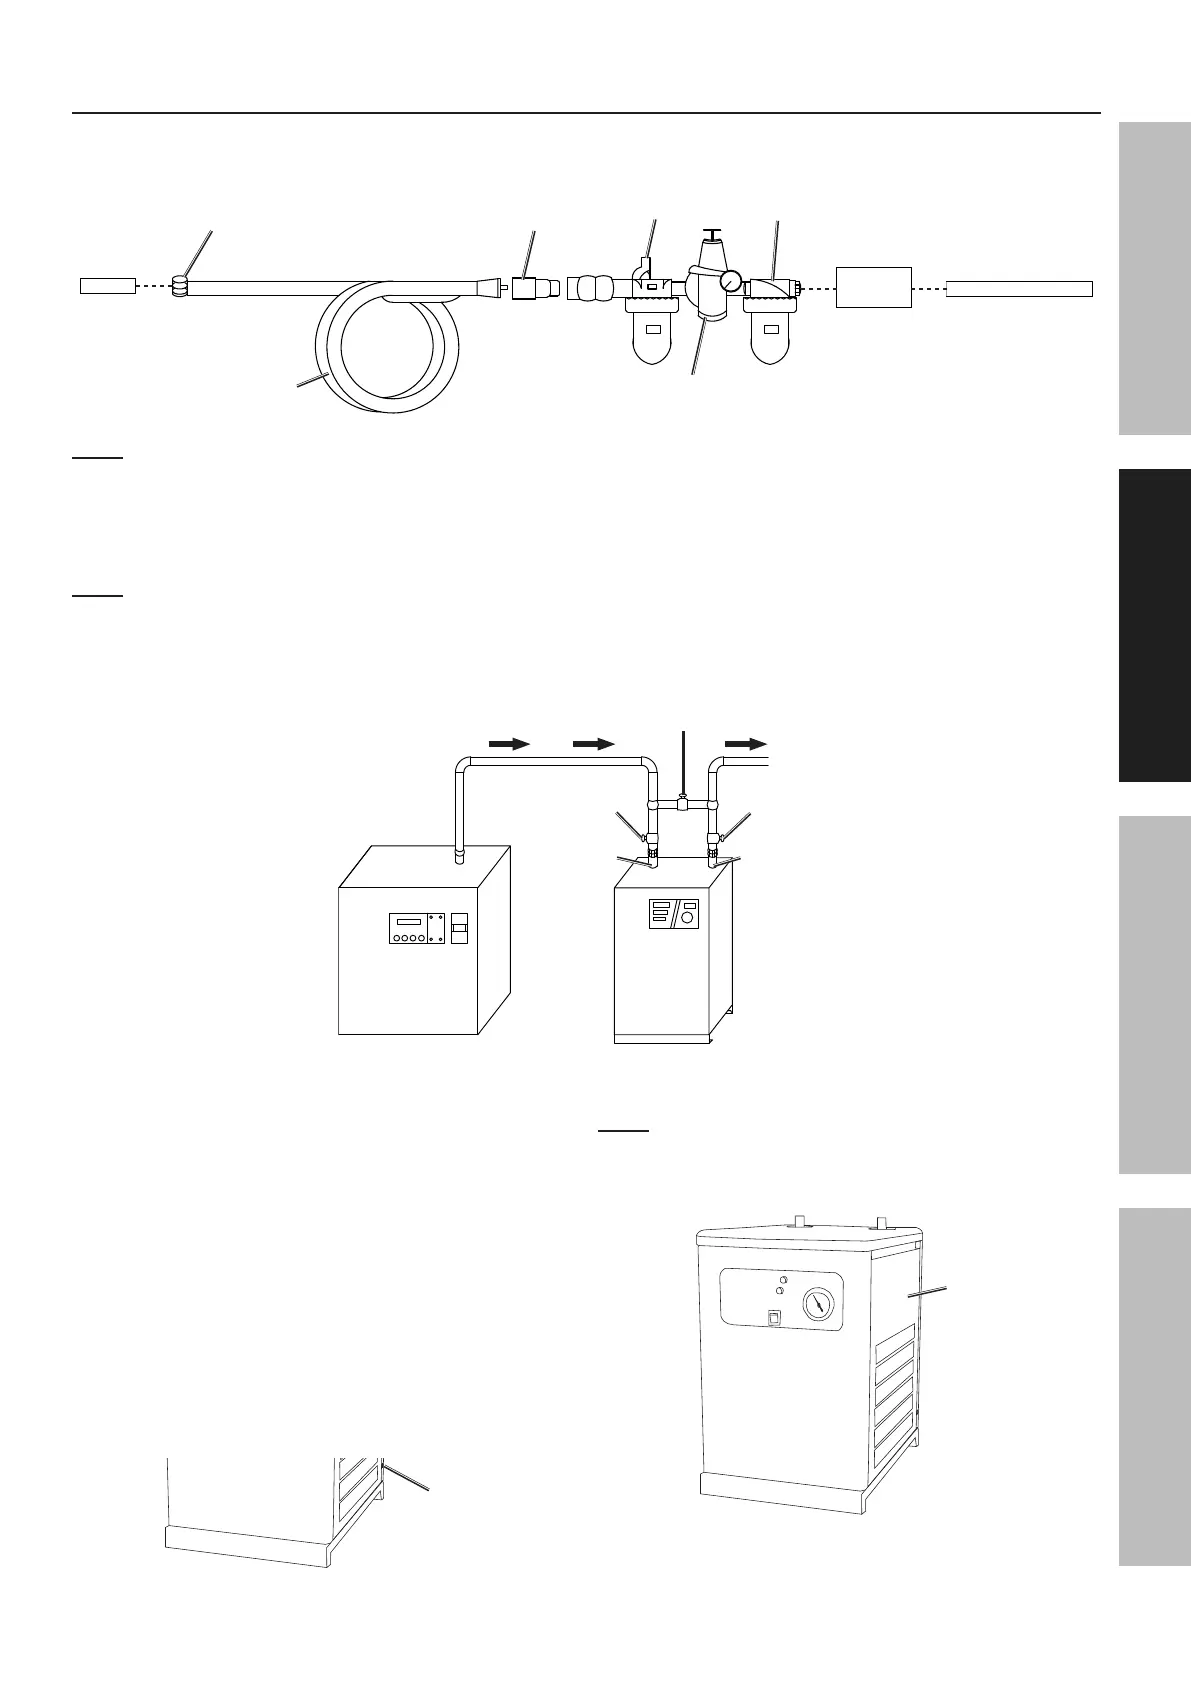
For best performance, an oiler, regulator, and inline filter should be incorporated as shown in the diagram
below. Hoses, couplers, oilers, regulators, and filters are all available at Harbor Freight Tools.
TOOL
AIR
DRYER
COMPRESSOR
Hose
Line
Air
Hose
Oiler Filter
Regulator
Air
Valve
Note: It will be necessary to install valves and couplers (not included) from the compressor to the
Air Dryer (1/2" steel pipe-14 NPT) and from the Air Dryer (1/2" steel pipe-14 NPT) to the tool. Use
pipe thread seal tape or pipe dope for all connections. If you are not using an automatic oiler system,
before operation, add a few drops of pneumatic tool oil to the airline connection. Add a few drops
more after each four hours of continual use. Check the air connections for leaks before use.
Note: It is recommended that a bypass valve (not included) be added between the Air Inlet and Air Outlet
of the Air Dryer for applications when the Air Dryer is not needed as shown in the diagram below. The
shutoff valves (not included) must be plumbed below the horizontal piping containing the bypass valve.
The bypass and shutoff valves must be installed by a plumber or an authorized service technician.
Air Inlet
Air Outlet
Shutoff
Valve
Shutoff
Valve
Bypass
Valve
Compressor Air Dryer
1. Install the Air Dryer at least 2 feet from the wall on all
four sides. This will give the unit proper ventilation
and allow space for maintenance and repair.
2. Make sure the floor is level.
3. Do not expose the unit to rain or any moisture.
4. Install the unit out of direct sunlight and
away from any heat sources. Otherwise, the
cooling function of the unit will continually
run, eventually overheating the Air Dryer.
5. Position a small bucket to capture foul water
from the drain hose at the bottom of the unit.
Condensation water can be piped to a floor drain, if
available; be sure to follow local plumbing codes.
Drain
Front
6. Complete all plumbing as required.
Note: Electrical wiring must be done by a
professionally certified electrician.
7. Remove the Right Side Panel.
Right
Panel
Front
 Loading...