EasyManua.ls Logo

Central Pneumatic 42202 User Manual

Central Pneumatic 42202
40 pages
To Next Page IconTo Next Page
Page #1 background imageLoading...
Page #1 background image
Manual Revised 11h
Owners Manual & Safety Instructions
Save This Manual Keep this manual for the safety warnings and precautions, assembly,
operating, inspection, maintenance and cleaning procedures. Write the product’s serial number in the
back of the manual near the assembly diagram (or month and year of purchase if product has no number).
Keep this manual and the receipt in a safe and dry place for future reference. 17e
When unpacking, make sure that the product is intact
and undamaged. If any parts are missing or broken,
please call 1-888-866-5797 as soon as possible.
Copyright
©
2000 by Harbor Freight Tools
®
. All rights reserved.
No portion of this manual or any artwork contained herein may be reproduced in
any shape or form without the express written consent of Harbor Freight Tools.
Diagrams within this manual may not be drawn proportionally. Due to continuing
improvements, actual product may differ slightly from the product described herein.
Tools required for assembly an d se rv ic e may n ot b e in cl uded.
Read this material before using this product.
Failure to do so can result in serious injury.
SAVE THIS MANUAL.
Visit our website at: http://www.harborfreight.com
Email our technical support at: productsupport@harborfreight.com
Questions and Answers:

Central Pneumatic 42202 Specifications

General IconGeneral
BrandCentral Pneumatic
Model42202
CategoryUltrasonic Jewelry Cleaner
LanguageEnglish

Summary

Safety Alert Symbol and Signal Words

DANGER

Indicates a hazardous situation resulting in death or serious injury if not avoided.

WARNING

Indicates a hazardous situation resulting in death or serious injury if not avoided.

CAUTION

Indicates a hazardous situation resulting in minor or moderate injury if not avoided.

NOTICE

Used to address practices not related to personal injury.

CAUTION without Safety Alert Symbol

Used to address practices not related to personal injury.

Important Safety Instructions

General Safety

Basic precautions to reduce the risk of injury to persons when using the tool.

Work Area Safety

Guidelines for maintaining a safe and well-lit work environment, keeping others away.

Personal Safety

Precautions for operator alertness, common sense, and avoiding impairment.

Tool Use and Care

Proper Tool Application

Use the correct tool for the job for better and safer operation.

Dress Code and Personal Attire

Avoid loose clothing, jewelry, and secure long hair to prevent entanglement.

Preventing Unintentional Starting

Ensure the trigger is off before connecting to air supply and avoid accidental engagement.

Maintaining Balance and Footing

Keep proper footing and balance at all times for better tool control.

Required Safety Equipment

Use dust mask, non-skid safety shoes, and hard hat as applicable.

Eye Protection

Always wear ANSI-approved safety goggles.

Hearing Protection

Always wear hearing protection due to high noise levels.

Service and Air Source Guidelines

Qualified Service Personnel

Tool service must be performed only by qualified repair personnel.

Authorized Replacement Parts

Use only identical replacement parts for servicing and repairs.

Safe Air Source Connection

Never connect to air exceeding 200 psi. Use clean, dry, regulated compressed air.

Prohibited Air Sources

Never use oxygen, carbon dioxide, or combustible gases as an air source.

Symbols and Specific Safety Instructions

Symbol Definitions

Explains various safety symbols and their associated meanings.

Attachment Safety

Attach all accessories properly to the tool before connecting the air supply.

Silicosis and Aluminum Oxide Warnings

Respiratory Hazard Warning

Crystalline silica exposure can cause serious or fatal respiratory disease.

NIOSH Silica Exposure Recommendations

Measures to reduce crystalline silica exposure and prevent silicosis.

Vibration Precautions

Pre-Use Medical Examination

Regular users should have medical check-ups for vibration-related issues.

Smoking During Use

Do not smoke during use as nicotine reduces blood supply to hands.

Protective Gloves

Wear suitable gloves to reduce vibration effects on the user.

Tool Vibration Levels

Use tools with the lowest vibration when a choice is available.

Vibration-Free Periods

Include vibration-free periods each day of work to minimize exposure.

Grip Technique

Grip tool as lightly as possible while maintaining safe control.

Tool Maintenance for Vibration

Maintain tool as explained to reduce vibration. Stop if abnormal vibration occurs.

General Precautionary Disclaimer

Manual cannot cover all conditions; operator must use common sense and caution.

Functional Description

Specifications

Lists technical specifications like compressor requirements, air inlet, and capacity.

Components and Controls

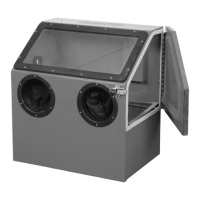
Identifies the main parts and operational controls of the blast cabinet.

Initial Tool Set Up and Assembly

Unpacking Instructions

Check product for intactness and damage upon unpacking; contact support if issues.

Air Supply Requirements

Use only clean, dry, regulated compressed air to power the tool.

Operating Instructions

Tool Set Up Procedures

Steps for preparing the blast cabinet and blast gun for operation.

Work Piece and Work Area Preparation

Designate a clean, well-lit work area and set up the cabinet.

General Operating Guidelines

Instructions for safe and effective use of the blast cabinet and gun.

User Maintenance Instructions

Cleaning and Maintenance Steps

Procedures for cleaning and maintaining the tool.

Changing Blasting Medium

How to clean out or change the abrasive medium in the hopper.

Blast Gun Maintenance

Steps for cleaning the blast gun after each use.

Daily Air Supply Maintenance

Routine maintenance of the air supply system for safe operation.

Troubleshooting Guide

Blast Cabinet Parts List & Assembly Diagram

Blast Gun Parts List & Parts Diagram

Limited 90 Day Warranty