Page 8 For technical questions, please call 1-888-866-5797. Item 68293
9. If the tool will not be used at this time, turn off
and detach the air supply, safely discharge
any residual air pressure, and release
the throttle and/or turn the switch to its off
position to prevent accidental operation.
Note: Residual air pressure should not be present
after the tool is disconnected from the air supply.
However, it is a good safety measure to attempt to
discharge the tool in a safe fashion after disconnecting
to ensure that the tool is disconnected and unpowered.
Operating Instructions
Read the ENTIRE IMPORTANT
SAFETY INFORMATION section at the
beginning of this manual including
all text under subheadings therein
before set up or use of this product.
Inspect tool before use, looking
for damaged, loose, and missing
parts. If any problems are found,
do not use tool until repaired.
Tool Set Up
TO PREVENT SERIOUS INJURY FROM
ACCIDENTAL OPERATION:
Turn off the tool, detach the air supply, safely
discharge any residual air pressure in the tool,
and release the throttle and/or turn the switch to
its off position before performing any inspection,
maintenance, or cleaning procedures.
TO PREVENT SERIOUS INJURY:
Do not adjust or tamper with any control or
component in a way not specifically explained within
this manual. Improper adjustment can result in tool
failure or other serious hazards.
Work Piece and
Work Area Set Up
1. Designate a work area that is clean and well-lit.
The work area must not allow access by children
or pets to prevent distraction and injury.
2. Route the air hose along a safe route to reach
the work area without creating a tripping hazard
or exposing the air hose to possible damage.
The air hose must be long enough to reach
the work area with enough extra length to
allow free movement while working.
3. Secure loose workpieces using a vise or clamps
(not included) to prevent movement while working.
4. There must not be hazardous objects (such
as utility lines or foreign objects) nearby that
will present a hazard while working.
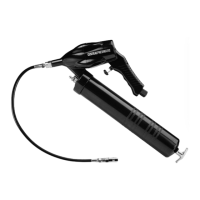
Loading Grease Gun
1. There are three different ways to
load the Grease Gun.
2. Cartridge Loading:
a. Remove the Container Tube (1) from the
Head (3) and draw back Plunger Handle (38).
b. Insert the open end of grease
cartridge into Container Tube.
c. Remove seal/pull-tab from other end of cartridge
and tightly reattach Container Tube to Head.
d. Press Plunger Release Tab (39). Release
Plunger rod and pull down Plunger Handle.
3. Pump Filling:
a. Draw back Plunger Handle completely.
b. Insert plug into the filler pump socket. Verify
socket is fastened securely to plug.
c. Operate Grease Gun from filler pump.
d. Disconnect Grease Gun from filler pump.
e. Press Plunger Release Valve and
pull down Plunger Handle.
4. Bulk Filling:
a. Remove Container Tube from Grease Gun Head.
b. Draw back Plunger Handle completely and
bulk fill grease into empty Container Tube.
c. Wipe off any excess grease on
outside of Container Tube.
d. Re-attach Container Tube to gun head
and press the Plunger Release Valve. Pull
down Plunger Handle and begin using.