Do you have a question about the Central Pneumatic 91053 and is the answer not in the manual?
Crucial safety preamble instructing users to read all warnings and instructions before operating the tool.
Keep work areas free of clutter to prevent injuries.
Work in well-lit, dry areas away from flammable substances.
Ensure children are kept away from the work area and tool.
Store tools in a dry location, locked up and out of reach of children.
Use the tool only for its intended purpose and do not modify it.
Wear appropriate clothing and footwear to prevent entanglement in moving parts.
Maintain proper footing and balance; avoid reaching over machinery.
Always wear ANSI-approved safety goggles and hearing protection.
Keep tools clean, lubricated, and inspect for damage.
Disconnect air supply before servicing or when not in use.
Ensure all adjustment tools are removed before connecting to air.
Keep trigger in Off position and do not carry with finger on trigger.
Remain alert and use common sense while operating the tool.
Inspect parts for damage or misalignment before use.
Avoid body contact with grounded surfaces to prevent electric shock.
Use only identical replacement parts and approved accessories.
Avoid operation if impaired by alcohol, drugs, or medication.
Use the correct extension cord size for the compressor to prevent overheating.
Perform maintenance as outlined; service by qualified technician.
Use only compressed air as a power source, not combustible gas.
Avoid unintentional firing by not depressing trigger/safety during loading.
Always disconnect air supply before loading or adjusting the nailer.
Fire fasteners into suitable surfaces; avoid ricochets and steep angles.
Avoid firing near edges to prevent workpiece splitting and flying debris.
Be aware of toxic wood preservatives like CCA and take precautions.
Be aware of hazardous chemicals in dust from construction activities.
Never operate the Nailer above the specified maximum air pressure.
Keep the tool away from your body to avoid injury from kickback.
Disconnect air supply and carry by handle to avoid accidental firing.
Avoid working alone for safety; have someone available for assistance.
Verify all parts are present upon unpacking.
Connect the tool using the quick connector and add oil to the airline if needed.
Set compressor air pressure between 75-125 PSI, do not exceed maximum.
Inspect air connections for leaks. Experiment with scrap material.
Re-check connections and disconnect tool after testing.
Ensure the tool is disconnected from the air supply before testing.
Remove all nails from the magazine before testing.
Test if the nailer fires only when the lower safety is depressed.
Verify that the trigger and lower safety mechanisms move smoothly.
Connect air supply and set regulator to 75-125 PSI.
Test firing without trigger; tool must not fire.
Test firing without workpiece contact; tool must not fire.
Test safe cycling and non-firing after trigger release.
Wear safety goggles during reloading and maintenance.
Ensure air hose is disconnected before loading nails.
Slide the tab back to open the magazine for loading.
Load nails into the magazine slot with the nailer pointing down.
Carefully press the latch while holding the tab to secure the magazine.
Connect the nailer to the air supply and set pressure.
Adjust exhaust cover to direct air away from the user.
Place nailer nose on workpiece and gently squeeze trigger. Avoid repeated firing.
Do not force the lower safety; allow tool recoil to handle the work.
Clean sawdust buildup from the lower safety to ensure normal operation.
Disconnect from air supply, empty nails, and test fire to ensure disconnection.
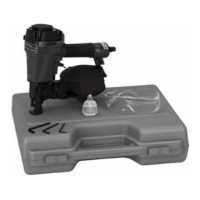
Store the nailer in its case in a clean, dry, safe location.
Disconnect the nailer from the air hose before any maintenance.
Ensure the magazine is completely empty of nails.
Test fire into scrap wood to confirm disconnection.
Use pliers to remove jammed nails, carefully handling the latch.
Reconnect the air supply after clearing the jam.
Test fire into scrap wood to confirm proper operation after jam clearing.
Disconnect air supply, remove nails, and store the nailer safely.
Inspect and lubricate the nailer regularly with proper tool oil.
Inspect and clean/replace the air supply filter as needed.
Clean the nailer with a damp cloth and dry it thoroughly.
Store the unit in a clean, dry place away from children.
Only qualified technicians should perform maintenance not covered in this manual.
| Brand | Central Pneumatic |
|---|---|
| Model | 91053 |
| Category | Nail Gun |
| Language | English |