CLEAHMI21 EXTERNAL HMI – PRODUCT DATA
EN0Z-0988GE51 R1018
2
HARDWARE INTERFACES
3
1
2
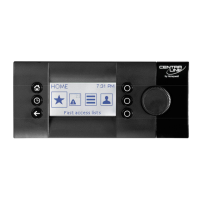
Fig. 1. CLEAHMI21 operating elements
Legend
1 LCD display
2 Six operating keys
3 Push & Turn button
The LCD display presents items for application-specific
system information, operator entries, and menus of functions.
It can show max. five lines of alphanumeric text with max. 20
characters per line.
The display's backlight is switched ON once an operating key
or the push & turn button is pressed, and switched OFF if no
operating key or button is used for 2 minutes.
The six operating keys consist of three fixed-function keys
(left) and three soft keys (right).
The push & turn button is used to navigate through menus
and lists; to highlight items (menu, list, option, value,
command symbol), and to adjust options (ON, OFF, etc.) and
values (temperature in °C, etc.).
MOUNTING
See also CLEAHMI21 External HMI – Mounting Instructions
(MU1Z-0988GE51) for details.
Cabling
4 4
3
1 2
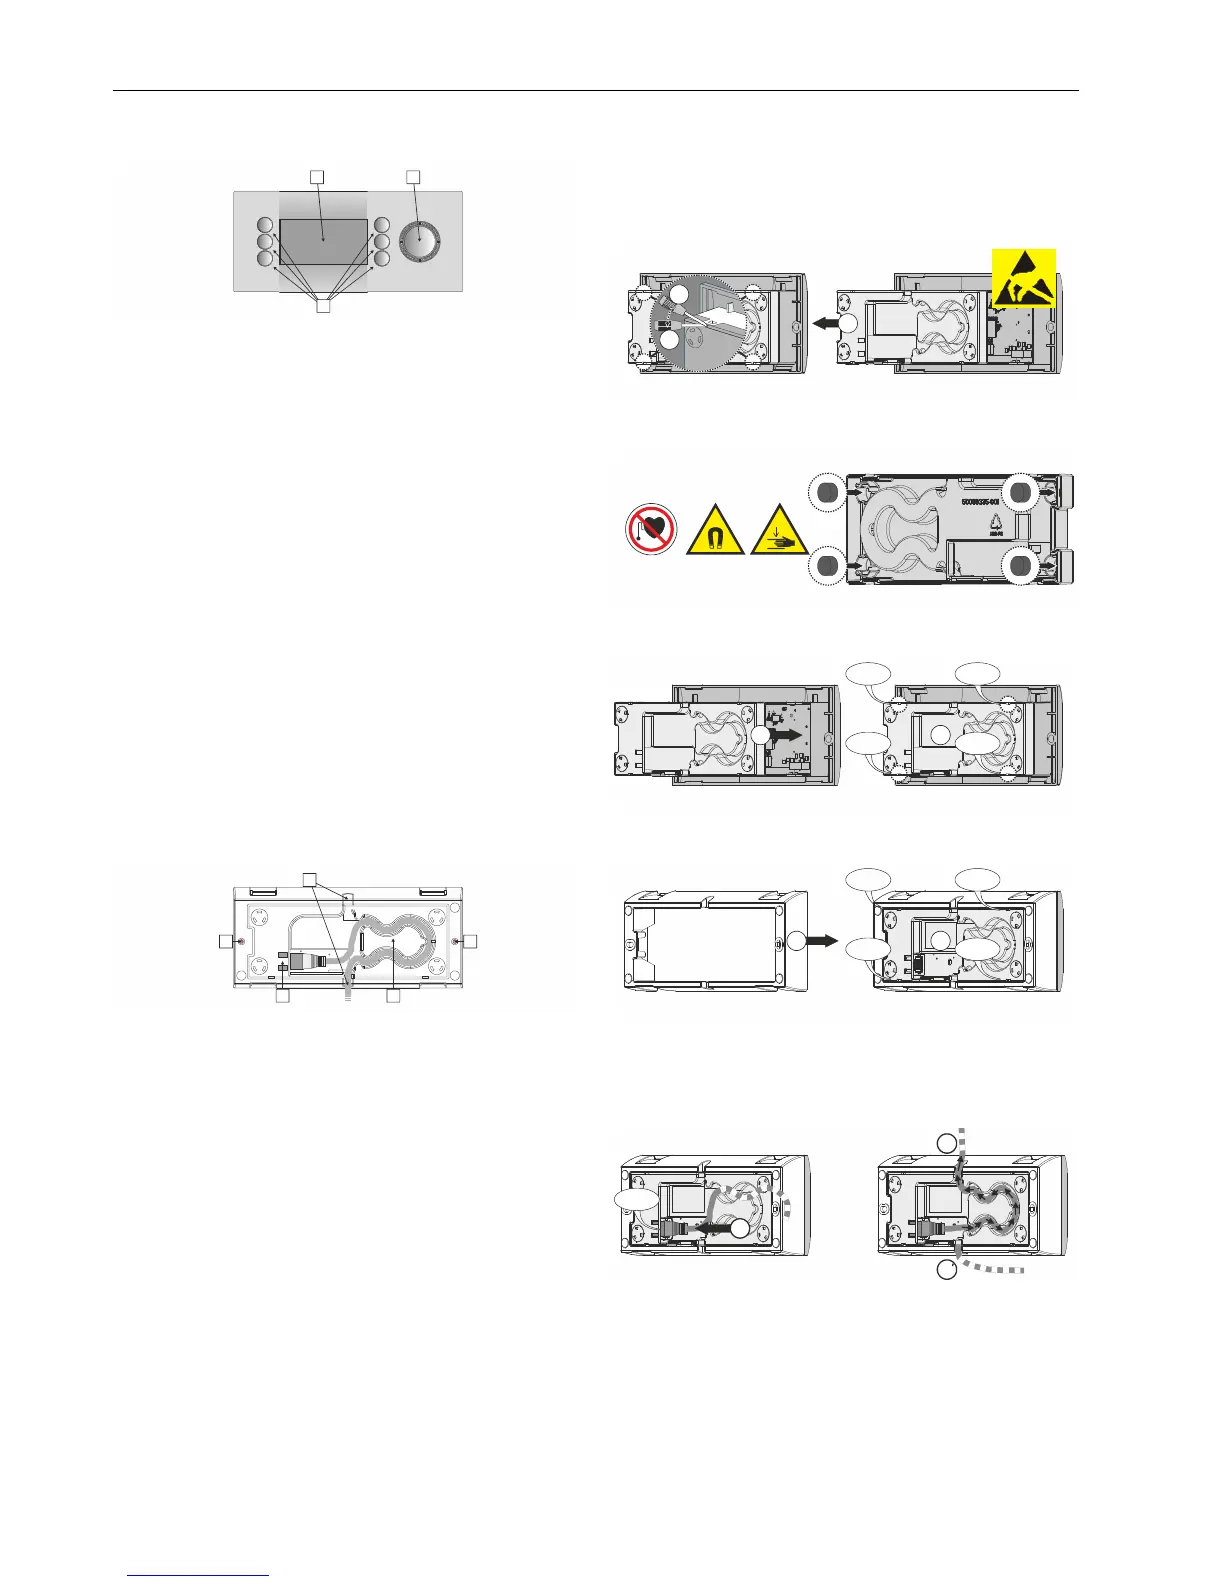
Fig. 2. Rear view of CLEAHMI21, with connector cable
Legend
1 RJ45 socket for connection cable (see also WARNING
in section "Electrical Data" on pg. 4)
2 Cable guide for strain relief
3 Cable outlets
4 Screw holes (for mounting into panel doors)
Magnetic Mounting onto Metal Surfaces
For magnetic mounting, proceed as follows:
1. Remove the cover (see Fig. 3). Observe precautions
for handling electrostatic sensitive devices so as not to
damage the open printed wiring assembly.
C
A
B
Fig. 3. Removing cover
2. Insert the four magnets (incl. in delivery) (see Fig. 4).
Fig. 4. Inserting magnets into cover
3. Click the cover back into place (see Fig. 5).
A B
CLICK!
CLICK!
CLICK!
CLICK!
Fig. 5. Clicking cover back into place
4. Click the sub-base into place (see Fig. 6).
A
CLICK!
CLICK!
CLICK!
CLICK!
B
Fig. 6. Clicking sub-base into place
5. Plug the connection cable into the RJ45 socket and
loop through the cable guide for strain relief (see Fig.
7). The cable can exit the unit either through the upper
(B) or lower (B') outlet.
A
CLICK!
B
B
Fig. 7. Plugging cable and looping through guide
6. The unit can then be conveniently attached to any
metal surface (see Fig. 8).
 Loading...