Do you have a question about the Challenger 9300M and is the answer not in the manual?
Lists standard features like Digital Radio Controls, Safe Finish Photosystem, and Alternating Action Operation.
Lists optional features such as a Keyless Entry System.
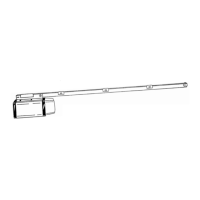
Details the process of assembling the garage door opener unit.
Instructions for mounting the front bracket to the header above the door.
Instructions for mounting the front bracket for one-piece doors without track.
Instructions for raising the Tee Rail and aligning it with the front bracket.
Instructions for positioning the power unit on a ladder for sectional doors.
Instructions for positioning the power unit for one-piece doors without track.
Guidance on mounting the power head unit to the ceiling joists.
Instructions to tighten the rail/wall mounting bracket connection.
Aligning the opener tracks with the door's center line.
Instructions for installing the bracket onto the garage door.
How to connect the door arm to the trolley assembly.
Instructions for attaching the door arm to the door bracket.
Specific instructions for connecting the door arm for one-piece doors.
Explains how to use the manual release disconnect for power failures.
Instructions for connecting the electrical power supply to the opener.
Instructions for installing a light bulb in the opener.
Step-by-step guide for installing the standard wall push button.
Information about the remote control radio system and its features.
Instructions on how to reset and program the transmitter codes.
Details the express coding method for multiple transmitter buttons.
Guide to teaching the opener to recognize the transmitter code.
Instructions for programming multiple operators with a single transmitter.
Guidance on mounting the transmitter, e.g., on a sun visor.
Instructions for replacing the batteries in the transmitter.
Steps to check the radio control operation after programming.
Detailed steps for installing the Safe Finish Photosystem accessory.
How to mark the correct mounting positions for the photosystem on the door jambs.
Instructions on mounting the "L" brackets for the photosystem units.
Steps to connect the transmitter and receiver wiring.
Final steps to attach the photosystem units to the brackets.
A checklist to verify all steps are completed before powering on.
Instructions on how to safely turn on power to the opener.
Explains how the opener responds to different button presses.
How to adjust the open limit stops for proper door travel.
Adjusting the force settings for opening and closing cycles.
How to set the close limit for the trolley position.
How to adjust the obstruction sensing feature for closing.
Procedure to test the obstruction sensing feature with a test object.
Adjusting the automatic mechanical locking system for the closed position.
Aligning and testing the Safe Finish Photosystem for proper function.
Testing the photoelectric sensor's ability to detect obstructions.
A diagram illustrating the electrical wiring connections for the opener.
A guide to diagnose and resolve common problems using LED indicators.
| Type | Chain Drive |
|---|---|
| Horsepower | 1/2 HP |
| Voltage | 120V |
| Drive Type | Chain |
| Security | Rolling Code |