EasyManua.ls Logo

Chamberlain 3500 - 1/2HP Series User Manual

Chamberlain 3500 - 1/2HP Series
39 pages
To Next Page IconTo Next Page
Page #1 background imageLoading...
Page #1 background image
Garage Door Opener
Owner’s Manual
For Resident Use Only
Series 5100 - 1/2HP
(Includes Models 7200, 2610-437 & 2002012)
Series 4100 - 1/2 HP
(Includes Model 710C-2)
Series 3100 - 1/3HP
(Includes Models 2610-428
&2002011)
Series 3500 - 1/2HP
(Includes Model 2610 - 446)
Series 2100 - 1/3HP
Please read this manual and the enclosd safety materials carefully!
Fasten the manual near the garage door after installation.
The door WILL NOT CLOSE unless the Protector System® is connected an
properly aligned.
Periodic checks of the opener are required to ensure safe operation.
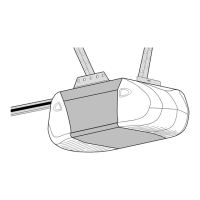
The model number label is located under the lens on the front end panel of
your opener.

Table of Contents

Question and Answer IconNeed help?

Do you have a question about the Chamberlain 3500 - 1/2HP Series and is the answer not in the manual?

Chamberlain 3500 - 1/2HP Series Specifications

General IconGeneral
TypeGarage Door Opener
Horsepower1/2 HP
Max Lift Power1/2 HP
Drive SystemChain Drive
Remote ControlYes
Remote Control TypeWireless
Battery BackupNo
Safety FeaturesSafety Sensors
Motor WarrantyLifetime
WarrantyLifetime Motor Warranty

Summary

Important Safety Alert Symbols

Hazard Warning Symbols

Explains symbols for mechanical, electrical hazards, and equipment damage.

Installation Preparation and Safety

Assembly Step 1: T-rail and Pulley Bracket

Assembly Step 2: Trolley Installation

Assembly Step 3: Fastening T-rail to Opener

Assembly Step 4: Chain, Cable, and Sprocket Cover

Assembly Step 5: Chain and Cable Tension

Important Installation Instructions

General Installation Safety Warnings

Critical safety guidelines to follow during the installation process.

Installation Step 1: Header Bracket Location

Sectional Door Bracket Placement

Determining the header bracket position for sectional doors.

Installation Step 2: Install the Header Bracket

Installation Step 3: Attach T-rail to Header Bracket

Installation Step 4: Position the Opener

Installation Step 5: Hang the Opener

Installation Step 6: Install the Door Control

Installation Step 9: Electrical Requirements

Proper Electrical Connection and Grounding

Information on power connection, grounding, and outlet compatibility.

The Protector System® Installation

Safety Reversing Sensor Function and Mounting

Explains the sensor's role and guides on its mounting and alignment.

Installation Step 10: Safety Reversing Sensor

Assembling and Mounting Sensor Brackets

Instructions for assembling and attaching the sensor mounting brackets.

Sensor Wiring and Alignment Checks

Installation Step 11: Fasten Door Bracket

One-Piece Door Bracket Installation

Installation Step 12: Connect Door Arm to Trolley

One-Piece Doors: Door Arm Assembly and Adjustment

Adjustment Step 1: Adjust UP and DOWN Limits

Setting Door Travel Limits

Adjusting the opener to stop the door at the fully open and closed positions.

Adjustment Step 2: Adjust the Force

Setting Opening and Closing Force

Adjusting the force controls for safe and effective door operation.

Adjustment Step 3: Test The Protector System®

Verifying Protector System Functionality

Testing the Protector System® to ensure it operates correctly.

Adjustment Step 4: Test the Safety Reverse System

Safety Reverse System Test Procedure

Performing the critical test to ensure the door reverses upon obstruction.

Opener Care, Maintenance, and Safety

Crucial Safety Guidelines and Care

Essential safety instructions and advice for maintaining the opener.

Receiver and Remote Control Programming

Troubleshooting Common Problems

Opener Not Responding and Door Movement Issues

Solutions for opener malfunctions and problems with door movement.

Troubleshooting Continued

Reversing, Straining, and Noise Issues

Diagnosing and resolving issues with unexpected reversals, strain, or noise.

Related product manuals