EasyManua.ls Logo

Chamberlain 1120E-1/2HP User Manual

Chamberlain 1120E-1/2HP
64 pages
To Next Page IconTo Next Page
Page #1 background imageLoading...
Page #1 background image
CONTENTS PAGE
Safety Rules ................................................................2
Features of Your Opener.............................................3
Specifications ..............................................................3
You'll Need Tools.........................................................3
Completed Installation Illustration ..........................4 - 5
Carton Inventory..........................................................6
Hardware Inventory .....................................................7
Assembly Section.................................................8 - 12
Installation Section .............................................13 - 22
Travel Limit Adjustments ...........................................23
Force Adjustments.....................................................24
CONTENTS PAGE
Test the Safety Reverse System.................................25
The Protector System™..............................................26
Receiver & Remote Control Programming..................26
Operation of Your Opener...........................................27
Accessories.................................................................27
Care & Maintenance of Your Opener..........................28
Having a Problem? ..............................................29 - 30
Repair Parts, Opener Assembly..................................31
How To Order Repair Parts.........................................32
Warranty......................................................................32
Garage Door Opener
Owners Manual
FOR RESIDENTIAL USE ONLY
The Chamberlain Group, Inc.
845 Larch Avenue
Elmhurst, Illinois 60126-1196
© ©
Model 1120E – 1/2HP
Model 1110E – 1/2HP
Please read this manual and the enclosed safety materials carefully!
Fasten the manual near the garage door after installation.
Periodic checks of the opener are required to ensure safe operation.
The model number label is located on the front panel of your opener.
Question and Answer IconNeed help?

Do you have a question about the Chamberlain 1120E-1/2HP and is the answer not in the manual?

Chamberlain 1120E-1/2HP Specifications

General IconGeneral
TypeChain Drive
Horsepower1/2 HP
Remote ControlYes
Speed7 inches per second
SecurityRolling code technology
Battery BackupNo
Motor WarrantyLifetime
Max Door Height7 ft
Safety FeaturesSafety sensors

Summary

Important Safety Rules

Door Operation Safety Precautions

Ensures safe operation by checking door balance, safety reverse system, force limits, control placement, and manual release procedures.

Personal, Electrical & Material Safety

Covers personal safety (clothing, entanglement, locks), electrical safety (wiring, grounding), and material safety (door reinforcement).

Opener Features and Specifications

Opener Features Overview

Details key features like opener lights, manual disconnect, safety system, and easy limit adjustment for user convenience.

Technical Specifications

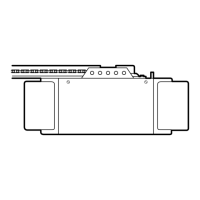
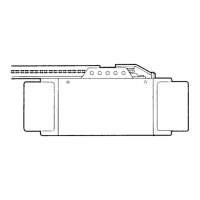
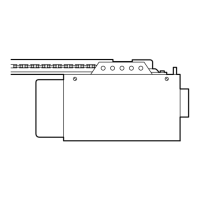
Provides essential technical details including motor, drive mechanism, safety features, and dimensions of the opener.

Installation Tools Required

Lists the necessary hand tools for assembling and installing the garage door opener.

Garage Door Installation Types

Sectional Door Installation Guide

Illustrates the setup for sectional garage doors, including header bracket and trolley placement.

One-Piece Door Installation Guide

Illustrates the setup for one-piece garage doors, including header bracket and trolley placement.

Gate Installation Types

Sliding Gate Installation

Diagram showing the installation of the opener on a sliding gate system.

Swinging Gate Installation

Diagram showing the installation of the opener on a swinging gate system.

Assembly Step 1: T-rail and Chain Pulley Bracket

Assemble T-rail Sections

Instructions for correctly joining the T-rail sections to ensure proper alignment and trolley movement.

Attach Chain Pulley Bracket

Guidance on securely fastening the chain pulley bracket to the front end of the T-rail.

Assembly Step 2: Install Trolley

Assembly Step 3: Fasten T-Rail to Opener

Assembly Step 4: Model 1110E - Install Chain & Sprocket Cover

Assembly Step 4: Model 1120E - Install Chain

Assembly Step 5: Tighten the Chain

Installation Step 1: Determine Header Bracket Location

Header Bracket Mounting Options

Guides header bracket placement for sectional and one-piece doors, considering clearance and door type.

One-Piece Door Installation: Header Bracket

Jamb Hardware Mounting for One-Piece Doors

Details for installing the header bracket using jamb hardware on one-piece doors.

Pivot Hardware Mounting for One-Piece Doors

Details for installing the header bracket using pivot hardware on one-piece doors.

Installation Step 2: Install Header Bracket

Mounting Header Bracket to Wall

Securely attach the header bracket to the wall using lag screws and pilot holes as per instructions.

Mounting Header Bracket to Ceiling

Securely attach the header bracket to the ceiling using lag screws and pilot holes as per instructions.

Installation Step 3: Attach T-rail to Header Bracket

Installation Step 4: Position the Opener

Installation Step 5: Hang the Opener

Installation Step 6: Attach Manual Release Rope & Handle

Installation Step 7: Install Door Control

Wiring Instructions & Control Operation

Connect accessories and understand the operation of the door control panel, including its features.

Installation Step 8: Install Lights and Lenses

Installation Step 9: Electrical Requirements

Permanent Wiring Connection

Detailed steps for making a permanent electrical connection to the opener, adhering to local codes.

Installation Step 10: Fasten Door Bracket and Plate

Installation Step 11: Connect Door Arm to Trolley

One-Piece Doors: Door Arm Assembly and Limits

Open Door Limit Adjustment

Procedure to adjust the UP limit screw for one-piece doors to set the fully open position.

Closed Door Limit Adjustment

Procedure to adjust the DOWN limit screw for one-piece doors to set the fully closed position.

Adjustment Step 1: Adjust UP and DOWN Limits

Incomplete Opening Adjustment

Increase UP travel limit if the door does not open completely or at least 1.5m.

Reversed Closing Adjustment

Decrease DOWN travel limit if the opener reverses when the door is fully closed.

Adjustment Step 2: Adjust Force

Testing DOWN (Close) Force

Check if the door reverses halfway through closing; adjust DOWN force if it doesn't reverse normally.

Testing UP (Open) Force

Check if the door stops halfway through opening; adjust UP force if it doesn't stop easily.

Adjustment Step 3: Test Safety Reverse System

The Protector System™

Receiver and Remote Control Programming

Operation of Your Opener

Manual Disconnect Operation

Procedure to manually open or close the door using the red release handle.

Lockout Position Explained

Engages the lockout feature to prevent automatic trolley reconnection for manual door control.

Available Opener Accessories

Care of the Opener

Critical Adjustments & Testing

Highlights the importance of checking and adjusting limit, force, and safety reverse system settings.

Safety Reverse System Criticality

Emphasizes that the safety reverse system is crucial for preventing severe injury or death from closing doors.

Maintenance of Your Opener

Scheduled Maintenance Tasks

Outlines monthly maintenance checks and biannual tasks like chain tension inspection.

Troubleshooting: Opener Issues

Opener Not Operating

Diagnoses and solves issues where the opener fails to respond to controls or the remote.

Door Not Opening Completely

Provides solutions for doors that do not open fully, involving force or limit adjustments.

Troubleshooting: Continued Issues

Door Reverses Unexplainedly

Addresses unexpected door reversals by checking for obstructions, balance, or setting issues.

Motor Hums But Won't Work

Troubleshoots openers that hum but do not operate, checking for locks or motor phase issues.

Repair Parts Information

Opener Assembly Parts List

A detailed list of all parts for the opener assembly, including part numbers and descriptions.

How to Order Repair Parts

Lift-Master Limited Warranty

Related product manuals