EasyManua.ls Logo

Chamberlain M150 1/2 HP User Manual

Chamberlain M150 1/2 HP
36 pages
To Next Page IconTo Next Page
Page #1 background imageLoading...
Page #1 background image
The Chamberlain Group, Inc.
A DUCHOSSOIS ENTERPRISE
845 Larch Avenue
Elmhurst, Illinois 60126-1196
For Residential Use Only
Garage Door Opener
Owners Manual
Model M150
1/2 HP
Complies with UL 325
regulations effective
January 1, 1993
®
Please read this manual and the enclosed safety materials carefully!
Fasten the manual near the garage door after installation.
The door WILL NOT CLOSE unless the Protector System
®
is connected and properly
aligned.
Periodic checks of the opener are required to ensure safe operation.
The model number label is located on the back of your opener.

Table of Contents

Question and Answer IconNeed help?

Do you have a question about the Chamberlain M150 1/2 HP and is the answer not in the manual?

Chamberlain M150 1/2 HP Specifications

General IconGeneral
BrandChamberlain
ModelM150 1/2 HP
CategoryGarage Door Opener
LanguageEnglish

Summary

Understanding Safety Alerts and Precautions

Safety Symbol Meanings

Describes WARNING and CAUTION symbols used in the manual for safety.

General Opener Safety Statement

States the opener's design and testing for safe operation.

Garage Door Safety and Hardware

Garage Door Balance Testing

Provides a procedure to test the garage door's balance and operation.

Included Hardware List

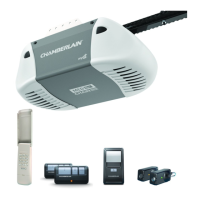
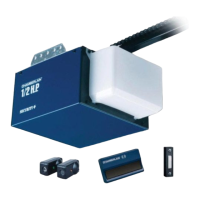
Lists all components included in the opener package.

Carton Inventory and Parts Identification

Opener Components Overview

Visually identifies key parts included in the opener packaging.

Installation Preparation and Door Types

Sectional Door Installation Overview

Illustrates initial setup considerations for sectional doors.

One-Piece Door Installation Overview

Illustrates initial setup considerations for one-piece doors.

Opener Assembly Procedures

Fastening Rail to Power Unit

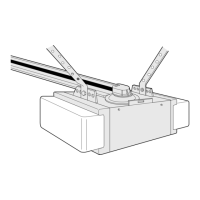
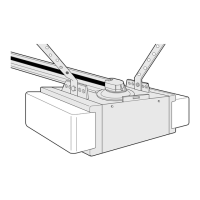
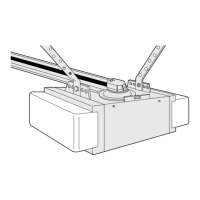
Details connecting the rail assembly to the opener's power unit.

Installing the Trolley

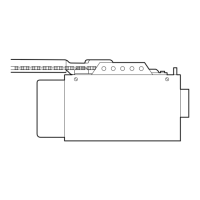
Describes attaching the trolley onto the rail assembly.

Opener Assembly and Installation Warnings

Attaching Rail Brackets

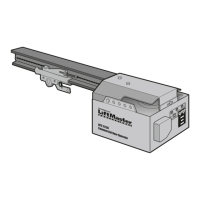
Explains how to attach brackets to the end of the rail.

Critical Installation Warnings

Lists essential safety instructions before proceeding with installation.

Installation: Header Bracket Location

Determining Header Bracket Location

Guides placement based on door type and ceiling clearance.

Sectional Door Header Bracket Placement

Illustrates header bracket placement for sectional doors.

One-Piece Door Header Bracket Placement

Header Bracket Height Calculation

Provides an example for calculating header bracket height.

Installation: Header Bracket Mounting

Fastening Bracket to Wall

Details wall mounting procedures for the header bracket.

Fastening Bracket to Ceiling

Details ceiling mounting procedures for the header bracket.

Installation: Rail Attachment

Connecting Rail to Header Bracket

Describes attaching the rail using a clevis pin and ring fastener.

The Protector System®: Safety Sensor

Safety Reversing Sensor Importance

Explains this is a required safety device for proper opener function.

Sensor Placement Guidelines

Details proper sensor placement for safety and functionality.

Installation: Safety Reversing Sensor Mounting

Garage Wall or Door Track Mounting

Provides procedures for mounting sensors on the wall or track.

Alternate Sensor Mounting Options

Shows alternative wall and floor mount configurations for sensors.

Sensor Wire Routing and Securing

Installation: Opener Positioning

Positioning for Sectional Door

Details opener positioning for sectional doors using a 2x4.

Positioning for One-Piece Door

Details opener positioning for one-piece doors.

Installation: Hanging the Opener

Mounting Opener to Structural Supports

Explains how to attach hanging brackets to supports.

Ceiling Mount Installation

Illustrates mounting the opener to finished ceilings.

Installation: Wiring and Door Control

Installing the Door Control

Guides locating and mounting the door control panel.

Connecting Door Control and Sensor Wires

Details wiring connections to the opener's terminal screws.

Installation: Electrical & Sensor Testing

Electrical Requirements

Discusses plug type, grounding, and permanent wiring options.

Aligning Safety Sensors

Explains how to align sensors for correct operation and indicator lights.

Installation: Lights and Manual Release

Installing Opener Lights and Lens

Describes bulb and lens installation for the opener's lights.

Attaching Manual Release Rope and Handle

Details connecting the manual release mechanism.

Installation: Sectional Door Bracket

Sectional Door Bracket Installation

Explains how to attach the door bracket to sectional doors.

One-Piece Door Bracket Installation

Installation: Door Arm Connection

Sectional Door Arm Connection

Describes connecting arm sections for sectional doors.

One-Piece Door Arm Assembly

One-Piece Door Travel Limit Adjustment

Explains pre-connection adjustments for travel limits on one-piece doors.

Adjustment: Travel Limits

Adjusting UP and DOWN Limits

Regulates the points at which the door stops when moving.

When and How to Adjust Limits

Provides guidance on adjusting limits based on door behavior.

Adjustment: Force Controls

Adjusting Door Forces

Regulates the power required to open and close the door.

Testing and Adjusting Forces

Explains how to test and adjust the force settings.

Adjustment: System Testing

Testing the Protector System

Verifies the proper function of the safety reversing sensor.

Testing the Safety Reverse System

Ensures the door reverses correctly upon obstruction.

Important Safety and Opener Care

Key Safety Guidelines

Summarizes critical safety rules for operating the opener.

Opener Maintenance Schedule

Outlines monthly and yearly maintenance tasks for the opener.

Opener Operation

Activating the Opener

Explains how to open/close the door using various controls.

Multi-Function Door Control Features

Describes push bar, light, and lock features of the control panel.

Receiver and Remote Programming

Adding Remote Controls

Provides steps to program new remote transmitters to the opener.

Programming Keyless Entry

Details instructions for programming the keyless entry system.

Troubleshooting Common Issues

Opener Not Operating

Addresses issues with the door control or remote not working.

Remote Control Range Issues

Explains causes and solutions for short remote control range.

Door Reverses or Stops Unexpectedly

Opener Motor Issues

Addresses problems like motor humming or failure to operate.

Repair Parts Identification

Rail Assembly Parts

Lists components related to the garage door opener rail assembly.

Installation Parts

Lists parts used during the installation process.

Power Unit Parts

Available Accessories

Accessory Overview

Lists various optional accessories for enhancing opener functionality.

Service and Warranty Information

Ordering Repair Parts

Provides instructions and information needed to order replacement parts.

One-Year Limited Warranty

Details the warranty coverage and terms for the garage door opener.

Related product manuals