EasyManua.ls Logo

Chamberlain 1280LMC-R 1/2 HP User Manual

Chamberlain 1280LMC-R 1/2 HP
72 pages
To Next Page IconTo Next Page
Page #1 background imageLoading...
Page #1 background image
GARAGE DOOR OPENER
Model 1280LMC-R
1/2 HP
For Residential Use Only
®
Owner’s Manual
Please read this manual and the enclosed safety materials carefully!
Fasten the manual near the garage door after installation.
The door WILL NOT CLOSE unless the Protector System
®
is connected and
properly aligned.
Periodic checks of the opener are required to ensure safe operation.
The model number label is located under the light lens on the left side
panel of your opener.

Table of Contents

Question and Answer IconNeed help?

Do you have a question about the Chamberlain 1280LMC-R 1/2 HP and is the answer not in the manual?

Chamberlain 1280LMC-R 1/2 HP Specifications

General IconGeneral
Horsepower1/2 HP
Drive TypeChain Drive
Remote ControlYes
Security+ 2.0Yes
Battery BackupNo
Max Door Height7 ft

Summary

Preparing Your Garage Door

Tools Needed

Essential tools for assembly and installation of the opener.

Planning

Carton Inventory

Assembly Step 1

Attach the T-Rail to the Motor Unit

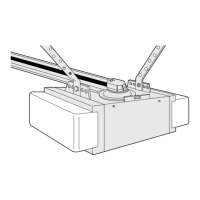
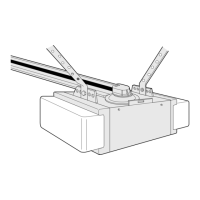
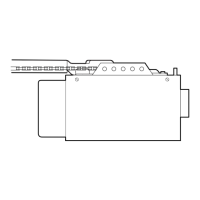
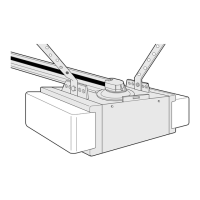
Connects the T-rail to the main motor unit assembly.

Assembly Step 2

Set the Belt Tension

Adjusts the belt tension for optimal garage door opener operation.

Assembly Step 3

Attach the Belt Cap Retainer

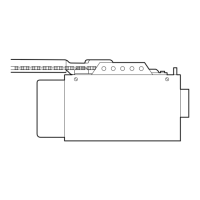
Secures the belt cap retainer over the motor unit sprocket.

Important Installation Instructions

Installation Step 1

Determine the Header Bracket Location

Locates and marks the correct position for the header bracket.

Installation Step 2

Install the Header Bracket

Attaches the header bracket to the wall or ceiling structure.

Installation Step 3

Attach the T-Rail to the Header Bracket

Connects the T-rail assembly to the installed header bracket.

Installation Step 4

Position the Opener

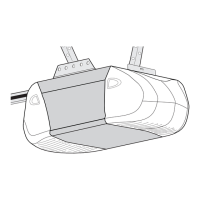
Places the opener unit at the correct height and position.

Installation Step 5

Hang the Opener

Secures the opener unit to the structural supports.

Installation Step 6

Install the Door Control

Mounts the wall-mounted door control panel and connects wiring.

Installation Step 7

Install the Lights and Lenses

Installs the light bulbs and lens covers for the opener unit.

Installation Step 8

Attach the Emergency Release Rope and Handle

Connects the emergency release handle and rope to the trolley.

Installation Step 9

Electrical Requirements

Details the necessary electrical connections and safety precautions.

Installation Step 10

Install The Protector System®

Installs the safety reversing sensor system for obstruction detection.

Installation Step 11

Fasten the Door Bracket

Attaches the door bracket to the garage door panel.

Installation Step 12

Connect Door Arm to Trolley

Joins the door arm sections to the trolley assembly.

Adjustment Step 1

Adjust the UP and DOWN Travel Limits

Sets the points where the door stops during open/close cycles.

Adjustment Step 2

Adjust the Force

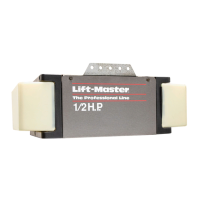
Regulates the power required to open and close the garage door.

Adjustment Step 3

Test the Safety Reversal System

Verifies the door reverses upon contact with an obstruction.

Adjustment Step 4

Test the Protector System®

Checks the functionality of the safety reversing sensors.

Operation

Important Safety Instructions

Key safety guidelines for operating the garage door opener.

Using Your Garage Door Opener

Explains basic operation with remote controls and wall button.

Using the Wall-Mounted Door Control

Details operation of the multi-function door control panel.

To Open the Door Manually

Procedures for manual door operation during power outages.

Care of Your Opener

Limit and Force Adjustments

Guidance on adjusting limits and force due to environmental changes.

Maintenance Schedule

Recommended monthly and yearly maintenance tasks for the opener.

The Remote Control Battery

Information on replacing the battery in the remote control.

Having a Problem?

Programming

To Add an Additional Hand-held Remote Control

Instructions for programming new remote controls to the opener.

To Erase All Codes From Motor Unit Memory

Procedure to remove all previously programmed remote codes.

To Add or Change a Keyless Entry PIN

Steps to program or modify the PIN for keyless entry access.

Repair Parts

Rail Assembly Parts

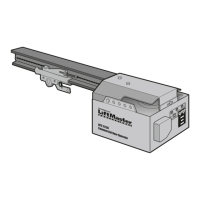
Lists parts associated with the rail assembly of the opener.

Installation Parts

Lists various parts used during the installation process.
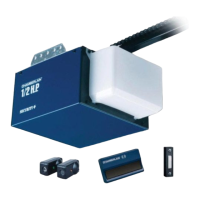
Motor Unit Assembly Parts

Accessories

Liftmaster Service Is On Call

How to Order Repair Parts

Liftmaster Garage Door Opener Five-Year Limited Warranty

Related product manuals