Do you have a question about the Chamberlain 4100 - 1/2 HP Series and is the answer not in the manual?
Lists essential hand tools required for assembly and installation.
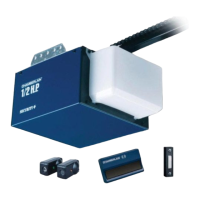
Details all parts included in the opener package for verification.
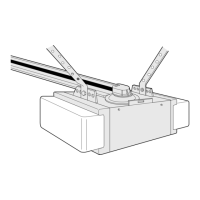
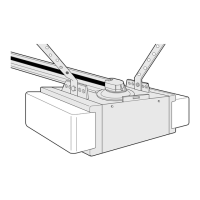
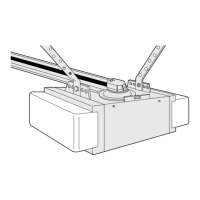
Connects the T-rail sections and attaches the cable pulley bracket.
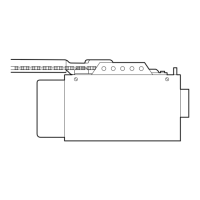
Installs the trolley onto the T-rail and secures the T-rail to the opener unit.
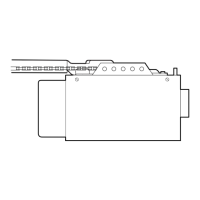
Attaches the chain/cable and the protective sprocket cover to the opener mechanism.
Adjusts the chain tension for proper operation and secures the connection.
Identifies the correct mounting position for the header bracket on the wall or ceiling.
Specific instructions for determining header bracket location for one-piece doors without tracks.
Details the process of securely fastening the header bracket to the garage structure.
Connects the assembled T-rail to the installed header bracket using provided hardware.
Guides on correctly positioning and securely hanging the opener unit.
Installs the wired door control button and the manual release rope/handle.
Covers installing light bulbs/lenses and connecting electrical power to the opener.
Secures the door bracket to the garage door itself, often requiring reinforcement.
Specific procedures for attaching the door bracket to one-piece garage doors.
Links the garage door arm to the opener's trolley mechanism.
Assembles the door arm sections and prepares for travel limit adjustments for one-piece doors.
Details the mounting and alignment of the safety reversing sensors for safe operation.
Regulates the points at which the door stops when moving up or down.
Sets the amount of power required to open and close the door for safe operation.
Verifies the functionality of the safety reversing sensor and reverse system.
Provides critical safety guidelines for operating and maintaining the garage door opener.
Outlines routine maintenance tasks and schedules for the opener.
Explains how to activate the opener using various devices and its operational behavior.
Instructions for programming remote controls to operate the garage door opener.
Lists common issues and their probable causes and solutions for troubleshooting.
Lists available replacement parts for rail assembly and installation components.
Provides a breakdown of individual parts for the opener assembly for repair purposes.
Lists optional accessories that can enhance the functionality of the garage door opener.
Details the terms and conditions of the product's limited warranty coverage.
| Brand | Chamberlain |
|---|---|
| Model | 4100 - 1/2 HP Series |
| Category | Garage Door Opener |
| Language | English |